Table of Contents
What Is Google Ads?
If we’re going to create a Google Ads guide, it’s going to be the ultimate guide. Go big or go home, because you’ve probably already read a number of “ultimate” AdWords guides and still find yourself left with questions. And that brings you to this post right here...
So, let’s start with the basics.
For starters as of June 2018, Google has rebranded from AdWords to Google Ads (just to clear up why you probably see that name pop up still here and there).
Google Ads is a self-serve auction-based pay-per-click (PPC) advertising platform, meaning you only pay when someone clicks on (or shows interest in) your ad. It brings Google roughly 75-80% of all the money it makes.
Back to Top
The History of Google Ads
Google Ads started a little over 2 years after Google launched in 1998 with 350 selected advertisers and a direct sales team that sold top placements on Google through a program called Premium Sponsorships. Today, there are over one million advertisers across the globe using Google Ads.
Back to Top
How Does Google Ads Work?
Google Ads runs on a silent-based “Vickrey” auction that decides which advertisers show up and rank the best for their ads. With 63,000 searches per second, ad rank is determined quickly by these factors: max cost per click, quality score, ad format, ad extensions, and bid modifiers. Keep in mind what average positions actually drive money for your business.
So far, what we covered in this guide have all been short and sweet. Just you wait...
Back to Top
Introduction to Google Ads Interface
Different parts of the Google Ads interface and structure allow varying levels of control. Put simply, you drill down: My Client Center (MCC) Account > Account > Campaigns > Ad Groups > Keywords.
An MCC account is used when you are managing multiple, individual accounts at the same time, so you only have one login.
When you create an account, you’ll need the following:
- The name of your account (usually organization name)
- Your country/territory (where you're located)
- Your time zone (so all your metrics and data reflect the correct location you're in)
- Your currency (USD, DKK, etc.)
Once in the interface, you’ll see Navigation Bar (aka your Command Center), Campaigns, Opportunities, Reports, Tools, and Left Sidebar tabs/views.
Navigation Bar
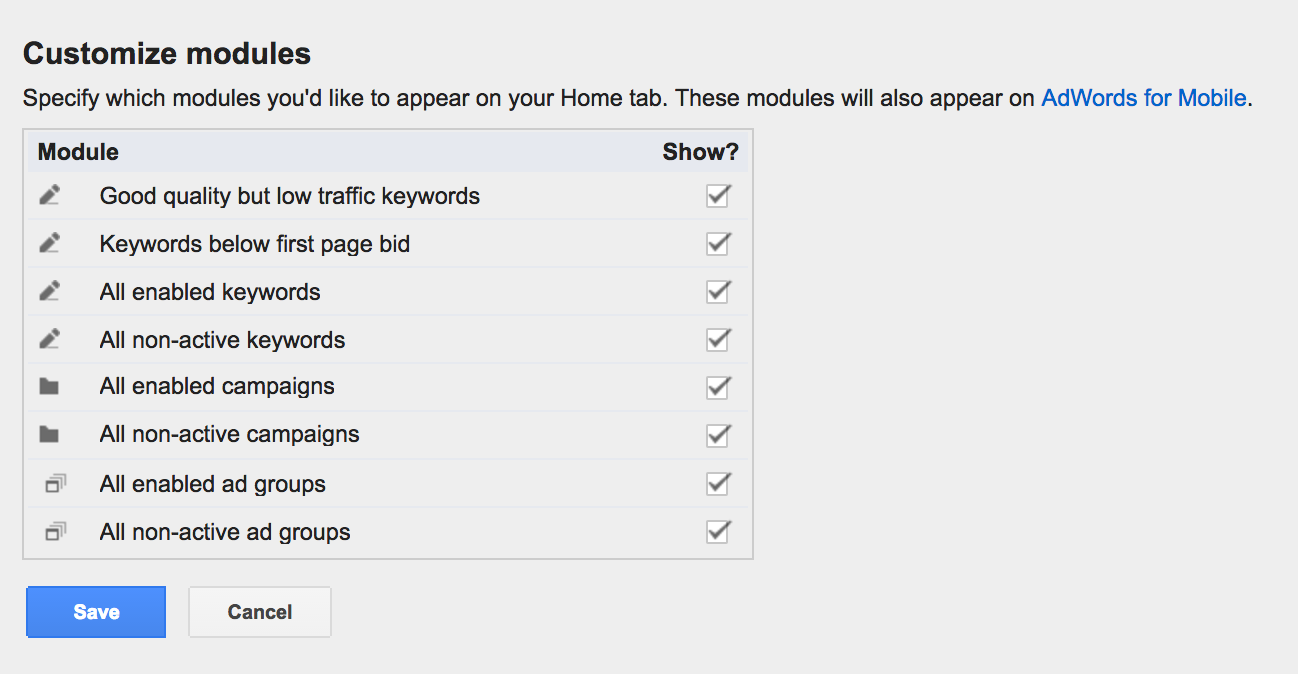
In your Navigation Bar view, “Home” is where you can customize graphs and which modules you want to see.
The gear icon in the top right hand corner allows you to control billing, user access, and linked accounts such as Google Analytics, Google Search Console, Google Merchant Center, and YouTube. The latter two require you to initiate or accept linking via those specific platforms themselves as well.
The bell icon is the notification hub informing you of disapproved ads, keyword conflicts, or other alerts.
Campaigns View
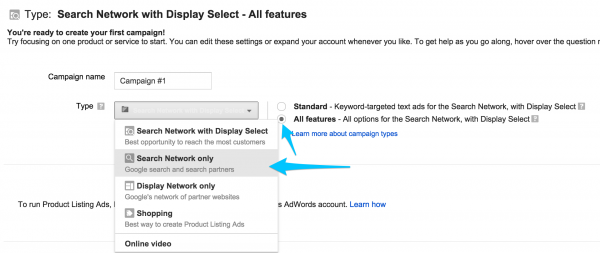
In your Campaigns view, you can select type of campaign:
- Search Network with Display Select: Show ads on Google.com and other sites within Display Network Google deems relevant to your keywords. Be careful, as it might show mobile apps irrelevant to keywords.
- Search Network only: Ads show on Google.com with the option for opting in to Search Partners.
- Display Network only: This includes Google’s partner websites like blogs and forums that offer ad space. You can target specific websites you want to advertise on or let Google automatically find placements, videos or apps to show ads on.
- Shopping: If an ecommerce store, showcase your entire inventory as ads without having to create one by one. This gives shoppers a visual ad compared to Search Network text ads.
- Video: Target YouTube search and videos with your own video ads.
- Universal App Campaign: If you just want mobile app installs.
In this same view, you can also select the following options:
- Feature Selection: What type of features do you want? You can select Standard or All, but you’ll want All Features, so you can determine days/hours to run your ads as the Standard option shows ads 24/7 and can lead to wasted ad spend.Once you’ve decided on this selection, you can name a campaign after a common theme identifier such as Brand, Generic, or Competitors.
- Networks: Do you want to opt into only Google or also their search partners? Since not all of your competitors may be using search partners and people still have to type in the keyword for your ad to get served you can get cheaper cost per click.
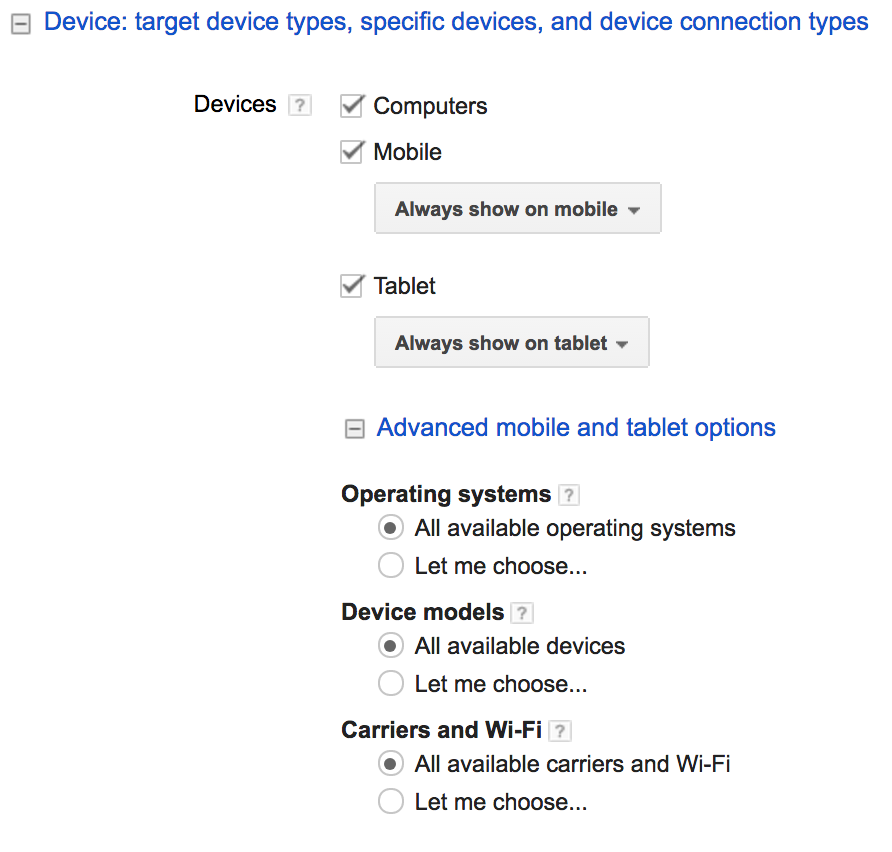
- Devices: Do you want to show your ads on desktop, mobile, tablet, or all?
- Locations: What geographies do you want to target? You can select All countries and territories, United States and Canada, United States only, or “Let me choose”. Default selections vary depending on country you’re in. To get more granular, hit “Advanced search”.
You can also choose one of these options:
- Search: Allows you to type in any geographical areas and add them such as zip codes, cities, countries, and states.
- Location Groups: Allows you to target specific areas of interest like universities, airports, or central commercial areas. You can also target by demographic criteria of household income or location extensions.
- Bulk Locations: Allows you to upload multiple cities, zip codes, etc. all at once.If you’ve selected “All features,” you’ll see “Locations options (advanced)”. This helps prevent ads from showing up in random countries.
- Languages: These are interface languages that users use, like the Google.ca or Google.co.uk domain. Even though your ad is in a specific language, English reading individuals may be using different devices with different Google domains, browser or computer settings than for English. Target all languages--because if your keywords are in a specific language, the ad will not be served unless they type in that language anyways.
- Shopping Channel: Only applicable to ecommerce, but you want to select checkboxes accordingly if you offer products only online, only locally, or both.
- Bid Strategy: Will it be automatic or manual? Manual is good to start with as well as more Basic options.
- Default Bid: This is what you’re willing to pay for a click or other action.
- Budget: What’s your daily budget? Be aware that Google allows itself to go 20% over your budget on certain days, but will never go over your average monthly budget.
- Delivery Method: This is where you decide on days of week and times of day that you want your ads to run. You have two options: Standard or Accelerated. Standard means Google shows ads all throughout the day whereas Accelerated means showing as fast as possible every time the keyword you’re bidding on is searched. By using Accelerated, you can discover if more daily traffic volumes are available beyond your current set budget.
- Ad Extensions: Will it be Sitelinks, Callouts, or Reviews?
At the bottom, when you create a campaign, you see Advanced AdWords Settings:
- Schedule Function: You’’ll want to choose the Schedule function to show at certain times/days.
- Ad Delivery Function: You’ll want to use the Ad delivery function to show only best performing ads or rotate more evenly. If you rotate more evenly, it allows you to see which are top performers and pause those that aren’t.
- AdWords Experiments: You can label new tests you want to run like bid or keyword changes and see the performance of those tests.
- IP Exclusions: If competitors may be clicking on your ads to cost your money, you can exclude them if you have their IP address.
- Dynamic Search Ads: Automatically create ads and decide what keywords to bid on depending on Google’s organic search index of your website. This hardly ever looks good though and doesn’t allow you to be creative with messaging. You can’t see what destination URLs are being used to see if system is sending right traffic to the right place. The Tracking URL for dynamic links is mostly used for ecommerce advertisers.
The Campaign view is also where you can compare performance, see trends, and adjust inputs to get closer to your desired performance.
While the Campaign view houses all your basics settings, the Ad Group level houses the following:
- Your Ads: Whether they’re text, image, or video ads.
- Your Keywords: If you’re running on the Search Network.
- Your Targeting: If you run other types of targeting like remarketing, topic targeting, etc.
You can see options to segment, filter, set automated rules or change date range for both the Campaign and Ad Group levels.
Opportunities Tab
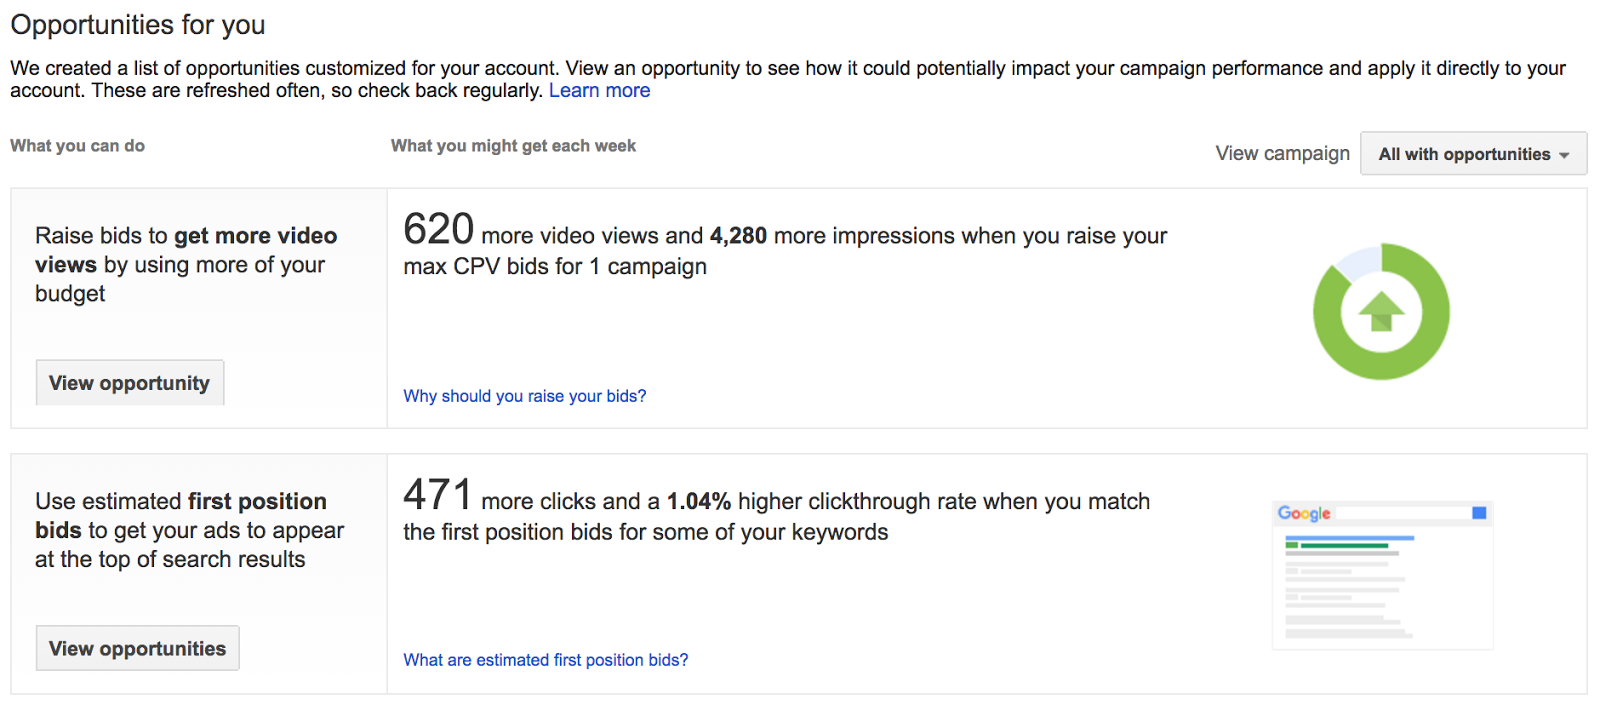
The Opportunities tab is not recommended to be used often. It’s a list of suggestions from Google that mostly revolve around raising your bids...
Reports View
The Reports view will have any reports that are automatically scheduled to be created and sent to you. You’ll find a history log of them as well as a log of one-time reports that have been created and by whom.
Tools View
In the Tools view, you’ll find the following:
- Change History: A timestamp log of all the changes made in your account and by whom.
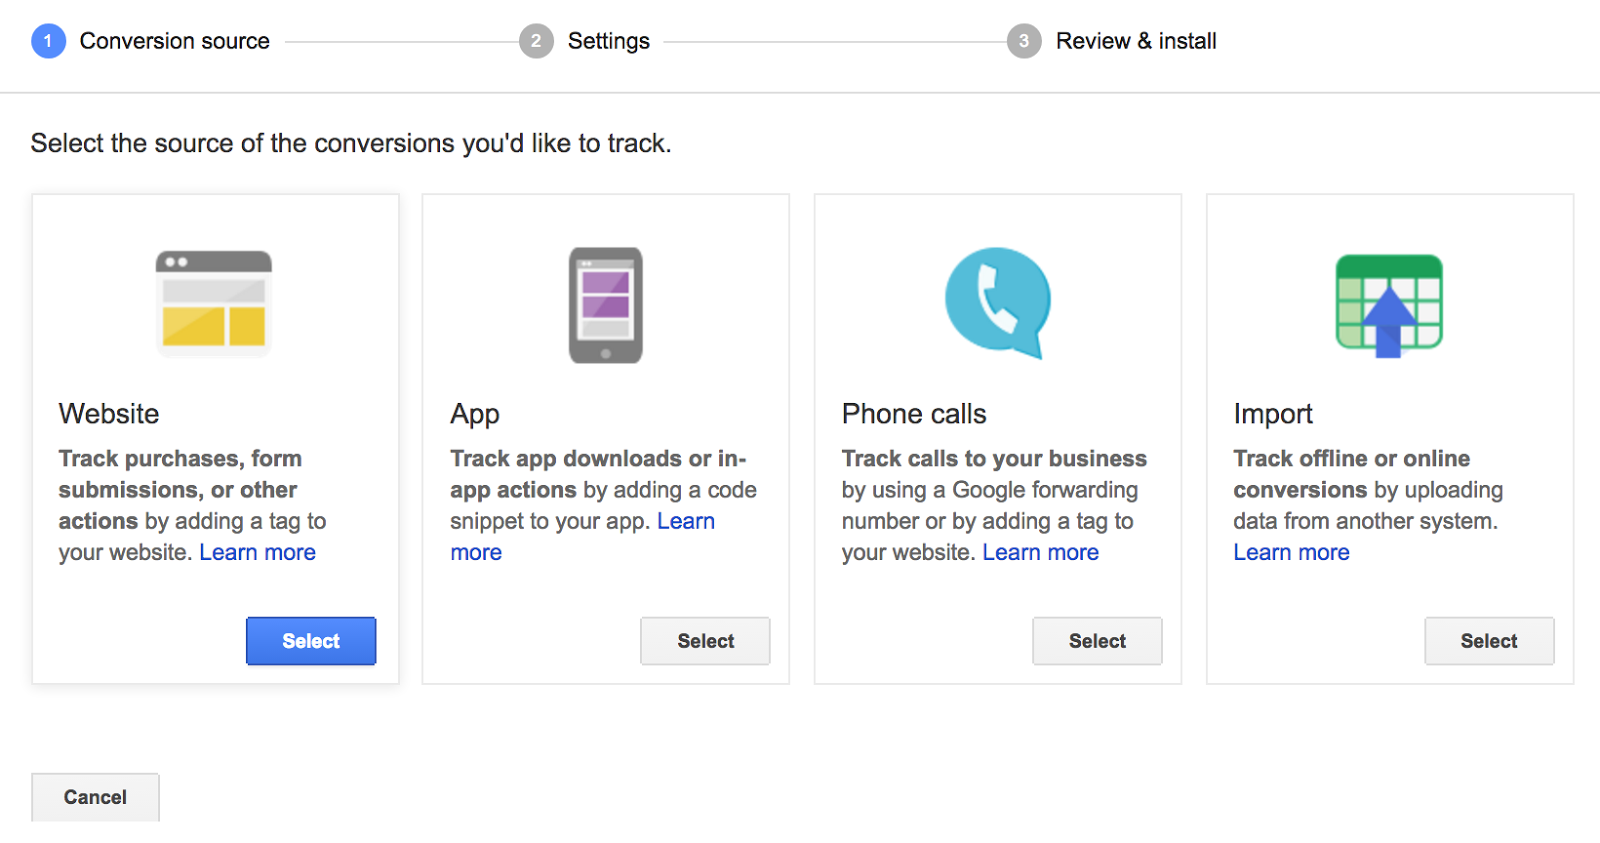
- Conversions: This is where you create conversion codes or import them from Google Analytics. Conversion tracking allows you to see which search term, keywords, placements, ads, and other targeting criteria that bring about leads or sales. Armed with this information, you can adjust bids and budgets.
- Setting Up Within AdWords: This is the fastest and easiest way to set up conversion tracking by going to Tools > Conversions. Click the red +Conversions button. Most will use the first option (Website) to create a conversion code.
- Name: Give your conversion a name, so you’ll remember what it’s tracking.
- Value: You can leave this blank, unless you know all conversions have same currency value.
- Count: If you’re an e-commerce store, you’ll want to select “Every” as you want to track every sale on your website that originated from an AdWords ad. If you select “One,” you’ll only give a single conversion credit to each person, which is more for lead gen or SaaS companies where they’re less likely to come back for multiple purchases.
- Conversion Window: A person who clicks your ad might not convert until 17 days later. That means your conversion window is 17 days wide, so you can set it to 90. View-Through Conversion are when people have had an ad impression (not a click) and then later converted on your website or landing page.
- Category: This is more for Google stats, so pick the one that suits your business. It can be Purchase/Sale, Sign-up, Lead, or View of a key page.
- Include In “Conversions”: 99% of the time, you’ll have this checked off. Conversion tracking allows you to track smaller/different events leading up to your actual bigger conversion--and by leaving this box unchecked, you can still track those smaller conversions, but not have it cloud overall data.
- Attribution Model: Leave this as “Last click,” unless you have a full understanding of attribution models. More on this later in the guide.
You’ll then get the code to go on the confirmation/thank you page (if set as destination URL), so it lives on that page and not all pages. When someone completes a conversion (landing on the page), data is sent to AdWords and you can see which keyword or ad performs better.
- Setting Up with Google Analytics: Google Analytics allows you to track Goals, which are conversion events that you can import back into AdWords.

You can set a value (dollar amount per conversion) or build out a funnel with multiple goals outlined. If you have multi-step forms, for instance, the funnel buildout may be worthwhile as each step is a micro-conversion to a bigger macro-conversion.
- Attribution: This is where you can compare different attribution models and see how different campaigns affect each other.
- Google Analytics: Just takes you to your linked Google Analytics account.
- Google Merchant Center: Just takes you to your linked Google Merchant Center account (more on how to use this later).
- Keyword Planner: This free tool you can use to research for new keywords.
- Display Planner: This is a tool you can use to research new display placements, topics, affinity audiences, etc. to target. It starts out very similar in structure to the Keyword Planner, but gives you a few more options/tabs. The keywords in the Display Planner could be used potentially as root keywords for the Search Network as well. Also, you can use some of the same strategies with URLs you use as you do with Keyword Planner. Remember, though, that Display Planner placements also include mobile apps and videos.
- Ad Preview and Diagnostic: If you’re curious how your ads look or if you’re curious why your ads aren’t showing up on Google, this tool gives you the reason why.
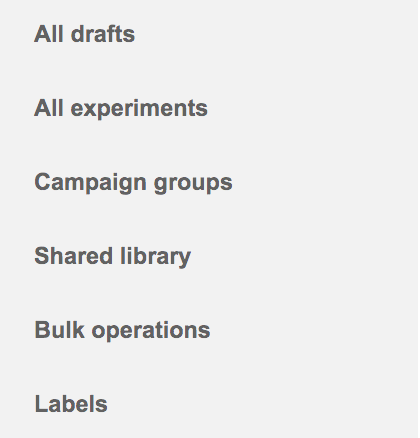
Here’s what you see in the left sidebar:
- All Drafts: If you’d like someone to review your campaigns before making them go live, you can make campaigns in “draft mode”. You can also draft as an experiment, so you keep the original in tact.
- All Experiments: After you’ve created a draft campaign, you can adjust the metrics you want to test such as lowering the CPC bid by 25%.
- Campaign Groups: If you have multiple campaigns with a common goal, you can create a group around them and set the performance target to track them all together.
- Shared Library: You can see a lot of information in the Shared Library:
- Audiences: This is where your audiences are created to remarket to and similar audiences.
- Budgets: This is where you can create shared budgets and have multiple campaigns share them.
- Campaign Negative Keywords: This is where you have lists of negative keywords you can apply to multiple campaigns at once.
- Bid Strategies: This is where you can create multiple bid strategies and apply them to different campaigns while tracking performance.
- Business Data: This is where you can connect a data feed to help you automatically update ads or extensions. Travel sites would frequently use this.
- Campaign Placement Exclusions: Similar to negative keyword lists, but this one is for display placements you’d like to exclude.
- Account Placement Exclusions: Instead of using placement exclusion lists that are applied to campaigns, you can use this to apply across an entire account.
- URL Options: This is where you can include an additional URL string behind all your final URLs to track everything.
- The Bulk Operations feature allows you to edit and change things at scale through four options:
- Automated Rules: This is where you can tell AdWords to adjust, pause, or enable things based on performance criteria you set.
- Scripts: This is the big brother to Automated Rules. Scripts allows you to change more things than Automated Rules.
- Bulk Edits: You can change multiple aspects within the AdWords account with the “Edit” dropdown at the keyword or ad view, for example.
- Bulk Uploads: To make massive changes at once, you can download a spreadsheet at the keyword, ad, ad group, or campaign level within AdWords, make edits and then re-upload it.
- Labels: A way for you to keep track of things -- labeling keywords, ads, ad groups, or campaigns. Let’s say you’ve increased bids by 25% for 10 keywords. To keep track of them, you can add a label and filter to understand the before and after impact of your bid change later.
And there you have it, a full introduction to the AdWords interface and structure. Now, before you create your first campaign, you want to do some planning to determine what networks you will engage, the type of audiences you will engage on them, and how you will tailor your campaigns for these specific audiences.
Back to Top
Search vs Display
The first thing you need to know is that AdWords has two major networks: Search and Display. The Search Network is where you bid on keywords to hopefully match up with the queries people type into Google search engine to trigger ads. The Display Network is where you use other criteria like demographics or browsing behavior to target. You pay when someone sees or clicks on your ad that lives on various websites or mobile apps outside of Google search.
Now that we have covered the main differences between the two, I want to dive deeper into the difference in visitor intent. Listen up, this is really important...
Search Network
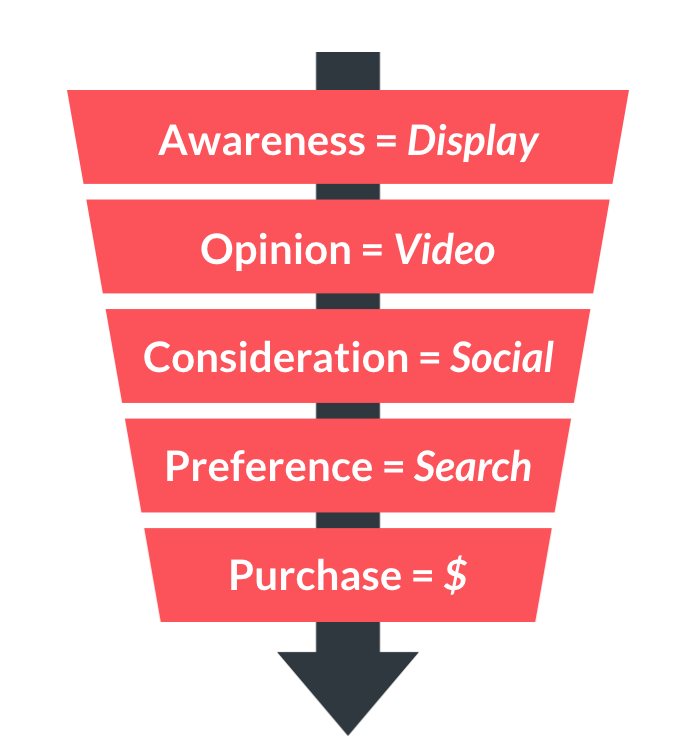
Search is the core of Google. So, when people are typing into Google, it's because they have intent to know/learn more about that topic. And most of the time, those searches also have commercial intent. Meaning, someone is potentially willing to buy something from you.
We also call this "Demand Harvesting,” because you're being reactive with your advertising and only showing your ads to people who are interested. You're essentially opening up the floodgates to people who are looking for what you offer. This also means your traffic is warmer or hotter on the Search Network than it would be in the Display Network.
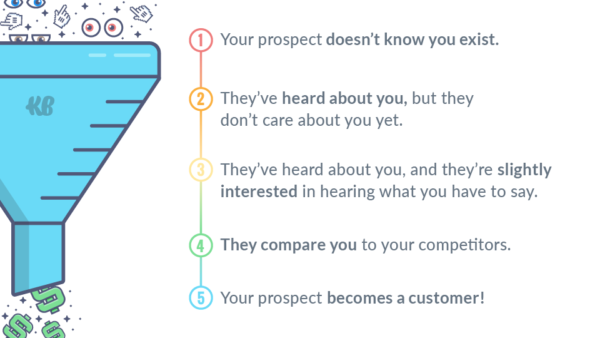
You don't have to do much persuasion or convincing, and in marketing terms, these prospects are at the bottom of your funnel, ready to act at Stage 4. This means that you can use the Search Network to get people to fill out a form, buy a product, pick up the phone, etc. to get what they want, because they have a strong intent.
Display Network
The AdWords Display Network is an impressive collection of publisher websites and publisher apps that partner with Google to have ads show on them. These publisher placements are opted into something called AdSense. Just like we advertisers use the AdWords platform, the publishers (places that house ads) use the AdSense platform.
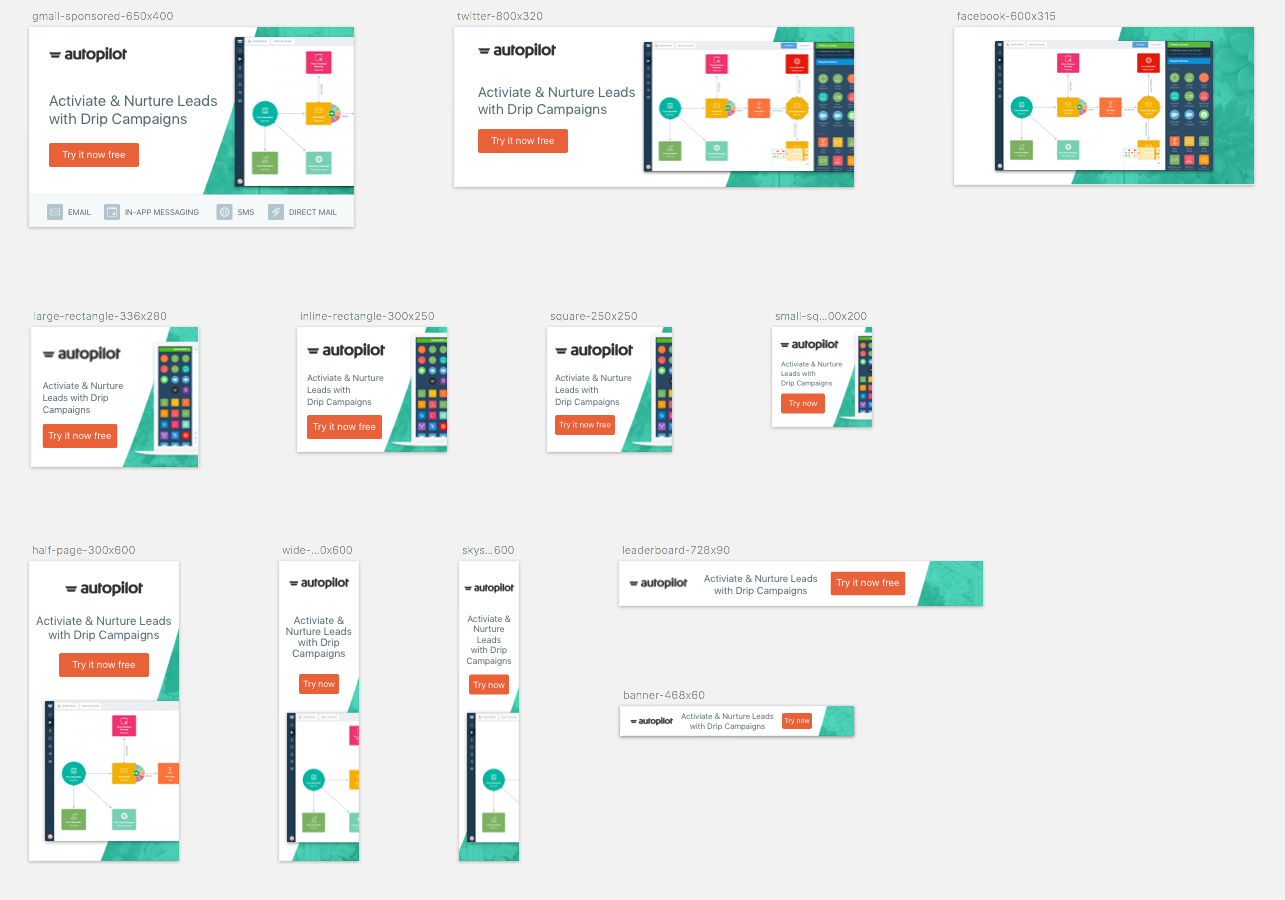
These ads can be text ads, image ads, video ads, and other ad formats that you see as banners or skyscrapers. Display Network visitors are usually much colder in intent compared to the Search Network. It's very difficult to get someone to click on a Display ad, and have them buy something from you right then and there.
The Display Network is mostly used for "Demand Generation". People don't go on a blog post or forum (where Display ads can live) to buy right away. People on the Display Network are usually in the research phase and higher up your funnel compared to people on the Search Network.
So, if you try to get them to fill out a form, buy your product, or pick up the phone to call you, you're gonna have a hard time. But you can still utilize it for direct response marketing to get contact information by offering them a value piece like a guide or webinar sign-up, so you can warm them up.
When you can be reactive with your advertising methods on the Search Network, you basically know that you’re only showing ads to people who are looking for what you have to offer. On the Display Network, there’s no search engine. You’re trying to be proactive and catch people early in their decision making cycle.
Let’s say you want to paint your house. You’re in the “awareness” or “interest” stage, because you’re actively browsing around trying to understand the pros and cons of painting and what type of paint you need to buy.
Here are some questions that could be running through your mind:
- Do I want to do this myself or hire someone?
- Do I need to use primers, basecoats, or is there just one type of paint that does it all?
- Should I go for oil, water, or lead based paints?
Once you have done research on the Display Network, you’ll go to Google Search to find a solution. Now, you’re more likely to convert or become a lead on someone’s landing page.
Metric Differences Between Search & Display
When you’re speaking from a metrics perspective, the Display and Search Networks are very different from each other. And although I hate to speak in absolutes, you’ll find this to be true in most cases:
Search Network:
- Higher CPC
- Higher CTR
- Higher Conversion Intent
- Higher Cost Per Conversion
Display Network:
- Lower CPC
- Usually Lower CTR
- Lower Conversion Intent
- Lower Cost Per Conversion
Now, the above findings aren’t always true. Sometimes Display has a much higher cost per conversion or even a higher CTR. Everything is relative.
Also, you’ll have a very hard time trying to sell your painting services to someone who is just now becoming aware and interested in painting. They’re still in their decision making mode. On the other hand, you can easily generate conversions and sales on the Search Network, since people are actively searching for what you have to offer.
Temperature Differences Between Search & Display
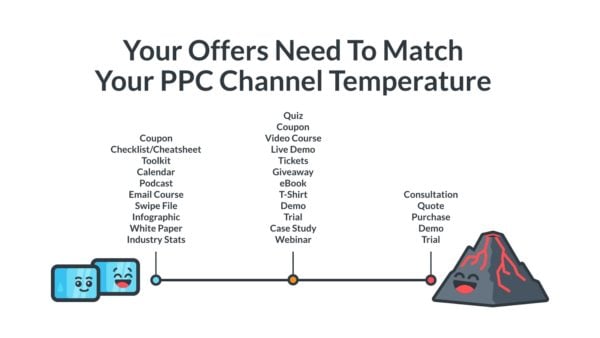
Let’s dive a little deeper into visitor intent beyond just ads. Why should you care about ice cubes and lava? You can plateau if you just look at PPC, so you want to be concerned with what traffic does to overall performance.
Brute force won’t work, because the channels bring in different traffic. Not all traffic will behave the same. You want to focus on continually unlocking new potential.
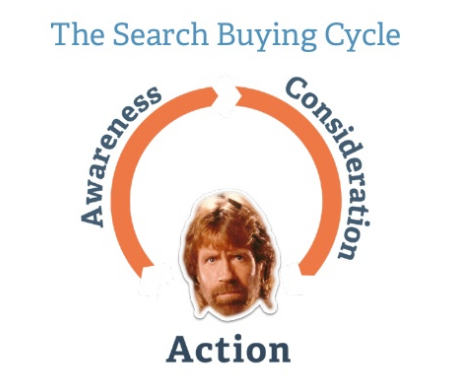
When you launch a PPC campaign and it doesn’t work, many times, it has to do with the offer on your landing page. No one is going to want to jump from a blog post to getting a consultation (i.e. your core offer). You have to court people and ask for permission, ask for a small favor before the big one, just like dating. They’re in the beginning of the Chuck Norris PPC Cycle.
You might find that the call to action (CTA) or offer you’re using on the Search Network won’t work as well on the Display Network. This is because of the difference between the conversion intent of the visitor and the conversion threat of your call to action/offer.
To break it down into simpler terms, think of your traffic and your call to action/offer in terms of temperature. If your visitor accidentally clicked your Display ad and landed on your landing page, they’re extremely cold in regards to their conversion intent. If someone is typing your brand name into Google and landed on your landing page, they’re extremely hot in regards to their conversion intent.
Now take that understanding and measure the different types of traffic temperatures against your call to action. Would a random ad clicker from the Display Network want to pull out their credit card and buy your product? Absolutely not.
If someone opted in for a podcast, maybe then offer them a coupon. Cold visitors don’t know who you are and might bounce fast. Warm visitors are interested in offer, but may not be interested in your solution, specifically. Hot visitors are actually looking for your brand. Start off people with the appropriate offer based on their temperature and channel.
Test new offers to see if a lower threat offer will perform better. However, keep in mind that the cost of acquisition to move from one offer or level to the next (counting all the PPC dollars) has to be less than the cost per acquisition at the bottom of the funnel. Have enough mini baits to test at a high rate that take less time to create and that you can run mini smoke tests on (more on this later), and find out what works. Then, you can scale from there.
Multi-Step Landing Pages/Forms
With a landing page form, it may not always be changing an offer completely, but just the way you request a call to action or phrase the wording to appear as a lower threat to the visitor.
Many experts say eliminating fields can increase conversion rate for your forms. The problem with just removing fields to make it seem like there’s less to fill out is you leave the visitor with the most threatening request for fields to fill out (i.e. contact information).
You still need to get this information somehow though. So, change the order of the field. If you have a multi-step form where you present lower threat requests upfront and progressively increase the threat level as people make micro-commitments, visitors may be more inclined to provide this information.
For example, when KlientBoost changed a form for a school to ask, “What year did you graduate high school?” first, we saw a 62% conversion rate increase and 95% confidence level.
Multi-Intent Keywords
Not all keywords are created equal. Meaning, different keywords have different performance levels and different levels of conversion intent. Try switching up keywords or keyword phrases based on the stage visitors and leads are in. You can read more on multi-intent keywords here.
Armed with this information, you begin to see that not only do different AdWords keywords come with different traffic temperatures (hot or cold visitors), but so do different channels within AdWords like the Display Network or YouTube.
So, with a plan in place, let’s begin to build out your Search and Display campaigns...
Back to Top
The Search Network
Initial Research
Believe it or not, there isn't much research or homework you'll need to do when you're getting started with AdWords for the Search Network. You don't need to worry about the search volumes, average cost per clicks, or some niche long tail keywords that might be your "cheap traffic goldmine".
Even if you find some long tail keywords in which your research tool shows low competition levels, competitors are most likely still going to have their ads show for that keyword -- because of match types like broad, broad match modified, and phrase match.
Now, if you're not getting enough traffic, you can add more keywords. But more often than not, you'll run into an issue of having to increase your bids first before you need to add new keywords. And studying the average of something doesn't improve your performance. The structure of your account can set you up for better performance, much quicker, as we saw in our original research when we compared research stats to actual stats.
Competition levels aren’t real time or even that accurate, and they shouldn’t dissuade you away from bidding on certain keywords or placements. When you do AdWords research, you'll also see average cost per clicks and suggested bids. The only problem with that is that it doesn't consider your account structure, geographic location, devices, day of week, hour of the day, etc. These are dynamic indicators for how a keyword will perform.
So, when is the best time to care about AdWords research? From our experience, it's when you're trying to expand and grow your account.
So, to just get started, you can look up synonyms for root keywords (keywords with shortest word count, but still enough context such as “online college” instead of “college” or “online college degree”) on Dictionary.com for a keyword and begin setting up ad groups with that. The more keywords you have, the more clicks you may get, and thus, the more expensive it could be. Take it slow.
Keyword & Query Basics
Keywords are the individual words or combination of words (phrases) that you bid on, that then trigger your ads to appear on the Google Search Network. When someone types something in on Google, Google will scan your AdWords account to find a match--and if there's a match between what the person typed in Google's search box and the keyword that's in your account, your ad could trigger to show.
These keywords have different competition levels, vary in search volume, and also bring in different types of visitors.
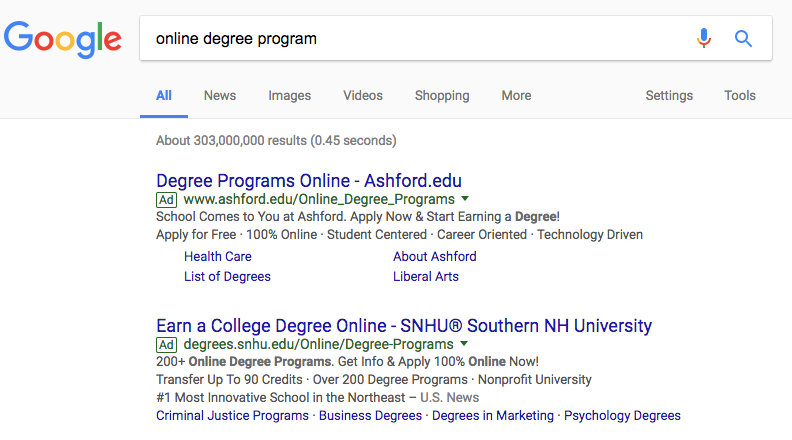
Let's say that you're an online college. Some of the keywords you might bid on are: online college, online degree program, college courses, digital degree. Those are four keyword examples that you could bid on right now and have your ad appear on Google.com.
But before that happens, you need to put a currency bid (like $3, for example) on your keyword that's competitive enough for it to appear in the ad auction. If that bid isn't competitive enough, Google might tell you that your ad can't rank or that it ranks very low.
The more keywords you have, the higher your chance of getting more traffic as well. But that also comes at the cost of your ad clicks. Because remember, it's called pay-per-click (PPC) advertising, and you get charged for every click on your ad. So, the more keywords could also equal more money being spent.
The great part is that you control everything. You don't have to have a ton of keywords. You can start with just a few, and keep your bids and your budget low as well to see what kind of results you get.
How To Judge Whether Keywords Are Good or Bad
If you can’t create new ad groups for each keyword, focus on keywords with high search volume (tending to be more shorter tail). It won’t always make sense to take competition into account for segmenting campaigns as sometimes competition levels correlate with average cost per conversion, because of the lower average cost per clicks.
Keyword Match Types
Keyword match types help you expand or restrict the amount of Google searches that your ads can trigger. Currently there are four different keyword match types that we’ve outlined in previous blog posts. So, definitely review these before you continue on.
Search Terms/Queries
Keywords are what you bid on, but search terms are what you pay for. A phrase match keyword like "online college" would trigger your ads to show if the search terms are: free online college, online college, online college for design. Those three examples are search terms, and they show you what people are truly typing into Google that leads to you paying for clicks.
Also called search queries, it's important you keep an eye on your search terms when you have an AdWords account running. They can quickly increase your spend and leave with a ton of clicks, but no conversions.
You can exclude them or you can extract them to create new ad groups with them. If you know what people are searching for, why wouldn’t you want to target exactly what they’re entering in as far as queries/keywords?
This brings us to The Iceberg Effect and Single Keyword Ad Groups (SKAGs), which we cover in-depth in previous blog posts. Make sure you give these a read before building out your campaigns.
Negative Keywords
When you're looking to control which search terms you want to trigger your ads and which ones you don't, you're going to want to use something called negative keywords. Negative keywords allow you to tell Google which words you don't want to have your ads trigger for.
Common negative keywords are things like: free, tutorial, jobs, salary. These words show low conversion intent. If someone types in 'online college jobs', they're not looking to become a student, they're looking for a job. Someone you wouldn't want to pay for when it comes to an ad click. So, every time you're paying for a click from the search term 'online college jobs', you're basically throwing money out the window.
Without negative keywords, you may only be able to convert a small percentage of your overall traffic. With them, you increase your chances of reaching a faster AdWords ROI.
Just like there are different keyword match types, there are also different negative keyword match types. In addition to negative keyword match types, there are also different levels of exclusion that correspond with your AdWords account.
Here's a breakdown of each one:
- Negative Keyword List: This is a list you can create in your Shared Library and apply it to as many campaigns as you want. So, as you update the list by adding/removing negative keywords, it will automatically apply to the campaigns associated with the list.
- Campaign: If you add a negative keyword to a campaign, it will automatically exclude search terms when there's a match in that one campaign.
- Ad Group: If you add a negative keyword to an ad group, it will automatically exclude search terms when there's a match in that one ad group.
Don’t underestimate the power of negative keywords.
Bidding
So how much did you bid on these keywords?
Remember, your max CPC bid is how much you're willing to pay for a click. It doesn't mean that you'll always be charged that amount. You can do all the research you want, but it's mostly a waste of time. The market/economy of Google AdWords has a minimum "pay for play" price that you have to come in at. Depending on your industry, this price could vary wildly. Hair salons could have an average CPC of $2 and personal injury lawyers could have an average CPC of $120.
So, how do you decide where to begin? If you're a brand new advertiser, start as low as possible and be conservative. Why would you want to pay more if you don't have to? If you're not getting any impressions or clicks or your average position is low, you should inch your bids up over time.
You also have two levels of bidding:
- Ad Group Level - All keywords in the ad group have the same bid. If it’s greyed out in the Max CPC column, it’s at Ad Group level.
- Keyword Level - Keywords in the ad group have individual bids.
If keyword level bids are specified, they'll always override ad group level bids.
Other Bidding Strategies Overview
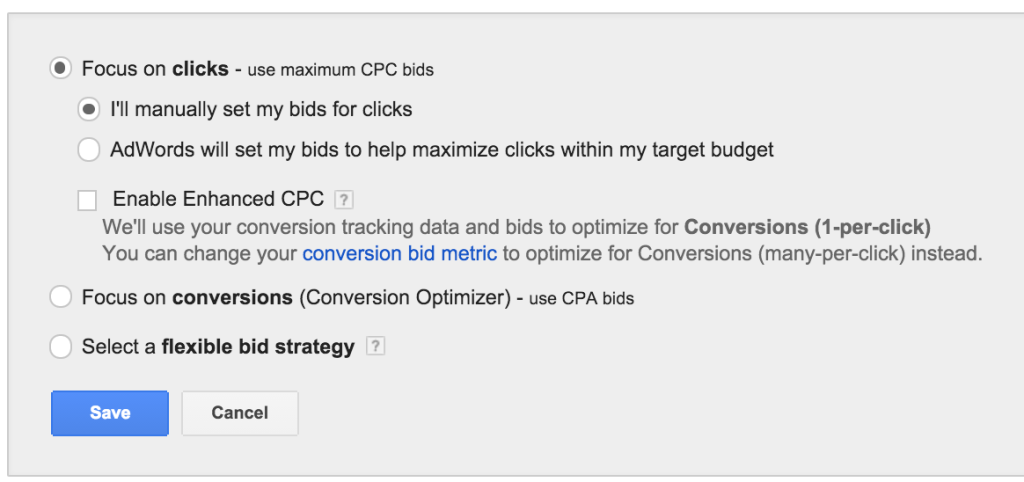
If you go to Campaign -> Settings, you’ll see where you can set Bid Strategy. You have a lot of options when it comes to bidding, so don't get overwhelmed. 90% of the time with search, you'll use manual CPC, because it gives you more control. Check out this blog post to discover more on automatic bidding options you can change.
Your selection really depends how much time you have and what your budget is -- do you have wiggle room? Once you know what your average cost per click for quality traffic is, you’ll want to aim for these minimums of traffic per day, so you get enough traffic to test ads and landing pages: search would be 10 clicks per day.
Ad Creation
Did you know that your ads are the only part of the AdWords account your visitors see? They see no bids, no negative keywords, no keywords, no targeting criteria, nothing. They only see your ad that takes them to the destination you've selected. But this doesn't mean that you should feel pressure writing your ads. Sure, they're important, but we've found that ads are lower on the priority list when it comes to other parts of PPC success.
Here's the priority order we've found:
- Conversion ability
- Sales ability (for non eCommerce advertisers)
- Targeting ability (keywords/audiences)
- Ad copy/creative
If you can't get 1-3 right, your ad copy doesn't matter -- no matter how amazing it is. And with the AdWords structure we'll be talking about later, ad testing will lead to smaller/marginal gains compared to landing page/CRO testing.
Text Ad Layout
Here's a breakdown of the different parts of your text ad:
- Final URL: This is the actual website/landing page you're taking a visitor to when they click your ad. The full URL won't be visible to the visitor until they actually click your ad. They'll only be able to see the root domain (like www.example.com).
- Headline 1: This is the first line of text that your visitor reads (30 characters). It’s recommended to use keyword in Headline 1.
- Headline 2: This is the second line of text that your visitor reads (30 characters).
- Path: This is where you can add other text. It does not have to match your actual final URL. There are two paths of 15 characters each. It’s recommended to use keyword in your path.
- Description: This is the text beneath the two headlines. It's comprised of up to 80 characters.
You'll notice that the left part is where you can start typing, and the mock up to the right is where you'll see what your ad looks like when you're done writing.
Ad Copy
There are literally millions of different text combinations you can use when it comes to writing your ad, and they could all be great or really bad. We've run tests where we double write the same copy, purposely misspell, and write something that has nothing to do with the actual business. We've found that if the ad is "at a glance" relevant, people will click on it, and they won't spend the time reading your entire ad or all of your competitor ads for that matter either.
So, what should you do when it comes to writing ad copy? I’m so glad you asked, because we have three blog posts that cover just that:
- 31 PPC Ad Copy Tips To Lure In More Conversions
- 5 AdWords Ad Copy Laws You Must Obey
- 10 AdWords Ad Copy Hacks & 100 Tricks: Data From 100+ Clients
You should have at least two ads going head to head in an ad group. You can also do multi-ad group testing where you isolate a variable in ad copy for multiple ad groups, so can aggregate data and get lift potentially faster.
Ad Extensions
Ad extensions are like steroids for your text ads. And while steroids are bad for your health, ad extensions are amazing for your AdWords account.
So what are ad extensions? They’re basically additional pieces of text and options that help expand the size of your ad, while giving a visitor more upfront info about your business and ways to communicate with you. In the ad above, you have four different ad extensions being used, in addition to the regular ad text.
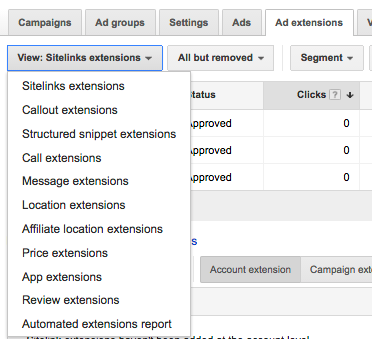
To find where your ad extensions are located in your account, go to the “Ad extensions” tab. As you can see, there’s a lot to choose from. And the cool thing is, if you can use the specific ad extension, do so. Consider it a buffet that you’ve paid a lot of money for, and you now want to make your money back.
But beyond just being a free for all, you should use ad extensions because they:
- Can increase your click-through-rate
- Can increase your quality score
- Can increase your average ad positions
- Can reduce your average cost per click
Let’s take a look at the different ones here. Keep in mind that even testing text within extensions can have an impact on results.
Back to Top
AdWords Display Network
The Display Network is everywhere else Google advertises, beyond the Google search engine and other search engines. And the truth is, it’s a massive network. It reaches over 90% of all Internet users in the world, with access to over 2 million websites that you can place your ads on. Many people call this banner advertising, but there’s also much more to it.
What happens with display advertising is that there needs to be a publisher and an advertiser. The publisher allows ads to be on its website. If a certain action like an impression or click happens, the publisher makes money and Google pays that publisher. The advertiser creates the ads and uses their own targeting to decide which publishers to have their ads show up on. If a certain action like an impression or click happens, the advertiser pays Google directly.
In addition to website ad placements, display ads can also appear within mobile apps or with YouTube videos. If that happens, the owners of the app or the YouTube content are the publishers, and they also get a percentage of the ad revenue from Google.
Basic Settings
Unless you’re trying to drive installs of your mobile app or build engagement within your app, you’ll always select the “No marketing objective” with “All features” radio buttons. The reason being is that all targeting is still available without a marketing objective and you’re always going to be focused on using the Display Network for direct response conversions.
Just like an “Ads in mobile apps” campaign, you also get to select device types, ad locations, operating systems, device models, and carriers and/or WiFi. Instead of using bid adjustments like you do in a Search Network campaign, you can fully decide to never want to target computers, as an example.
You then also have some ad location options within specific devices. Mobile/Tablet App is within the app itself, but doesn’t take up the entire screen. Mobile/Tablet Interstitial takes up the entire screen of the device. Mobile/Tablet Web doesn’t have an ad show up in an app, but only on the web while on that device type.
Types of Ads
The Display Network has a ton of different ad types (11 of them) that you can use. Some people see this as an annoyance as it requires more resources to create vs an easy text ad for the Search Network. But the truth is, it leaves a lot of potential compared to what your competitors are doing, or should I say, aren’t doing. You just need to know what to do, and make sure you have an arsenal of different ads ready to deploy when the time is right.
Targeting& Bidding
Unlike the Search Network, there are no match types on the Display Network. Google goes on a “hunt” for placement where your ad could appear, and these placements are called “automatic placements”. Keywords on the Display Network scan content on a publisher web page, app or video to decide whether or not your ad should show and if there’s a “contextual match” between your keywords and the content.
Google takes browsing behavior into consideration, so you might find that your automatic placements aren’t relevant to your keywords. Google tries to predict whether a visitor’s browsing history indicates they’d be interested in your ad. This can be turned off or off.
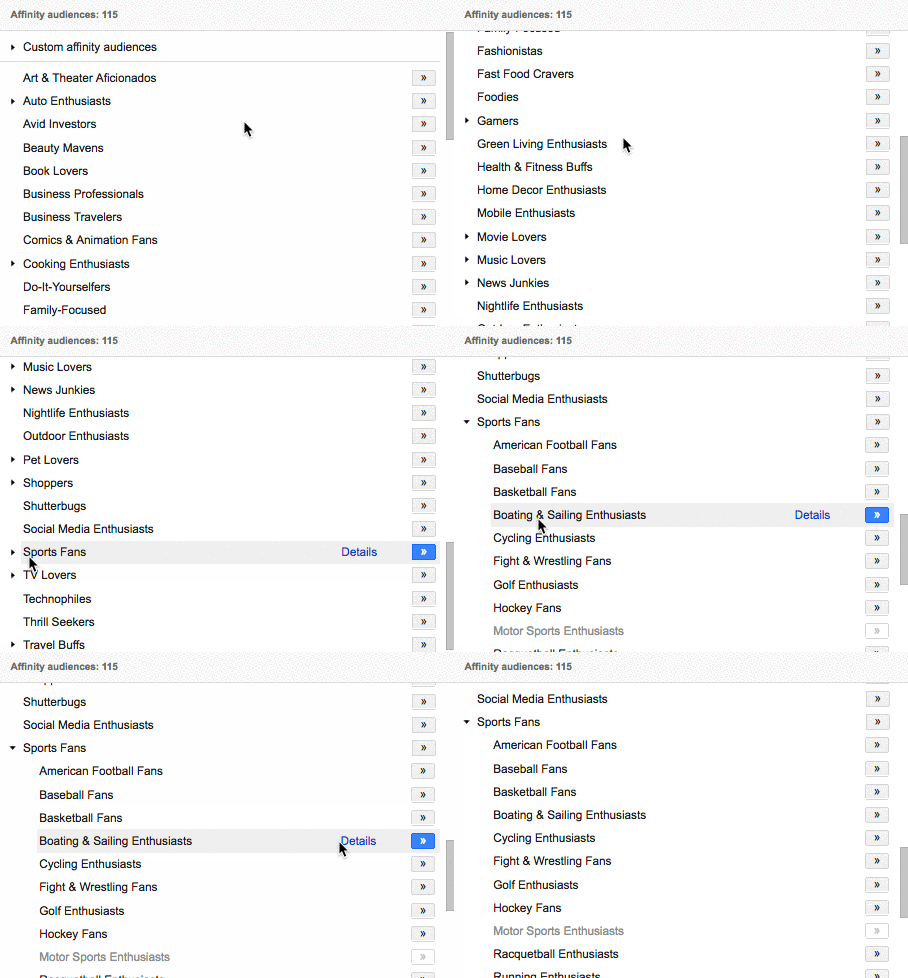
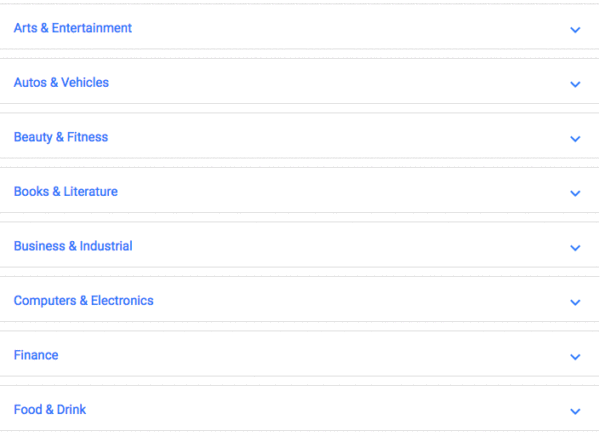
Remember how you can target keywords and certain audiences on the Search Network? You can do much more on the Display Network. Here’s the potential of what you can do: Display Keywords (Contextual Targeting), Placements, Topics, Interests, Demographics, Layer Targeting, Remarketing, Gmail Ads, Similar Audiences. As you can see, there’s much more to do and many more nuances on the Display Network compared to Search.
If you want to learn more about the various ways you can target, you can read more here. However, we’ll dive a little into layer targeting, because this covers a combination of the various individual targeting options you have available.
More layers of targeting can equal better performing display campaigns. The great thing about the Display Network is that you’re not limited to one type of targeting. You can continue to “layer” multiple types of targeting together to get your audience smaller more and more refined.
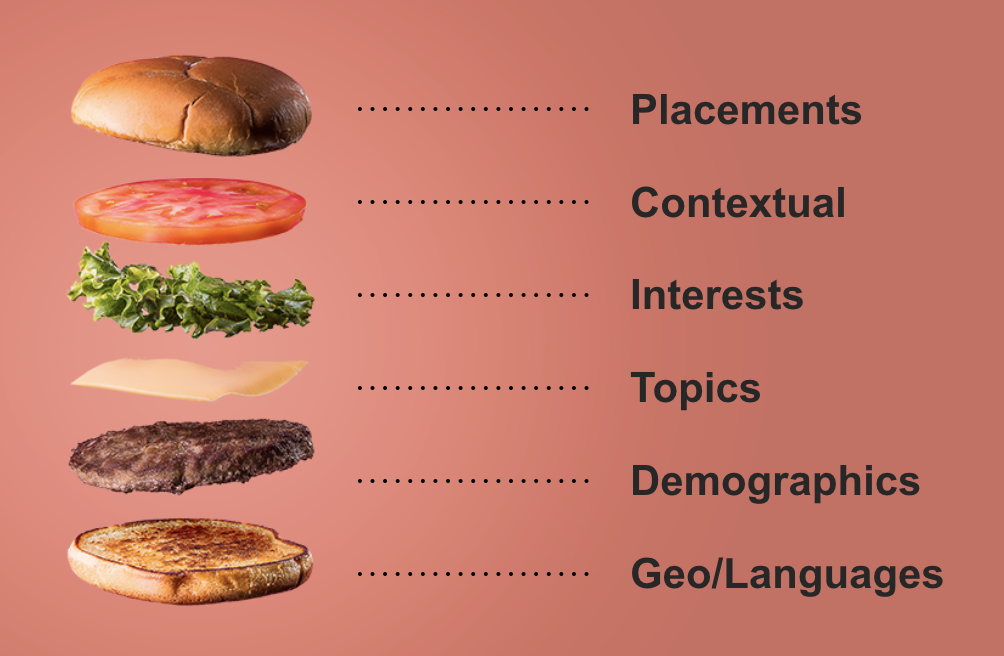
This type of targeting “refinement” also helps you achieve a lower CPA over time. Since multiple targeting layers have to “match together,” you can further try and match your offer with that audience.
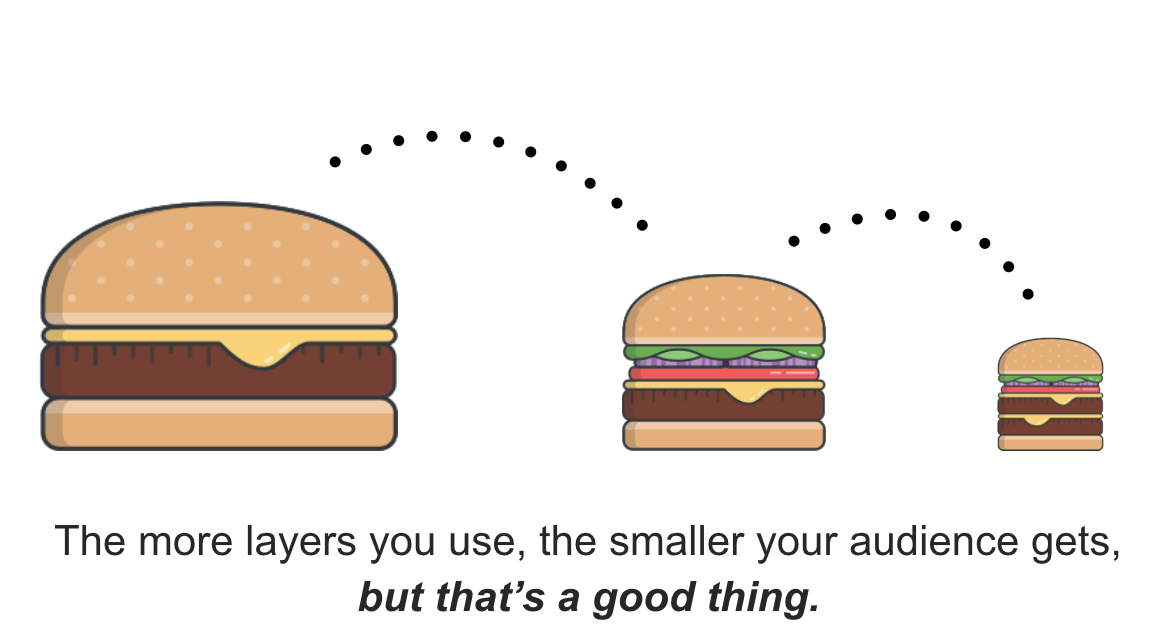

One thing to keep in mind, the Display Network has its own Iceberg Effect. Even if you added multiple layers, your automatic placements (what’s below the surface) will most likely be bigger than your predetermined targets (what’s above the surface). So, with any Display Network targeting, you should be mining your automatic placements to extract URL parameters that are performing well and target them directly.
Got it? Okay, let’s move on to bidding strategies and considerations...
Smart Display Campaigns are a near clone of DCO bidding (more on that in a bit). With no targeting options at all, Smart Display takes your ad copy and landing page to then combine it with context and audience based targeting as well as automatically remarketing to some visitors.
Target & Bid vs Bid Only Ad Group Setting. Within your display ad group, your different types of targeting criteria will default to “target & bid,” which means that all your targeting layers have to be used in combination before your ad is served. “Bid only” is a aside setting you can create to allow a certain type of targeting to act alone by itself without having the other targeting layers involved.
You can also utilize Targeting Optimization. In the ad group settings, the Conservative way allows you to keep your targeting criteria as is while the Aggressive way allows you to add some steroids to your goals. It’s called Display Campaign Optimizer (DCO) and it’s not recommended you try until after you’ve established conversion traction with the Conservative targeting. It takes your current targeting and ad, and uses additional signals like context, interests, and demographics to go out and find other conversions across other placements, all while adhering to your goal CPA bid.
Just like with Search, there’s minimum average cost per click you’ll want to test for any display, including YouTube, and that would be 50 clicks per day. You can switch between manual CPC and target CPA bidding.
In the forever expanding universe of the AdWords Display Network, you have two things that remain constant: 1) the placement and 2) the visitor. Google can’t make money without those two end points.
Back to Top
Google ShoppingCampaigns
Google Shopping Campaigns are really a beast within themselves and that’s why I think it warrants its own section. Google Shopping allows online retailers and ecommerce stores to highlight their products with image and pricing on search, display, and YouTube. These ads show up above organic search results or on the right hand side, next to text ads.
Setting Up Account and Data Feed
To create a shopping campaign, you need both AdWords (housing budgets and bids) and a Google Merchant Center (housing shopping feed that includes all product info.) account. To sign up for the latter, go to google.com/merchants.
The last step of the onboarding process will ask you to verify you own the website you’re claiming. You can do this in the following ways:
- Google Search Console: If you’ve already verified via GSC, Google Merchant Center should recognize.
- HTML File Upload: You can upload a file to your server where Google can verify it lives on your website.
- HTML Tag: You can add a meta tag to your homepage for Google to crawl.
- Google Analytics: If you have the code on your website and it’s the asynchronous tracking code, Google can verify if you have the same email for both Google Analytics and Google Merchant Center.
- Google Tag Manager: Google can use your GTM container ID to verify that you own the website.
After you’ve verified your website, you can connect your shopping feed in one of these ways:
- Connect directly with your store platform: If you’re using BigCommerce, Shopify, Magento, WooCommerce, Volusion, 3DCart or another big player, they have direct connection to Google Merchant Center.
- Download your shopping file: If using another platform to host your store, you should have an option to download your product info into a file type that Google Merchant Center supports (e.g. XML or TXT).
- Connect your site with Google Sheets: You may be able to export your product data into a Google Sheet and connect that to Google Merchant Center. When you update information here, Google gets an alert.
Your data feed needs a way of being updated at scale. You have the option to set up a scheduled fetch, so that updates can be taken into account daily, weekly, or monthly.
Before the direct integrations with GMC, updates may have been made via FTP/SFTP. If going that route, you will need a host name where you send your feed to (partnerupload.google.com), user (username you’ll find in GMC SFTP settings), server port (19321), server fingerprint (85:19:8a:fb:60:4b:94:13:5c:ea:fe:3b:99:c7:a5:4d). and password (generated in your GMC account under Settings > SFTP and FTP).
You should only show products that are available for direct purchase, use an official language of the country you advertise in, showcase and be clear about refund policy and contact methods, and have a secure checkout with clear billing terms and conditions.
You’re not allowed much control as Google connects the dots between searcher queries and information in your data feed, but you can use negative keywords. There are the minimum data points or attributes in your data feed required to advertise.
Setting Up a Campaign
Targeting & Keywords
Try creating three shopping campaigns and three negative keyword lists: Generic, Brand, and Product. All campaigns will be linked to the same feed.
For a generic campaign, you don’t want to mention a specific brand or product, so “basketball shoe” instead of “Nike”. You’ll want to use negative keywords to exclude any terms with specific brand or product mentions. You’ll most likely start to see that your return on ad spend is lower than the other two campaigns, because you’re giving the user too many options of brands and products.
For the brand campaign, you’ll want to use exact match negative keywords for those terms that don’t include that exact brand in them. If people are searching for “Nike” you don’t want another brand showing up.
For the product campaign, you might see better ROAS, because searchers have done some research before, have a higher intent, and know more specifically what they want to buy. You’ll exclude any terms that are too generic or don’t mention specific product.
Bidding
For bidding, here’s a good strategy to follow: generic campaigns get high priority and low bids, brand campaigns get medium priority and medium bids, product campaigns get low priority and high bids. Generic campaigns have a higher priority, because they held you capture a larger share of the traffic--but lower bids prevent you from wasting money.
Here are some other ways to segment campaigns for higher ROAS:
- Segment by profit margin: Bid more aggressively on higher profit margin items.
- Segment by seasonality: If there are seasonal spikes in product sales, separate campaigns to control aggressive competition levels for certain times of the year.
- Segment by product type: These are specifications in your data feed like espresso vs coffee machines.
- Segment by custom label: You can have custom labels in data feed (e.g. best sellers, lower margin, winter, etc.).
The most control and granularity comes with single product ad groups (SPAGs) or single SKU ad groups. Within your campaign, you have ad groups and within those, product groups. Product groups showcase specific products or SKUs. You can then set bidding based on historical performance and have control over goals down to the individual product level.
If you go to your Campaigns tab and click “Automate”, you can set rules for different campaigns based on Target CPA or ROAS goals. For shopping campaigns, we’ve seen both manual CPC and target ROAS bidding work well.
Goal Alignment
Finally, when you think about a high-margin product that might warrant a follow up call to get the sale, you may consider having the Google shopping campaign be more geared to driving leads than product sales. In some cases, even though the sale isn’t secured right off the bat, you can get more sales this way.
Shopping Ad Optimizations
Product Title
Since most text ends up being truncated, the product title data in your shopping feed may be more important than the first headline in a regular search text ad. You want Google to be able to crawl your feed and find as many potential and relevant search terms that will connect a user’s curiosity to your product as well as you want product titles to have the higher CTR from your potential buyers.
If your title is truncated, you’ll want your most important words at the beginning of the sentence. If you’re selling a well-known brand, this format is good:
Brand > Gender > Type of Product > Keyword 1 > Keyword 2 > Color/Pattern/Design/Material > Size.
If it’s a seasonal product, this format is good:
Occasion > Type of Product > Keyword 1 > Keyword 2.
The keywords can be attributes.
Use the words in your product titles that people are using in search to improve performance (i.e. semantic query optimization). Look in your Search Terms Report to see which search terms perform better and take snippets of these words to test in product titles. Create a new product feed for experimentation and add negative keywords to your original campaign, so Google doesn’t think you’re trying to serve two ads at once.
Product Description
User’s eyes typically follow this route: Image > Price > Product Title, so product descriptions may not negatively impact traffic results. However, there may be some micro-improvements, so you’ll still want to front-load your most important attributes. See what competitors’ descriptions are and look for new keywords in search terms. If the term “casual” performs well, perhaps a synonym will as well, if not better.
Product Images
Optimize your images, so you aren’t using the same one other advertisers are and stand out -- but keep message match in mind as well.
Product Pricing
If you have a minimized advertised price threshold from the manufacturer that doesn’t allow undercutting, optimization of pricing may not work. If you have some wiggle room, note Google takes pricing heavily into account when it comes to Google shopping campaign auctions. A study by Search Engine Land showed 43% price increase across 2,000 products at over 5 million impressions directly made the impression share drop per product (75% on average).
They found products that were cheaper than the competitor’s took up the most of all impression share.

YouTube Advertising
If you want to learn everything there is to know about YouTube advertising and its tie-in with AdWords, you can view the 123-point-guide with more than just cat videos here. If you’re planning on doing any video ads, it’s definitely worth a read.
Back to Top
Remarketing
Remarketing (aka retargeting) is the practice of having ads follow a person around after they’ve left your website or landing page. You’ll see them as text ads or image ads scattered across different publisher sites that allow ads to run on them. This also means that remarketing is part of the AdWords Display Network. You can set up remarketing in Google AdWords or Google Analytics.
So, who do you remarket to?
Negative Audiences
Just like you have negative keywords, you can have negative audiences you want to exclude such as those visitors who might have already converted. You wouldn’t want to serve up the same ad asking them to convert again, unless for a different offer like an upsell.
You can create a regular audience (containing those you would want to exclude) and setup to exclude at the campaign or ad group level. When in the ad group, near the bottom, you’ll see Campaign audience exclusions. Click the plus sign on the “Exclusions” button. Then, add the audience you want to exclude that should be listed.
Customer Match
Customer Match is a way of uploading email addresses to target people via login identification vs the cookie remarketing method. If Google sees a match between the email addresses you’ve uploaded and the email address a person uses for Google products such as Gmail, YouTube or Search, you’re able to target that individual with display ads.
This type of remarketing doesn’t require a cookie or specific duration, so you can essentially target someone forever -- and if someone deletes cookies, they’re still accessible. The one downside is you can’t use Customer Match for regular display targeting. This is because Customer Match needs an identifier and a big percentage of display impressions are from people who are not logged into a Google account.
You got to Shared Library - Audiences. Then, click the “Remarketing” button with the plus sign and go to Customer Emails. From there, you can upload a file and set any expiration date.
Similar Audiences
Similar Audiences are, for lack of a better word, similar to Facebook Lookalike Audiences. Facebook Lookalike Audiences tend to work better, because Google Similar Audiences tend to be too broad or vague.
Similar Audiences are an extension of your current Remarketing Audience. Google will look at other people across the Display Network that share similar interest as your “seed” Remarketing Audience aka “original list”.
If you remarket to those who have an abandoned shopping cart and seen success, you find those who have similar browsing activity over the last 30 days or similar interests and characteristics to target. Similar Audiences lists will generally be larger than your Remarketing Audiences.
RLSA
Remarketing is not just for display. Remarketing Lists for Search Ads (RLSA) are for AdWords Search, and is a feature that allows you to change your bids or adjust your ad copy if the visitor is part of a remarketing audience you’ve identified. Someone needs to be searching for a keywords you’re bidding on and be part of the audience you’ve selected.
Using IF Functions
You can use IF functions, mentioned previously, in this circumstance.
Headline 1: Fresh New Roses On Sale
Headline 2: Picked Organically In the OC
Description: Get The Most Flowers At The Best Price. Save {=IF(audience IN(Cart Abandoners),20%} If Your Buy Now!
If a person has left your Checkout page without buying, the next time they type a keyword you’re bidding on into Google, they’ll see a modified ad with the bigger discount to incentivize them to finish their purchase. Another option is if your offer was too hot like a demo/trial, you can offer something less threatening like an e-book download.
Now, here are various types of remarketing to consider:
- Sequential Remarketing
- Time Delayed Remarketing
- Up-Sell/Down-Sell/Cross-Sell Remarketing
- Layer Remarketing
- Page Value Remarketing
- Geographic Granularity Remarketing
- Anti-Bounce Remarketing
- Dynamic Remarketing
- Content Remarketing
- Similar Audiences Remarketing
- YouTube Remarketing
We won’t cover them in-depth here, because we have a whole other blog post dedicated to these various types. So, don’t forget to read it before continuing on.
Back to Top
Tracking Metrics & KPIs
Now, that you understand the different networks and how to utilize them, what should you track and look for in the data of your account to help you continue to improve and scale?
What To Track?
Here are the most common Google AdWords metrics, starting with the least important and working up to the ones we think should be your primary focus.

Clicks: This is the number of clicks you get on your ad.
Impression: When your ad is loaded or shown on a placement, but doesn't necessarily have to be seen by a person.
Click Through Rate (CTR): Clicks divided by impressions (clicks ÷ impressions) -- this is used by Google as a relevancy indicator. The higher your CTR, the more relevant you are, which leads to...
Quality Score: A numerical number between 1-10 that Google gives you based on your relevance. The more relevant you are to visitors, the cheaper your cost per click (CPC) becomes. A higher quality score also unlocks other benefits like higher average positions and higher impression shares. You can usually hover over in your AdWords campaigns and get more of an explanation of what might need to be fixed to get a higher Quality Score.
Average Cost Per Click: This is the average you're paying considering that different keywords or placements can have different max cost per clicks.
Average Position: Where your ad is showing up on Google between the number 1 and 7 spot.
Impression Share: This is the number of impressions you received divided by the amount of total available impressions, calculated as percentage. High impression share means you’re tapped out and cannot get more volume. Impression share can change if new competitors enter or are more aggressive with bids.
Conversion: A conversion is any successful action that you determine. It could be a sale, a lead, a download, an install, or something else.
Cost Per Conversion: This is your total ad cost divided by you number of conversions. If you spent $100 and got 10 conversions, then your cost per conversion is $10.
Cost Per Acquisition (CPA): Same as cost per conversion, just a different name for it. Other people also call this "cost per action".
Conversion Rate: This is the calculation of conversions divided by clicks. So if you have 5 conversions from 100 clicks, then your conversion rate is 5%.
Now, let’s move on to extremely important metrics/KPIs…
Return on Investment (ROI): Very simple calculation of amount of money being made minus cost, expressed as a ratio or percentage. Let's say you spend $100, but make $300, that means your ROI is 1:3 or 300%.
Return On Ad Spend (ROAS): Same calculation as ROI, just in fancy terms of ad spend
Cost Per Sale: If you're generating leads of any sort, you eventually have to turn them into sales (either on the phone, through your onboarding, or other efforts). This means that not all your leads will close. So, your cost per conversion will almost alway be less than your cost per sale, unless your conversion is a sale (which is almost always what happens in an eCommerce setting).
Closing Rate/Sales Rate: Just like you have a conversion rate, you also having a closing rate/sales rate. Let's say that you have 100 leads and only closed/turned into sales 20 of those, then your closing rate/sales rate is 20%.
How To Track
So, now you know what you’re measuring, but how are you going to track it properly?

With ValueTrack and UTM parameters, that’s how.
ValueTrack parameters are points of value you append to the back of your final URL. If Google tracks certain parts of it, it will automatically pre-fill that information into your URL before the visitor even hits your landing page. Then, you can set up a tracking URL template. You can go to Shared Library > URL options to set the template or go to ad and click “Ad URL options (advanced)” to edit under the Ads tab.
As mentioned previously in this guide, you’ll need hidden fields (i.e. the visitor can’t see them) to capture this new data from your forms that will accompany name, email and phone number fields they do see. Then, you’ll need to field map those hidden fields to your CRM or back-end data collection system, so all data can be synced and combined.
UTM parameters require manual updating and don’t provide as much insight as the ValueTrack parameters. If you’ve properly tagged, you should be able to go into Google Analytics to Acquisition > Campaigns > All Campaigns, and toggle between primary and secondary dimensions. Be aware that other companies may share your link and add own parameters, so these results will show up as well.
Back to Top
Scaling and Growth
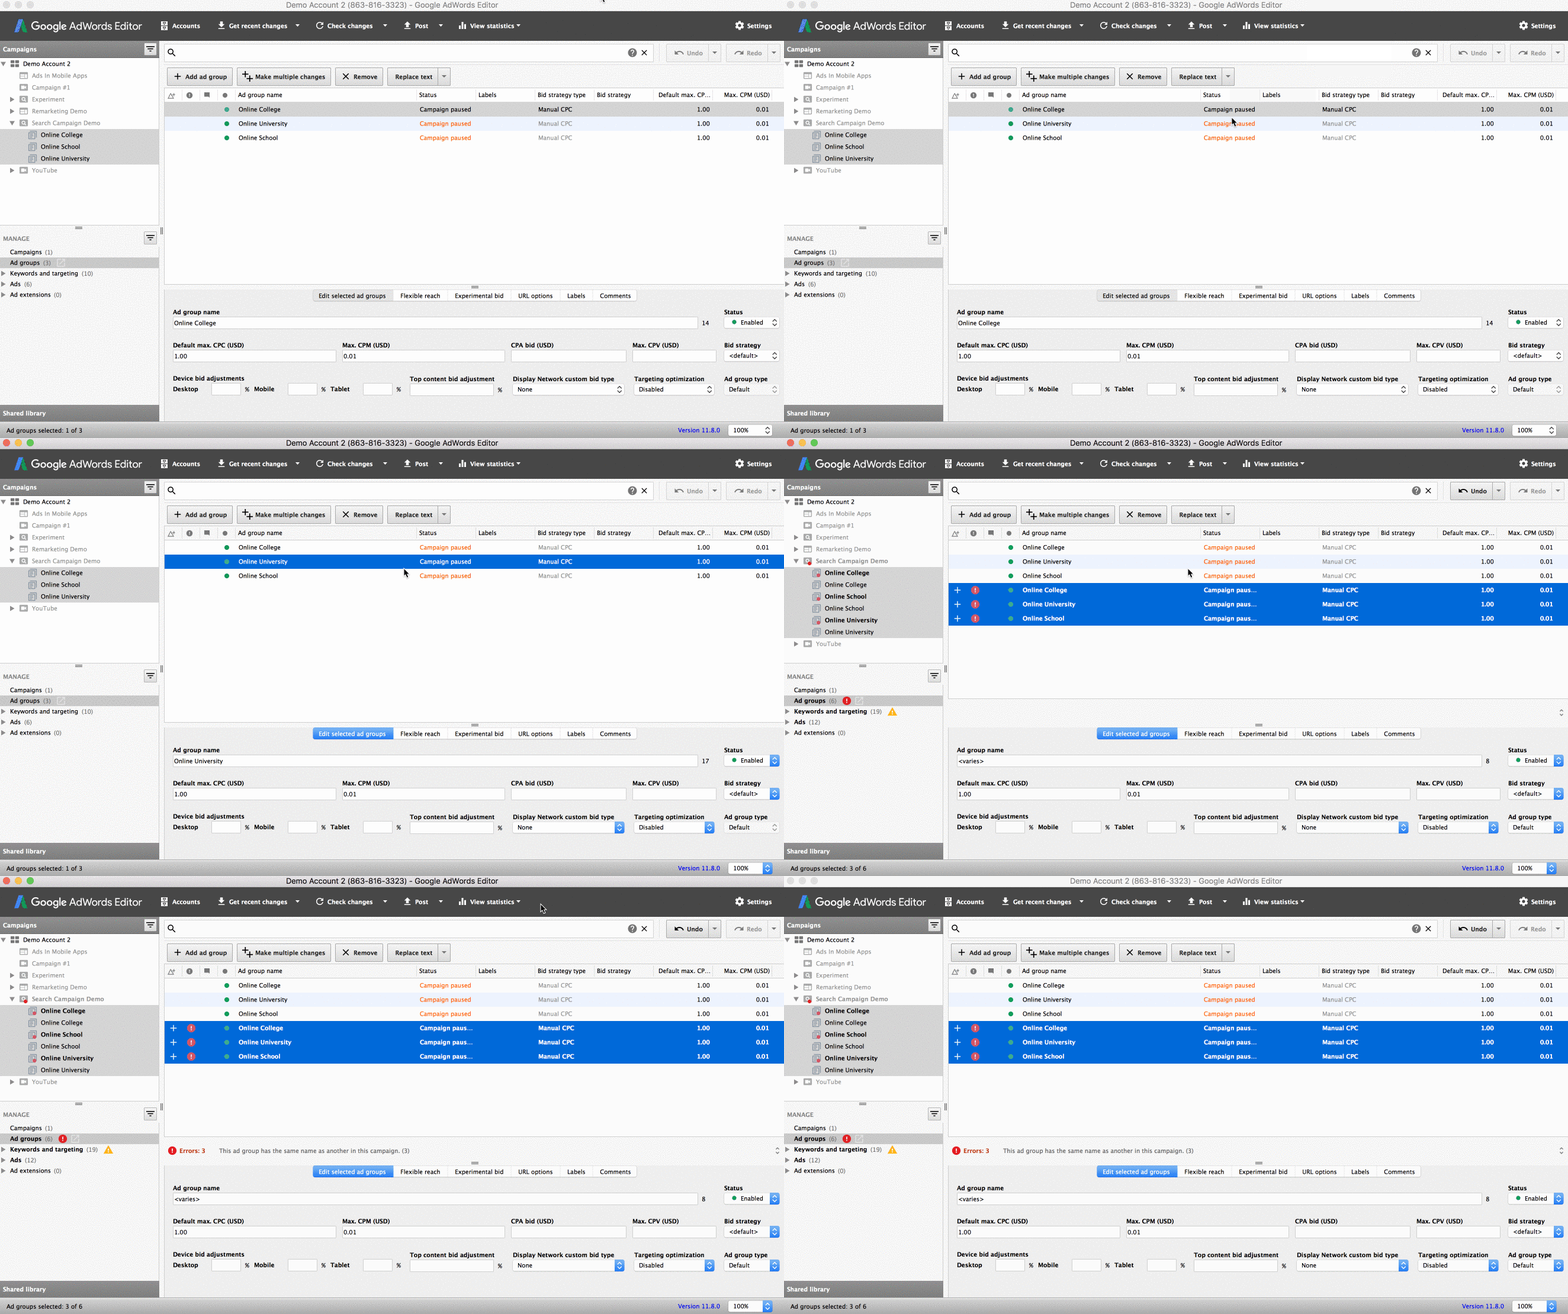
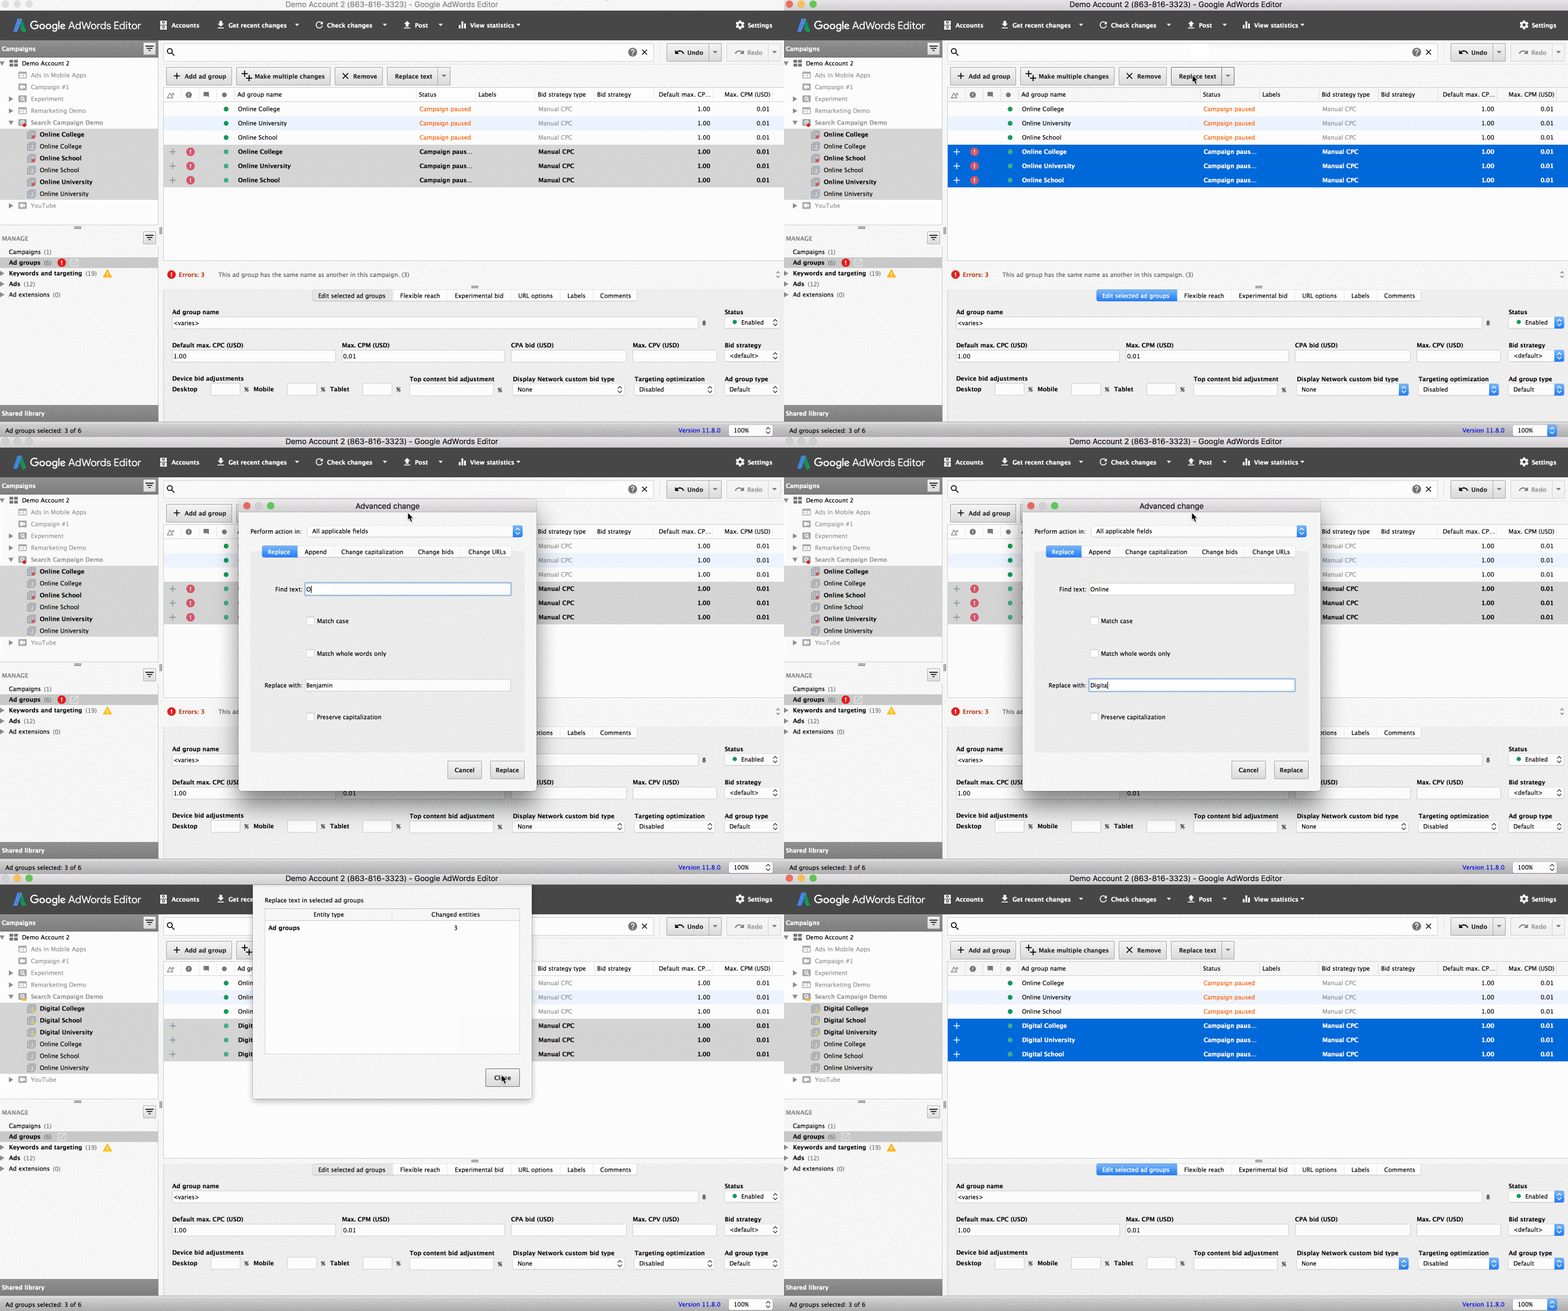
If you’re making large-scale changes as you continue to manage and grow your account, AdWords Editor is a free Google tool that can be used offline.
Continue with your keyword expansion and mining, so you can adjust bids on your brand, competitor, general, and multi-intent keywords. You can use tools like SpyFu’s Kombat to assist when it comes to your Search Network campaigns.
If you keep a campaign with broad match keywords, but have a lower budget and bid as not to waste money, you can use it as a SKAG mining tool. You can also use Dynamic Search Ads, so Google crawls non-ecommerce sites in search of terms to extract. These terms can be added as negative keywords or added as SKAGs in other campaigns.
Even though you should be able to get conversions with one layer of targeting, you can start testing layering different target criteria to uncover even more with display. There’s a lot of cross-pollination with Display Network audiences. So, you can often find ancillary audiences to target.
WhatRunsWhere let’s you see the placements of competitors and how long they’ve been targeting that placement. You can also see the ads that are being used and for how long in consecutive days they’ve been seen.
These are just a few of the tools and methods you can use to continue to scale and grow your account.
Back to Top
AdWords Guide Wrap Up
Google AdWords is mostly just a traffic generator; it's not an automatic conversion or sales machine. You need to put in much more work than just focus on your AdWords account if you truly want to get some amazing results.
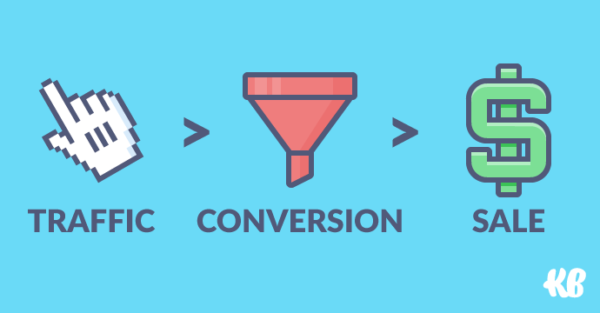
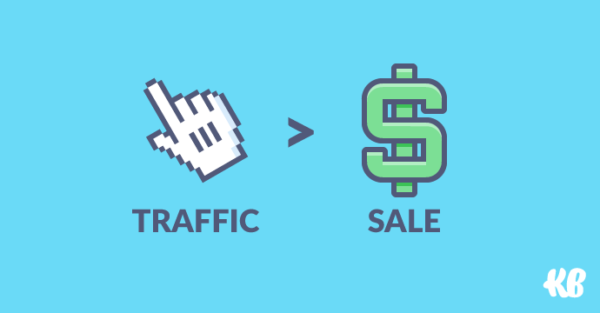
If you're in the SaaS or lead gen space, the parts of the equation that you need to get right is three-fold:
To achieve PPC success, AdWords is just the beginning of something much bigger. You also need to care about improving your conversion rates through landing page testing and conversion rate optimization.
And then from there, you also need to be able to turn your conversions into sales, which means working on your sales processes to either improve your closing rate or come up with new offers to be able to create revenue from any type of conversion.
This means that if you focus backwards on the equation above, you'll achieve much quicker success with Google AdWords. If you improve your sales rate, you don't need as many leads as before to be successful. And if you improve your conversion rate, you can work with less clicks and save money on your ad budget.
And the same thing applies if you're an eCommerce store.
If you focus on improving things like average order values, shipping costs, fulfillment costs, and repeat customers before you focus on improving things in AdWords, you'll be able to pay much less for a sale and be more aggressive with your bids. AdWords doesn’t operate in a silo -- it takes correct targeting, messaging, landing pages, offers, back end funnels, and the ability to sell.
Whether in B2B or B2C, continually ask questions when it comes to increasing those macro-metrics:
- Are there better follow up sequences you can test?
- Could you be faster at reaching out to leads?
- Does a two-step landing page perform better than a one-step?
- Does geographic granularity perform better than a generic landing page?
Get brand new Google ad strategies straight to your inbox every week. 23,739 people already are!
The more granular you get and the more smoke tests you run, the better performance you start to see. You get more control, and more consistent and predictable performance over time with AdWords -- and that’s, after all, is what you’re trying to achieve.


