Today, I want to talk about AdWords account expansion. Once you have your AdWords account running well (and making money), you may want to expand it to generate even more sales or leads.
There are several effective ways to grow your AdWords account, but expansion must be done carefully and strategically. So today, we’ll discuss ways to profitably add new features to your AdWords account.
Get brand new Google ad strategies straight to your inbox every week. 23,739 people already are!
Add New Keywords & Match Types
Adding new keywords is a quick and easy way to start generating more traffic and sales. You’ll likely discover there are many relevant keywords that can be added to your account to expand your keyword footprint.
This is where you’ll be looking to add new keywords to your account for which you’re not currently getting impressions.
Here are a few ways to add keywords.
Review Your Search Term Reports
The best place to start is with your search term reports. The search term report will show you all of the actual searches that triggered the display of your ads. Unless you’re using all exact match, you’ll find a surprising number of search terms that generated clicks on your ads – some of which will be relevant, and some of which won’t.
To run a search term report, simply navigate to one of your AdWords campaigns, select the Keywords tab, and click the “Search Terms” button.
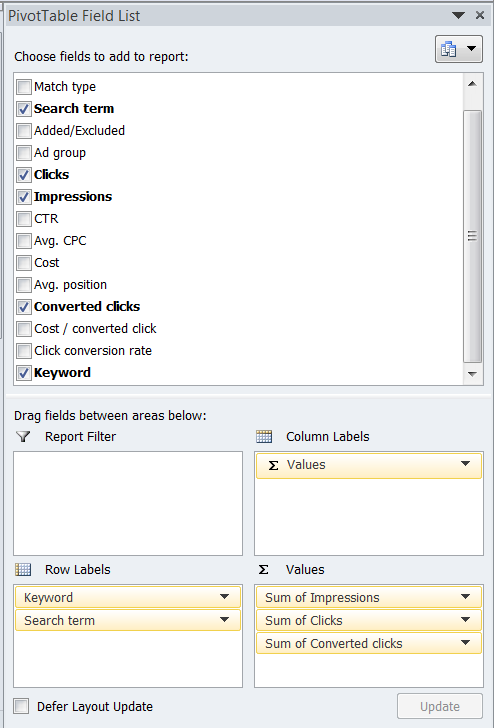
You can either review the info right in the AdWords UI, or export the data. The most efficient way to do a keyword expansion is to export the data into Excel and create a pivot table. Structure your pivot table as follows:
If you sort the table descending by clicks, you’ll quickly see which keywords and search terms are generating clicks and conversions.
Add any keywords that are converting to your account in the appropriate ad group. Be careful of letting ad groups get too big, however. You may want to create several new ad groups based on the results of your search term report.
Use The Keyword Tool
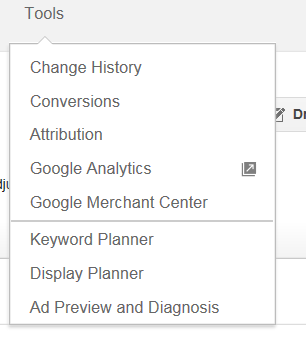
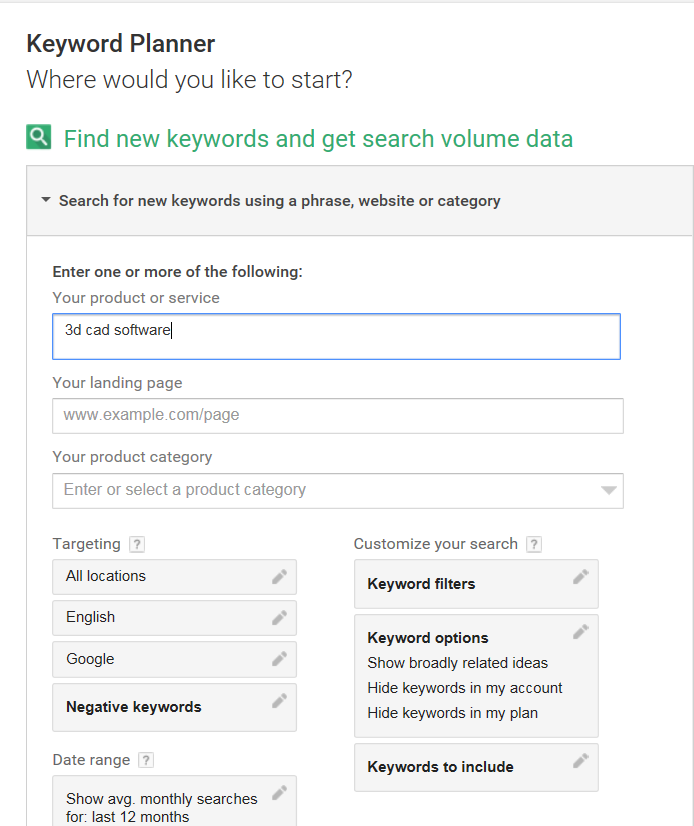
You can also use Google’s Keyword Planner to research new keywords. You’ll find the Keyword Planner in the Tools menu of your AdWords navigation bar:
Enter a few of your top-converting keywords into the Planner, and see what Google suggests.
You can also add in competitor URLs and Wikipedia/Reddit/Pinterest URLs to find even more potential keyword ideas.
Export the results, and pull out the keywords that are relevant to your business.
Don’t just blindly accept all of Google’s suggestions – some of them will not be a good fit for your business and could lead to negative results. Carefully review the list and add only the keywords that make sense for you.
Research Competitor Keywords
Another interesting way to expand your keywords is to see what your competitors are bidding on. You can do this by performing a few actual Google searches, but a more efficient way is to use PPC spy tools.
There are several good tools out there, including SpyFu, SEMrush, AdGooRoo, and iSpionage.
These are paid tools, but most of them will let you perform a search or two for free. You’ll be able to see a sample of the keywords your competitors are bidding on, along with ad copy examples. Pick the relevant terms and add them to your account.
Add Ad Extensions
Ad extensions are a great way to help make your ad stands out on the search results page.
Adding ad extensions generally helps your ads get a better click-through rate, which can increase traffic and conversions.
To have some ad extensions display, ads must appear in the top 1-3 positions, above the search results.
Sitelink Extensions:
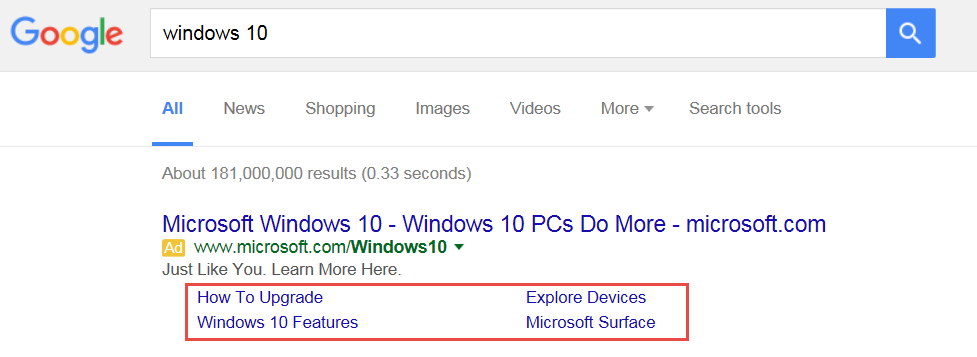
Sitelink extensions are additional links that display below your ad, leading to pages on your website other than your ad’s final URL.
Sitelinks are commonly used to show complementary products, FAQ pages, reviews, and other pages that you wouldn’t want to use for your main landing page, but may provide additional information to help the searcher convert.
In the image below, sitelinks are highlighted in red:
Each sitelink must have a different URL from your ad’s final URL.
Callout Extensions:
Callout extensions are similar to sitelinks in that they offer the opportunity to display additional text. However, callout extensions aren’t links.
Instead, think of callout extensions as a way to give more information about your company/product/service/benefits/features.
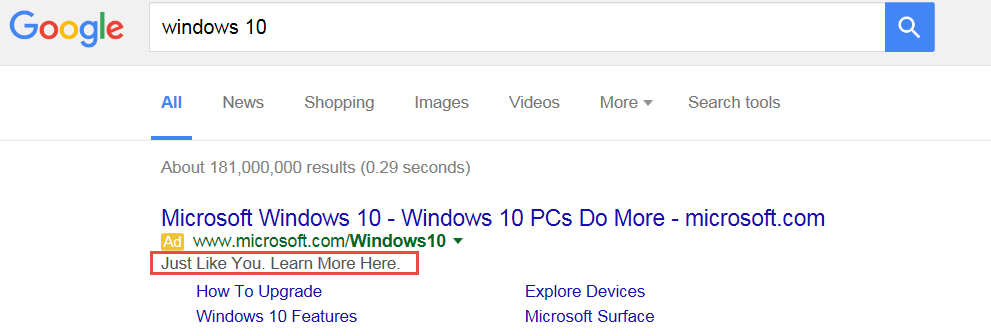
Using descriptive text such as “free shipping,” “24-hour service,” and other features that you want to share with the searcher is a good way to use callout extensions. Slogans can work well in callout extensions, especially if your slogan is well known.
Callout extensions are highlighted in red in the example below.
App Extensions:
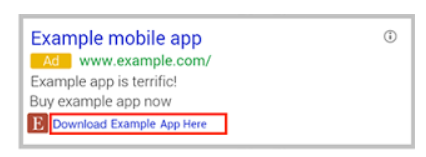
If you offer a mobile app, you can drive downloads via app extensions.
For e-commerce advertisers who offer a shopping app, encouraging searchers to download and use your app instead of buying on your website can help make shopping easier for the user, therefore potentially increasing your sales.
Call Extensions: Many businesses depend on phone calls to drive telephone sales or foot traffic to their store. Using call extensions allows you to include your phone number as an extension next to your ad. Here’s what call extensions look like on desktop:
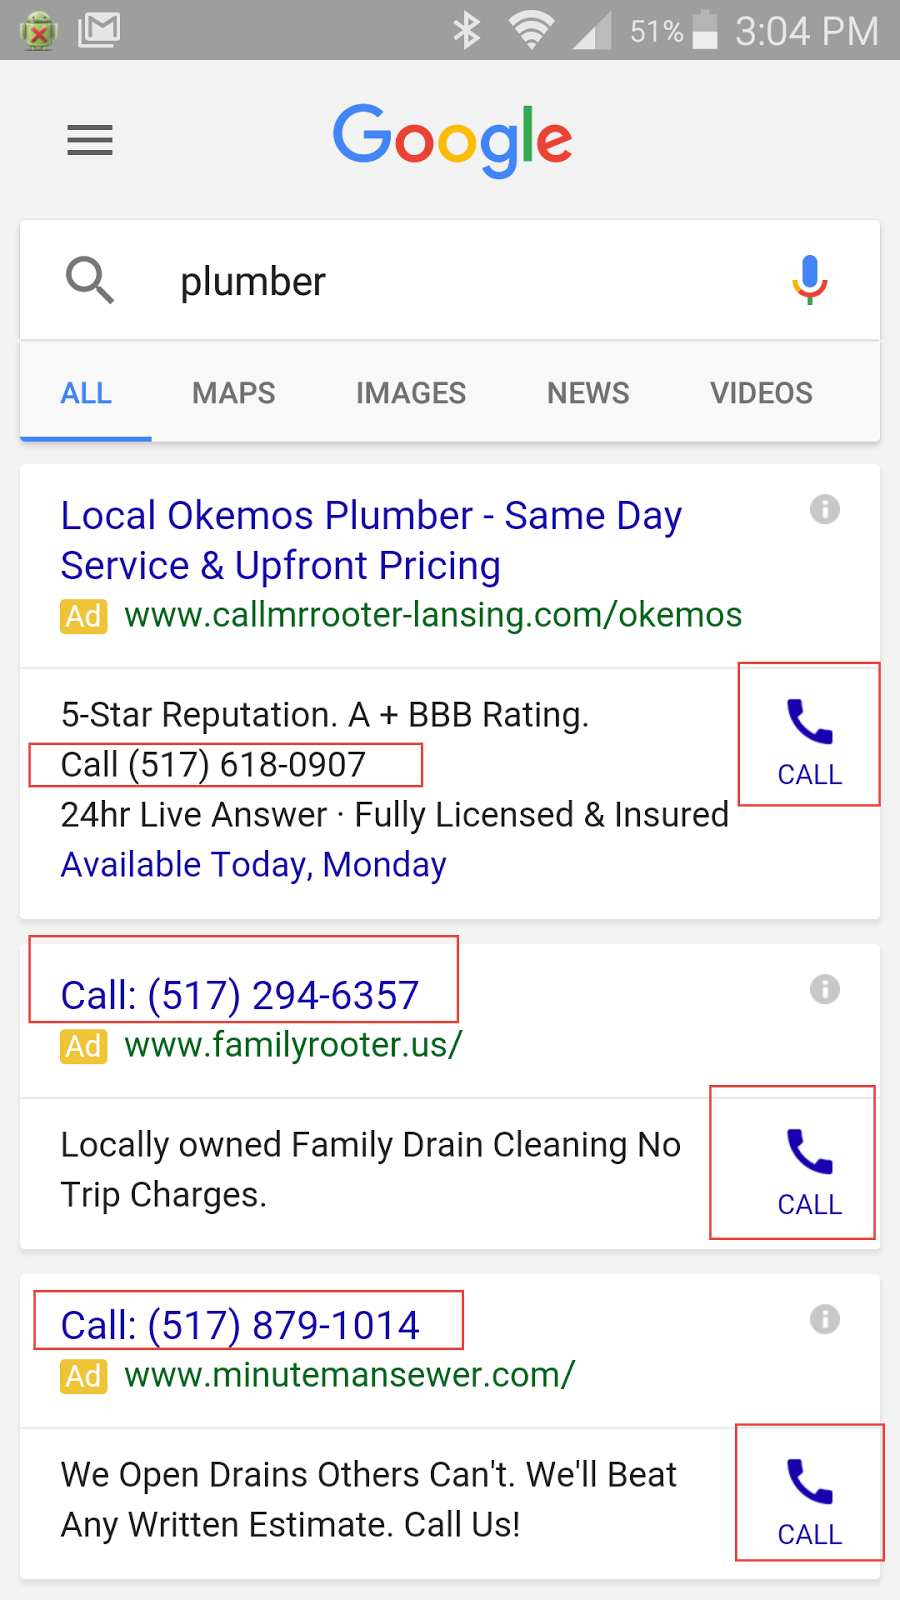
Call extensions are particularly helpful for users searching on a mobile device. These searchers could often have an immediate need, so making it easy to call your business will help generate more phone lhttps://klientboost.com/ppc/ppc-call-tracking/eads:
All the user has to do is tap the “Call” icon, and a call is placed to your business. Advertisers pay-per-click fee for each call tap, just as you would for a click to your website/landing page.
Location Extensions:
Location extensions allow advertisers to include their business address, directions to their business, a phone number, and a pin on Google Maps.
To use location extensions, you’ll need to set up a Google My Business account and link it to your AdWords account. Once the accounts are linked, just select Location Extensions from the Extensions menu:
The default is to add all business locations to your account. Location extensions can help drive both online and in-store traffic for your business.
Google will then consider the location of the searcher and display the address that is nearest them when it comes to proximity.
Remarketing and RLSA (Remarketing Lists for Search Ads)
Remarketing and RLSA offer advertisers a way to market to people who’ve already visited their website/landing page.
Remarketing ads appear across the Google Display Network, “a collection of websites -- including specific Google websites like Google Finance, Gmail, Blogger, and YouTube” -- that show AdWords ads.
This network also includes mobile sites and apps. If you've ever seen an AdWords ad on your favorite news site or in your Gmail account, and wondered how it got there, now you know: websites like these are part of the Google Display Network.
RLSA ads appear within Google search results themselves.
Setting Up Remarketing and RLSA:
To use remarketing and RLSA, you’ll need to tag your website and/or landing pages. There are two ways to tag your site: with Google Analytics, or with the AdWords remarketing tag.
If you’re using Google Analytics, remarketing is included as part of the code. There is no further code setup needed.
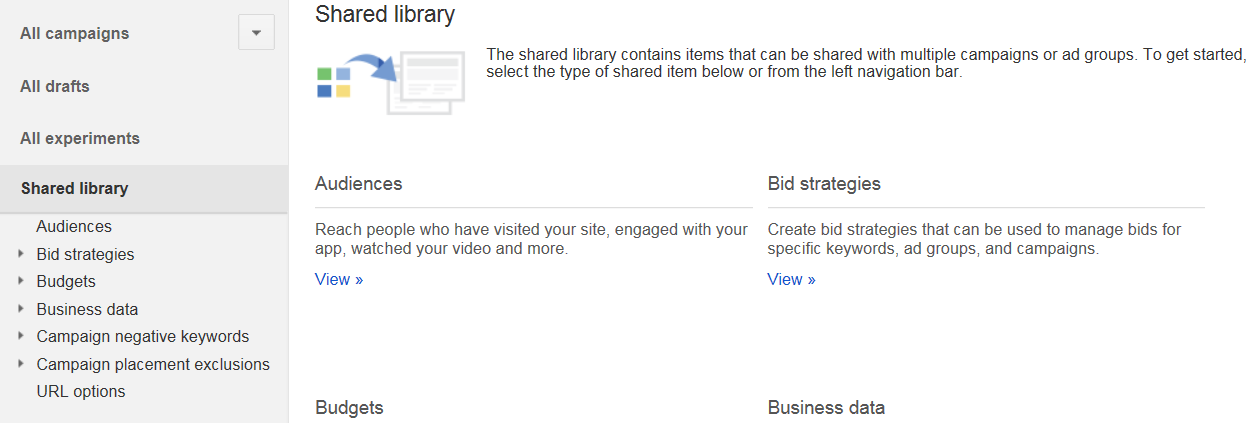
If you’re not using Google Analytics, you can get a remarketing tag in your AdWords account. Navigate to the Shared library and choose Audiences:
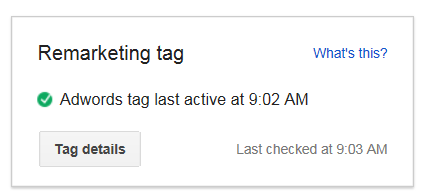
Once in the Audiences section, you’ll see a prompt for the tag at the upper right hand corner of your screen:
Click “Tag Details” to get the actual tag (code) to place on your site.
Remarketing and RLSA use the same tag. Be sure to place the tag on every page of your website to provide the most opportunities to reach previous site visitors.
Setting Up Audiences:
Once your site is tagged, you can start creating remarketing audiences.
Audiences are groups of people with similar behaviors. For example, you might create an audience of converted visitors: people who completed a sale or reached the “thank you for signing up” page.
Think about your customers and what behaviors they engage in. Do people who purchase usually browse a number of pages on your site before buying? Do they spend a long time on your site? Are there key pages you want them to visit? Create audiences for all of these behaviors.
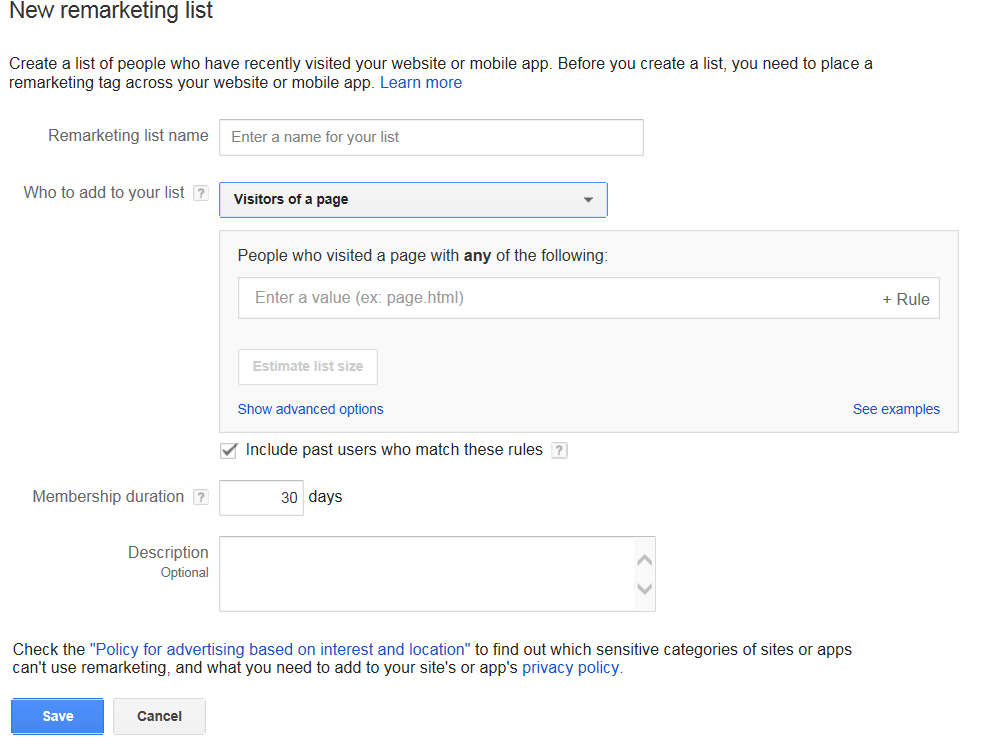
To create an audience, click “+Remarketing List” from the audiences section in the shared library. You’ll see a dialog box like this:
If you want to create a list of users who visited your Products page, for instance, you’d specify that in the “People who visited a page with any of the following” section.
You might put “/products”, for example; or use the full URL if you only have one products page.
Think carefully about your member duration. This is how long a user stays in the remarketing audience, and the number of days should correspond with the length of your buying cycle. If users usually purchase within a week, you may want to set your membership duration to 7 days. If you have a longer buying cycle, you might want to go 90 days or even longer – the upper limit is 180 days.
Don’t keep people in your remarketing audience longer than necessary – you don’t want to annoy users by pushing products to them that they no longer need.
Creating Remarketing Campaigns:
Once your audiences are set up, you can use them as targeting criteria in your AdWords campaigns.
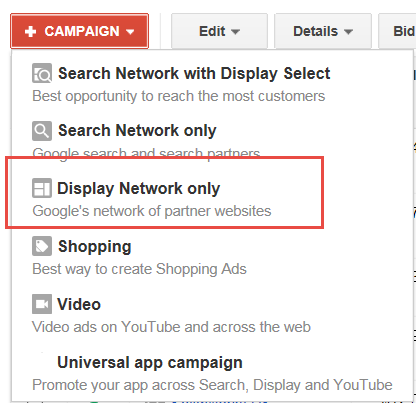
To use remarketing, which shows ads in the Google Display Network, create a Display Network Only campaign in AdWords.
Then create the ad groups you want to use for remarketing.
Navigate to your first ad group and go to the Display Network tab, and then choose “+Targeting > Interests & Remarketing.” From there, select the remarketing audience you want to target.
Be sure to think carefully about your ads when setting up remarketing. You don’t want to just show the user the same offer they’ve already seen. Think about their behavior and what makes sense:
- should you show them a special deal?
- A piece of content to help them make a purchase decision?
- An ad for a complementary product?
Putting some thought into your ad strategy up front will help make remarketing successful.
To get an idea of different remarketing campaigns you can run, check out this 30+ retargeting campaign post.
Using RLSA:
RLSA is similar to remarketing, except the ads show in the Google search results, rather than the GDN.
To set up a RLSA campaign, you can start by copying one of your search campaigns and adding a remarketing audience to it. Navigate to an ad group, and then to the Audiences tab to add an audience:
You’ll add an Interests & Remarketing audience for RLSA the same way you did for remarketing on the Display Network.
As with remarketing, be sure to think about your ad copy and what makes sense. RLSA is your opportunity to show different search ad copy to previous visitors of your site – so take advantage of it.
About Target and Bid vs. Bid Only:
RLSA has 2 different bid settings: Target & Bid, and Bid Only.
Target and bid will restrict your ad delivery to those who are ONLY in your remarketing audience.
No one else searching on the keywords in your RLSA campaigns will see your ads. Target and bid will be your most common setting for RLSA.
Bid Only is an interesting setting that enables you to set different bids for the users in your remarketing audience, while still showing ads to everyone searching on the keywords in the campaign (that aren’t part of your remarketing list).
For example, you may want to use Bid Only for high purchase intent keywords, setting a higher bid modifier for those who have already visited your website to help improve the position of your ad against competitors.
Be aware though, that Bid Only ads will serve to everyone who searches on the keywords, so use with caution.
Before pushing your RLSA campaign live, here are a couple tips to keep in mind:
- It sounds counter-intuitive, but use broad match keywords. Since you’re only targeting users who’ve visited your website and taken a desired action, you don’t need to worry about driving untargeted traffic from broad match. Broad match in RLSA allows you to cast a wide net to reach your audience.
- Use higher-funnel keywords. In regular PPC, you probably wouldn’t bid on single-word keywords like “ink” or “toner” because they’re just too broad and untargeted. With RLSA, you can afford to bid on these keywords, because the audience is smaller and is already pre-qualified by virtue of their previous visit to your website.
Negative Audiences:
When using remarketing and RLSA, keep in mind that you can use negative audiences as well as target audiences. Negative audiences are similar to negative keywords: they prevent your ads from showing to people in the audience.
If you’re targeting people who visited your site but didn’t convert, it’s a good idea to add “converted visitors” as a negative audience to make sure your remarketing ads don’t show to them. You also may want to consider creating negative audiences for people who bounced from your site, or who visited customer service pages, because these visitors are likely not qualified.
Google Display Network
When you’ve exhausted your options in Google Search and remarketing/RLSA, you may want to consider the Google Display Network.
The Google Display Network, or GDN for short, can be a great way to generate incremental traffic and sales. But it must be approached with caution. Ads in the GDN are not triggered by a user search, but rather are shown based on the relevance of advertisers’ ads to the content on the website. Users viewing the ads are usually in a passive rather than active mode.
That said, the GDN offers high impression volume and incremental exposure for your business that can drive direct response conversions if you do it right.
Targeting on the GDN:
To target your ads on the GDN, you can use keywords, placements, topics, interests and remarketing, or demographics; or any combination of these.
Keyword Targeting:
Keyword targeting sounds just like keyword targeting in search. It’s similar, but not exactly the same.
Keyword targeting in the GDN enables advertisers to tell Google what keywords represent the topics and interests they’d like to reach. For example, if you sell cookware, you may choose keywords like:
- Gourmet cooking
- Recipes
- Cookware
- Food network
These keywords seem random, but websites with this type of content will be relevant to your target audience. Remember, users aren’t searching on these keywords – they’re used directionally by Google to help match your ads to site content.
Placements:
Targeting by placements allows advertisers to choose the websites or placements on which they’d like their ads to appear. In the cookware example above, you might choose placements like:
- Foodnetwork.com
- Cookingchannel.com
- Epicurious.com
- Gourmetmagazine.com
Remember that high-traffic, well-known placements will have significant competition for ad space.
If you choose popular websites for placement targeting, you may have to bid quite high to be able to generate any impressions. Still, for advertisers who know where their target audience hangs out, placement targeting can be an efficient way to target on the GDN.
Topics:
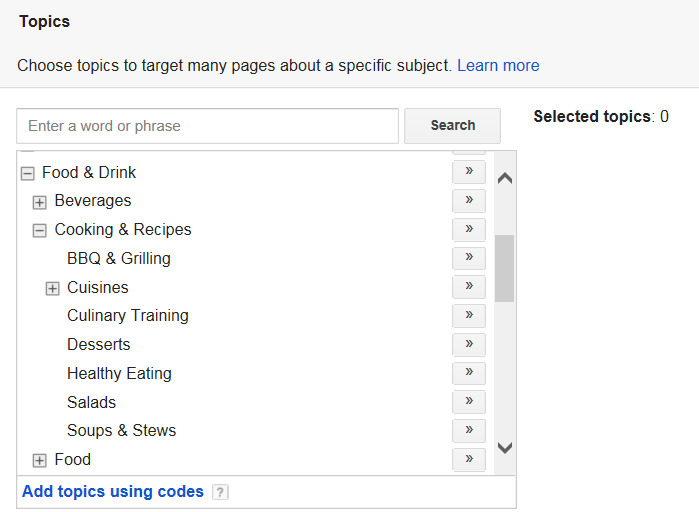
Instead of choosing keywords or placements, you can target ads in the GDN by topic. Here are some of the food-related topics for our cookware example:
You can select as many topics as you’d like.
Topics are collections of sites/placements that are grouped together because of the content they’re about.
Interests & Remarketing:
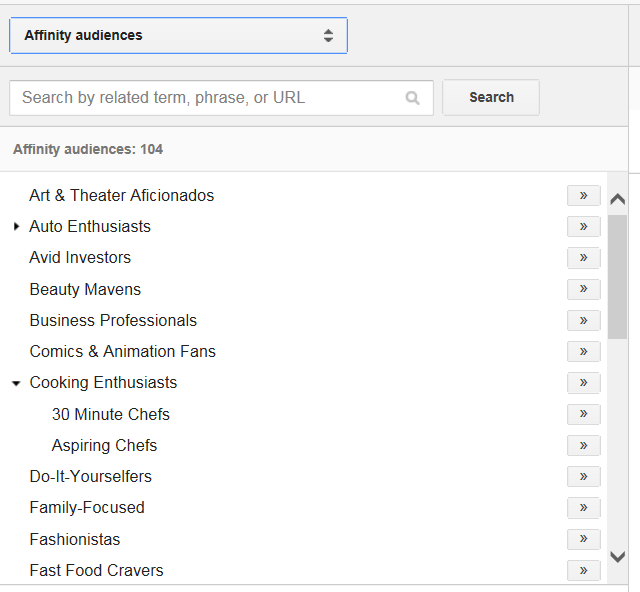
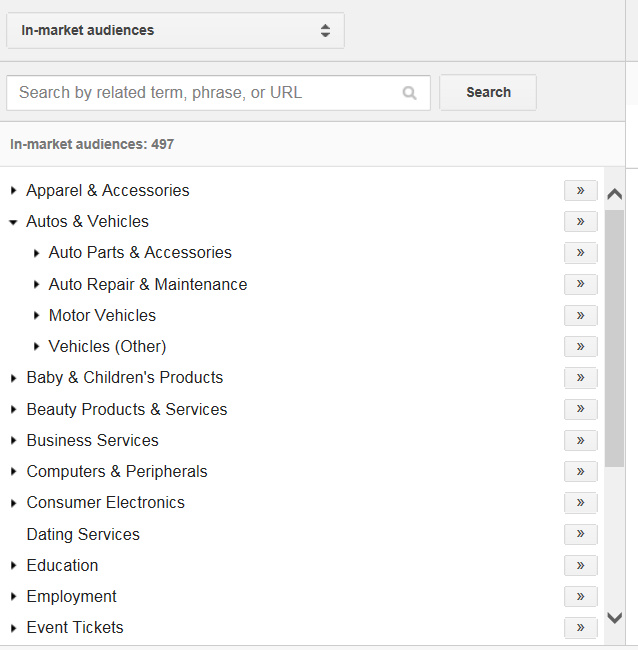
We talked about remarketing in the previous section. The GDN also offers interest targeting, based on either affinity audiences or in-market segments.
Like topic targeting revolved around the content of websites/placements, interest targeting revolves around the browsing behavior of the individual person.
Affinity audiences are developed by Google, based on long-term behavior of users. For example, the food-related affinity audience is made up of people who frequently visited food and cooking-related sites over time. Here are some examples of affinity audiences:
In-market audiences, on the other hand, are users who Google has determined are actively shopping for a particular product or service.
Demographics:
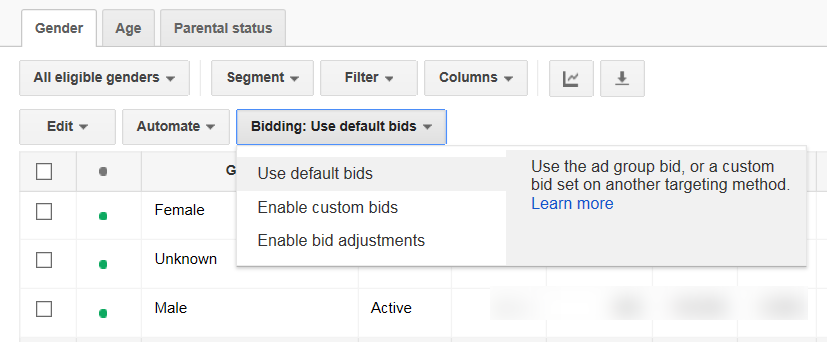
If you took marketing courses in college, you probably studied demographic targeting. Advertisers can target GDN ads by gender, age, and parental status.
You can also exclude demographics; for example, an advertiser targeting business owners might exclude users in the 18-24 and 65+ age groups, as these ages are less likely to be business owners.
Using Multiple Targeting Methods:
If you find that you’re getting too much untargeted GDN traffic, you can combine multiple targeting methods to narrow down your audience. In the cookware example, you could target by placement, and then add keywords to cover the items you sell: cast-iron skillets, saucepans, utensils, etc.
This will help prevent your ads from showing on pages that aren’t relevant to what you sell.
Combining keywords and placements works particularly well on large sites that cover a lot of topics, such as cnn.com or youtube.com. Adding keywords helps your ads to show on more relevant content.
Be aware that layering multiple targeting options will reduce the number of impressions you’ll receive in the GDN. Try to strike a balance between quantity (impressions) and quality (targeting).
Watch Your Performance and Adjust:
The GDN usually drives high impression volume and lower click-through rates than those seen in Google search.
CPCs are usually much lower than search, as well. But it’s important to monitor performance and exclude any targeting options that are not driving converting traffic. While this is true in any search campaign, because ads in the GDN lack the intent of a searched keyword, advertisers must be extra vigilant.
Other Ways to Continue AdWords Account Expansion
There are several other ways to expand your AdWords account:
- Customer Match – Google allows advertisers to upload a list of email addresses that can be used as an audience for remarketing or RLSA. Email addresses are cross-referenced with Google accounts; those that have a Google account are eligible to be used in the Customer Match audience.
- Gmail Ads/Sponsored Promotions – Gmail sponsored promotions is a unique ad type that shows up only in personal Gmail boxes (it does not show in Google business apps email boxes) in the promotions tab.
- Dynamic search ads - Dynamic Search Ads automatically show your ad based on the content of your website. This means that instead of keywords, Google uses dynamic ad targets to show your ads to customers. With dynamic ad targets, you can choose all or a subset of pages in your website's domain that'll be used to target your ads to customers.
- Shopping – Shopping ads are served in Google search results based on a product feed, rather than keywords. Ecommerce advertisers can upload a feed to their Google Merchant Center to be used for Shopping ads.
- New Betas - Keep tabs on your Google team/support person and ask for any new betas that you can get access to before they’re released to the general public.
Back To You
As you’ve learned, there are numerous ways in which advertisers can grow their AdWords accounts to generate more traffic and sales.
Depending on your business goals, you can add keywords and ad extensions to reach more visitors, launch remarketing and RLSA to encourage previous site visitors to return and purchase, and broaden your reach with the Google Display Network.
Use the best practices outlined in this guide and you’ll start generating more revenue for your business.

