


Ads are the only part of your PPC (pay-per-click) efforts that a potential customer ever sees.
All of your other settings and targets just tell the platform you’re using if, when, and how your ad should be displayed. In the end, however, ads are still one of the most important aspects of an entire PPC account.
So, it makes sense that testing your ads can increase your conversions exponentially, lower your cost per conversion, increase your ad quality, and offer many other benefits across your account.
But here’s the rub: most ad testing isn’t done correctly.
Mistakes in ad testing happen when advertisers don’t have a solid understanding of what they want to test and how to pick data-focused winning metrics.
In this guide, we’ll walk you through how to make informed decisions about running and measuring ad tests so you can improve your PPC campaigns tenfold.
Get brand new PPC strategies straight to your inbox every week. 23,739 people already are!
What exactly is ad testing and why does it matter?
Ad testing is the process of continuously rotating in new ads and having them compete with your existing ads.
When you determine a winning ad as your reigning champ within a test, then you continue to test new ads against that champ to find a new, better winner.
The elements you decide to test out in your new challenger ads could be a lot of things, including…
- new CTAs (calls-to-action)
- new headlines
- new descriptions
- new images
- new landing pages
Generally, you want to test one element at a time. Meaning, you don’t want to change multiple parts of your existing ads at once to form your challenger ads. If you do that, you won’t know which of your changes exactly made the difference you saw.
For example, if your reigning champion ad uses the CTA “Download your free e-book,” and you want to see if a new CTA, “free e-book ($10.99 value),” works better, that CTA is the only part you’d change in your new challenger ad (for this one test).
Ad testing is important because it helps you constantly improve upon your past efforts. And while all types of testing within a PPC account are important, ad testing is especially important because your ad is the gateway standing between your potential customers and your website.
You want to constantly improve the ratio of people who see your ad to those who click on your ad—because more clicks mean more potential converters.
Here’s what it boils down to: the better your ads are, the better your conversion rates can be. You can constantly improve on both those things, and that’s what ad testing’s all about.
The 2 main types of ad testing
There are two main ways to test ads; each has its own advantages and disadvantages.
We’ll lay out each testing method so you can learn which method is best to test in your accounts.
1. Single ad testing
The most common type of ad testing is single ad testing. This type of testing is also commonly referred to as A/B testing.
A single ad test is when you create two or more ads within one ad container to be shown to that container’s one audience. You’d then pick your top-performing ad amongst those to then compete against new ads.
What we mean by “ad container” here is the hierarchical structure in the account that contains your ads. In Google Ads, this would be an ad group. In Facebook, this would be an ad set.
Single ad testing is best when you want to find the best message for one targeting method.
When you consider an ad container like an ad group or ad set, it’s usually comprised of two parts:
- targeting method
- ads
The targeting method could be keywords or various audiences, depending on your platform and the type of campaign you’re working with.
The targeting method is what’s triggering your ads. So, when you test your ads, you’re only learning how those ads perform relative to that targeting method.
Advantages of single ad testing
The advantage of single ad testing is that you’re working to find the best message for that single targeting method. Therefore, single ad testing is usually the best testing method for
- brand terms
- your top keywords
- your target audiences with the most data or best performance
Disadvantages of single ad testing
Single ad testing doesn’t come without its drawbacks. Some of the main disadvantages to consider are
- testing on low volume ad containers just doesn’t work as well
- you don’t necessarily receive insights that apply to other targeting methods (keywords, audiences, etc.)
If an ad container doesn’t receive a lot of data, then you’ll also never have enough information to achieve statistical significance in your testing measurements. In other words, you’ll never be able to truly declare which ad was the “winner.”
In addition, since you’re only testing within a single ad container, your results only apply to the ad container where the test was conducted.
If there’s something you learned about your ads and user interactions within one ad container, you can certainly test that message in another ad container, but it might not be successful there.
If you want to receive global insights or test low-volume ad containers, you can turn to multi ad testing.
2. Multi ad testing
Multi ad testing is a testing technique where you can test a pattern, image, line of text, and more across multiple ad containers at once and then aggregate the data across the ad containers included within the test.
There are two main advantages of multi ad testing:
- increased data
- global insights
Since you are aggregating test data across multiple ad containers, you’ll have more data to work with, and thus low-volume accounts and ad containers can be tested at scale.
Of course, you can also test your high-volume ad containers with this method as well.
Because you’re including multiple ad containers within this type of test, the insights you receive don’t just apply to a single ad container, but to all the ones included within the test.
For example, here are some common ideas for multi ad testing:
- Does using geolocations in our ad copy increase our CTR?
- Will Dynamic Keyword Insertion (Google Ads and Microsoft Ads only) increase or decrease our conversion rates?
- Would users rather see a discount or a free shipping offer in the ad?
- Should our headlines include a benefit, call-to-action, or an authority line?
- Should our descriptions or primary texts focus on a wide variety of products or on a specific UVP (unique value proposition)?
- Should we use our brand in our ads?
In each of these examples, there are questions to be answered that will help you shape how you write ads across all the ad containers included in the test.
Therefore, the first step to multi ad testing is to determine what information you want to know.
A word on multi ad testing segments and audience intent
As mentioned, multi ad testing allows you to receive insights across the ad containers being included in the test. However, you generally don’t want to include all the ad containers within your account.
You should only include the ad containers that have similar characteristics.
For instance, many companies want to use their brand in their ads. However, some ad containers will have higher intent, and some lower (depending on your targeting there).
What we mean by high intent is that an audience has higher purchase intent, or higher lead submission, sign-up intent, etc. In other words, these audiences are closer to completing your main goal.
A higher-intent audience (one that already knows your brand) will typically respond better to a branded ad test than a low-intent audience who doesn’t know your brand at all.
When you consider most accounts, each level of intent will typically need to be its own ad testing segment.
For example, you would test different high-intent offers, copy, or ad creative against each other in a high-intent segment. You might test “Schedule a free demo” against “Get a free price quote” within all high-intent segments.
But in your low-intent segments, you might test “Join our free webinar” against “Download our free case study,” because these types of lower-threat offers do better with cold, low-intent audiences. (You can read all about aligning your offers to audience intent in our article about the PPC funnel.)
The bottom line? Be careful when blanketing ad tests across all your different segments.
Some general ad tests (like one action word vs. another in the copy) may become conclusive tests when blanketed across segments—but others won’t.
Lastly, if your ad test is likely to perform differently from one segment to another, your results probably won’t be indicative of how all those segments performed on that one test.
Setting up multi ad testing
Setting up multi ad tests isn’t too difficult once you have an idea of what you want to test. The main trick is to be consistent in your creation of ads. For instance, these two are different lines
- “Call us today”
- “Call us today!”
However, you don’t always have to be consistent depending on what you’re testing.
An example is testing geotargets in your copy to appeal to certain demographics based on where they are. You’ll have to do some market research to see where your highest-value audiences are located.
You might have ad headlines such as
- “Find Plumbers in LA”
- “Find Plumbers in Chicago”
- “Find Plumbers in London”
- “Local Plumbing Services”
In this case, you’re really only testing two different lines:
- “Find Plumbers in <geo>”
- “Local Plumbing Services”
The above is a test to see if adding geography to the ad increases user interaction more so than using the word “local.”
This could also be tested with prices vs. discounts, such as:
- “Save <X%> on <product>”
- “<products> for only <price>”
Once you determine what you want to test and where you want to test it, then you want to create at least two ads (you can test three or four ideas at once if you have enough traffic volume) in every ad container included within the multi ad test.
The trick is being able to then combine the data from the tests together.
Organizing the data you receive
With multi ad testing, you’re going to have to aggregate data across multiple ad containers.
To do this, you can either use ad testing software, such as Adalysis.com, or pivot tables within Excel.
Pivot tables allow you to pivot the data across all of your ads on a “key.”
If you’re testing the exact same line of text in several ad containers, then the key is the actual line of text that you’ve created.
To organize your ad tests, you can even add an ad label to your ads in Google Ads or Microsoft Ads. The label option lets you label the ads included in each test so that you can pivot the data based on that label.
For instance, if you’re testing geographic ads vs. non-geographic ads, then each ad container will have two ads in it. The ads that include geographies would have a label like “geo” and the ads that don’t include geographies would have a label like “non-geo.”
Once you’ve set up your ad tests—single ad or multi ad—the next step is understanding how to pick winning and losing ads.
Working with the data from your ad tests
Once you run an ad test, you’ll start to accumulate data. There are five steps to working with your data:
- ad rotation settings (Google and Microsoft Ads only)
- determining what metrics you’ll use to pick your winning ads
- ensuring you’re above minimum data
- achieving statistical significance
- defining maximum data
Let’s walk through each step to ensure you’re working with your data correctly.
1. Ad rotation settings
Your ad rotation is a setting at the campaign level within Google Ads or Microsoft Ads, specifically.
While this isn’t a setting you can apply to Facebook Ads or some other social platforms, it’s important to acknowledge in search ad campaigns (and look out for in new platforms).
This setting determines how the search engine rotates your ads within a campaign or ad group when there is more than one ad present.
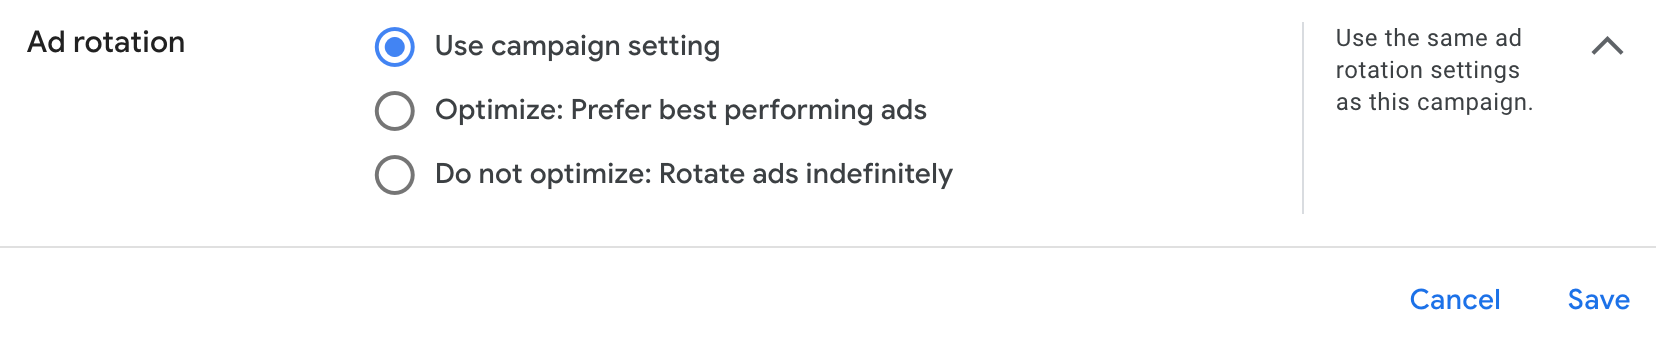
The default setting is “Optimize: Prefer best performing ads.” This tells Google to automatically show the ads with the best performance most often.
But with ad testing, you usually want to use “Do not optimize: Rotate ads indefinitely,” because that will ensure each ad receives roughly equal exposure.
When you’re testing new ads against reigning champions, you don’t want Google to rotate in your reigning champion more just because it has more ad performance history. Your new ads might not get a chance to shine fairly.
However, this isn’t a set-in-stone rule. Google Ads and Microsoft Ads are only getting smarter. And if I’m honest, I’ve run ad tests using both settings and still had new ads trump reigning champions while using the “Prefer best performing ads” setting.
But if you see that your new ads are getting pithy traffic compared to your reigning champs, check on this setting and try changing it to “Rotate ads indefinitely” to see if your new ads are given a better chance.
2. Choosing winning metrics
There are four main metrics we like to look at to define success in ad testing:
- conversion volume (the number of conversions your ad received)
- CPA: cost per acquisition (also known as cost per conversion)
- ROAS: return on ad spend
- conversion value (the amount of money your ads generated as far as sales)
If you’re wondering where metrics like CTR (click-through rate) and CPC (cost-per-click) are, they’re not on the list for a reason.
This is because when you’re looking at how successful your ads are, you want to look at what those ads did to benefit your business (e.g., how many leads, sales, sign-ups, etc. they brought in).
It’s imperative that you look at the metrics that matter, AKA conversions. You can focus on which ad got the lowest CPC, but in doing so, you’re not determining anything in terms of how that ad benefitted your bottom line.
So, shift your focus to conversion-related metrics, and you’ll know exactly which ads are bringing in the most cheddar.
Of the four above, the metric that you choose is dependent on your primary goal.
Is it more important to you to get the highest bulk of conversions, regardless of the cost of each conversion? Focus on conversion volume.
Is it more important that each conversion comes at a reasonable cost, so you can make the most of your budget? Focus on CPA.
Is it more important that you make a better profit on your ads relative to what you spent on the ads? Focus on ROAS.
Or is it more important that your ads make you the highest dollar amount possible in sales? Focus on conversion value.
Using two metrics at once
There will always be times when it makes sense to consider more than one metric regarding ad success. Sometimes, you’ll only have one goal in mind…and other times, you’ll want to try to get the best of both worlds.
For example, at KlientBoost, we often look at conversion volume and CPA in tandem. This is because, yes, we want to hit certain volume goals, but if each of those conversions is costing us more than $1,000, we know we still have some work to do to make the most out of our budget.
Or, we’ll look at conversion value and ROAS in tandem to not only assess how much we’re making, but also how much profit is coming in relative to what we spent.
If it’s between two ads that brought in the same or very close conversion volume, we take a look at their CPAs to see which is doing better. Often, that’s where you’ll find your winner.
Sometimes, one key metric alone just isn’t enough of an identifier of success, and that’s okay.
So now you’ve established how you’re going to pick an ad winner. But before you can actually determine that, you must hit minimum data amounts.
3. Hitting minimum data amounts
Minimum data is described as the absolute minimum information you must have for an ad before you decide to examine the metrics and find your winner(s).
For instance, let’s say that you have these three ad tests:
- 1 click, 40 impressions
- 5 clicks, 33 impressions
- 0 clicks, 24 impressions
From a purely mathematical point of view, Ad 2 has achieved a 97% confidence factor that it will have the highest CTR among the three.
The problem with that assumption is that this data might have occurred within a single hour on a Tuesday night, since it has a total of just 97 impressions.
To ensure that you don’t have this problem of ending a test too soon, you should define your minimum data and then examine your confidence factors after each ad has achieved minimum data.
The first part of defining minimum data is to determine the type of metric you’re using for testing.
Some metrics are ‘yes’ or ‘must use’ in defining your minimum data as they represent the total volume of traffic to those ads (like impressions). The other metric(s), like conversions, are secondary and represent action.
Secondly, time frames must be defined for every test.
You should always use at least a week since search behavior changes throughout a week. We like to push it a bit further and give each test at least two weeks to run (or more, if traffic is low).
Once you’ve determined your testing metrics and the minimum data you need to define, the next step is to choose the actual numbers.
Some accounts get millions of impressions each week and others get just a few impressions each week; it’s impossible to globally define minimum data for everyone.
However, the chart below gives the bare minimum recommended amounts. Using higher numbers is perfectly fine if you accumulate a lot of data every week.
| Impressions | Conversions | ||
| Low traffic | 350 | 7 | |
| Mid traffic | 750 | 13 | |
| High traffic | 1,000 | 20 | |
| Well-known brand terms | 100,000 | 100-1,000 |
4. Confidence levels & statistical significance
A confidence level is the percentage of confidence that an outcome wasn’t just due to chance, giving you statistical significance when it comes to your ad testing.
For instance, if an ad test has a confidence level of 80%, then there’s only a 20% chance that the outcome is due to chance and not due to a repeatable pattern.
Before you decide to take action on an ad test, you should ensure that you’ve achieved a confidence level of at least 90%.
There are a few ways to determine statistical significance, such as
- using an online calculator (like this one)
- using an Excel plugin, such as Analysis ToolPak
- using a third-party system that calculates this for you automatically, such as Adalysis
In general, you don’t want to fall below a 90% confidence level because you’re taking too big of a risk that the results are due to chance.
This handy chart can serve as an overall reference guide to best practices for determining your minimum confidence levels. (Keep in mind that the figures below are based on our experience and are general recommendations.)
| Term type | Minimum confidence |
| Long-tail keywords | 90% |
| Mid-data terms | 90% – 95% |
| Third-party brands you sell | 90% (small brands) to 95% (large brands) |
| Top keywords (the ones you watch daily) | 95% – 99% |
| Your brand terms | 95% (unknown brand) – 99% (well-known brand) |
The main problem with confidence factors is that they assume that the data you have now will be similar to the data that’ll come later.
For instance, search behavior on a Monday morning when people are starting work is very different from search behavior on a Saturday afternoon when they’re relaxing at home.
So, before you calculate your confidence factors, you must ensure that you have hit those minimum data requirements we mentioned earlier.
5. Maximum data
Not every test you run will result in a clear winner and a loser.
In some cases, after a couple months of running an ad test, you’ll have less than 90% confidence that one ad is better or worse than another.
To ensure these non-statistically significant test results don’t run indefinitely, you want to define maximum data.
Maximum data is the most data you want before you end an ad test, regardless of the results.
There are two easy ways to define maximum data:
- three months
- 10x your minimum data
It’s easier to just define a three-month time frame for a test. If a test has been running longer, and it has reached minimum data, then it needs to be ended.
A more scientific method is to use 10x your minimum data—but this is often much harder to track—and so three months is an easier number to work with.
Taking action after ad testing
Once an ad test has achieved results, it’s time to take action.
For single ad tests, your options are to
- pause the losing ads
- create new challenger ad concepts to compete with the winning ad
For multi ad tests, your can now decide to
- pause the losing ads across all ad containers
- replace the losing ad element (headline, image, description, etc.) with a different ad element to test
- create a new multi ad test with a different hypothesis across the ad containers used in the test
- examine and make note of any insights
The last bullet is very important.
What did you learn from your multi ad test?
This information can be used in other places within your account or even within your landing pages and other marketing material. For instance, we often see companies use multi ad testing in this fashion:
- use your best CTA in your emails as CTAs to visit a website
- use your best headline in your SEO efforts to increase organic CTRs
- use benefits, calls-to-action, or headlines on landing pages
- use images that won in emails or in social media
As multi ad testing gives you insights across an entire segment of your PPC account, you want to make note of those insights, share them with your team, and see how else you can use that insight within all your marketing efforts.
Time to start your own ad testing
If you’re not already ad testing—whether that’s copy or creative testing—you should be.
If you are ad testing, but realized you’re not necessarily doing it correctly, then it’s time to make a change.
Because your ad is the only part of your advertising efforts that potential customers actually see, a lot of your success rides on effective ads. So, you don’t want to get stuck using the same ads that are only giving you mediocre performance.
So test, test, and test.
And by the way, ad testing should be something you continuously do throughout your PPC advertising journey. It’s not something you do for a bit and then just stop doing.
You’ve got all the info you need to form ad testing solutions correctly and assess their performance scientifically. With this methodology in hand, it’s time to get those tests going.
If you’re looking to read up on crafting the best ad copy before you try your hand at ad testing, build your knowledge even more with our article on PPC ad copy.


