Leave some sugar out in the open, and you’ll find ants surrounding it.
Today, Facebook, with its 2.89 million monthly active users, is like sugar. You’ll find endless business owners and marketers looking to cast a wide net with their pay per click (PPC) advertisements scrambling for a piece of this sugary goodness.
What’s more, Facebook has rolled out different management and analytics tools like Ads Manager, Audience Analytics, and Page Insights to retain their massive hold on the market. But many of these tools are spread out across the social media platform, making them easy to miss.
That’s when Facebook Business Manager comes into the picture.
Here’s the deal: Today, we’re going to walk you through Facebook Business Manager and show you exactly how the tool works and how you can use it to achieve your campaign goals.
Let’s get to it, shall we?
Get brand new Facebook ad strategies straight to your inbox every week. 23,739 people already are!
What is Facebook Business Manager?
Facebook’s Business Manager tool makes it easier to manage multiple Facebook pages, ad accounts, and business assets, as well as Instagram accounts and product catalogs—all in one place.
(enter praise hands)
In Facebook‘s words, “Business Manager serves as a one-stop-shop to manage business tools, business assets and employee access to these assets.”
With this tool, you can:
- Remove or change viewing permissions
- See who has access to your business pages and ad accounts, and assign them different roles within the platform
- Share your Business Manager accounts with agencies you’ve hired to help you manage your ad campaigns
The whole point of using Facebook Business Manager is to help you and your team stay organized and focused when creating, monitoring, and publishing ads, pages, and other business assets on Facebook.
What’s the difference between Facebook Ads Manager and Facebook Business Manager?
Remember that absurd Geometry rule about how every square is a rectangle, but not every rectangle is a square?
Here’s a quick review:
- A rectangle has four interior right angles
- A square has four interior right angles and four equal, straight sides
As you can see, a square fits under the general definition of a rectangle, but a rectangle doesn’t fit the definition of a square.
The same logic applies to Facebook Ads Manager (the square) and Business Manager (the rectangle).
Facebook Business Manager is the hub for accessing all of your Facebook marketing needs, including pixels, new ad accounts, catalogs, and business pages.
On the other hand, the Ads Manager allows us to create and track multiple Facebook ads, ad sets, and Facebook campaigns for your business pages. It’s a part of the Business Manager suite of tools.
You can work in multiple Ads Manager accounts with the Business Manager.
Get it?
Why use Facebook Business Manager?
Managing several business pages, ad accounts, and other assets can quickly turn into a nightmare. The situation can get even worse—way worse—for agencies that have to manage dozens of client accounts.
Even the thought sounds insane.
Luckily, we have Facebook Business Manager to keep everything secure and organized and smoothen the back-and-forth to get from one asset to the next from a single dashboard.
To reiterate our point further, here are six benefits of a Facebook Business Manager:
- Separates your personal Facebook profile from your business page. As such, you no longer have to worry about privacy concerns or accidentally posting something that isn't meant for your business account.
- Easily manage multiple Facebook ad accounts and Pages in one place. You’ll have a central location to track your ads and post performance. In turn, this will help organize your social media marketing and advertising efforts.
- Safely share access with multiple people. You’ll have full control over which agency, partner, or vendor gets access to your accounts and still have complete ownership of your assets.
- Build custom audiences for different ad campaigns. This is a huge advantage for agencies that run ads for multiple clients, as well as for businesses that target different types of audiences.
- Control the level of access each employee has based on the role. This will simplify the process of delegating tasks and monitoring what your employees are doing without risking security.
- Revoke access for people who no longer work for you. Moreover, you can easily maintain an up-to-date roster in Business Manager.
Another feature that’s great about Facebook Business Manager is it keeps you focused on your work.
After logging into your account, you’re immediately directed to your business assets from where you can access your pages, Ads Manager, and other business-related assets. So no getting distracted by your personal Facebook feed or notifications.
How to set up a Facebook Business Manager
The Facebook Business Manager account has a totally different setup process from that of creating a personal account—all you need is a business name and email to get the ball rolling.
Here’s a step-by-step rundown of how to get started with Facebook Business Manager:
Step 1: Create a Facebook Business Manager account
"How do I access Facebook Business Manager?"
First and foremost, you’ll need a personal Facebook profile to create an account on Business Manager. It’s required to confirm your identity.
Don’t worry, though. Your co-workers, vendors, and partners won’t have access to any personal information in that account.
Note: We’re going to assume you’re one of 2.89 million people who have a Facebook personal account. But if you don’t, you can click here.
Follow the steps below to create a Facebook Business Manager account:
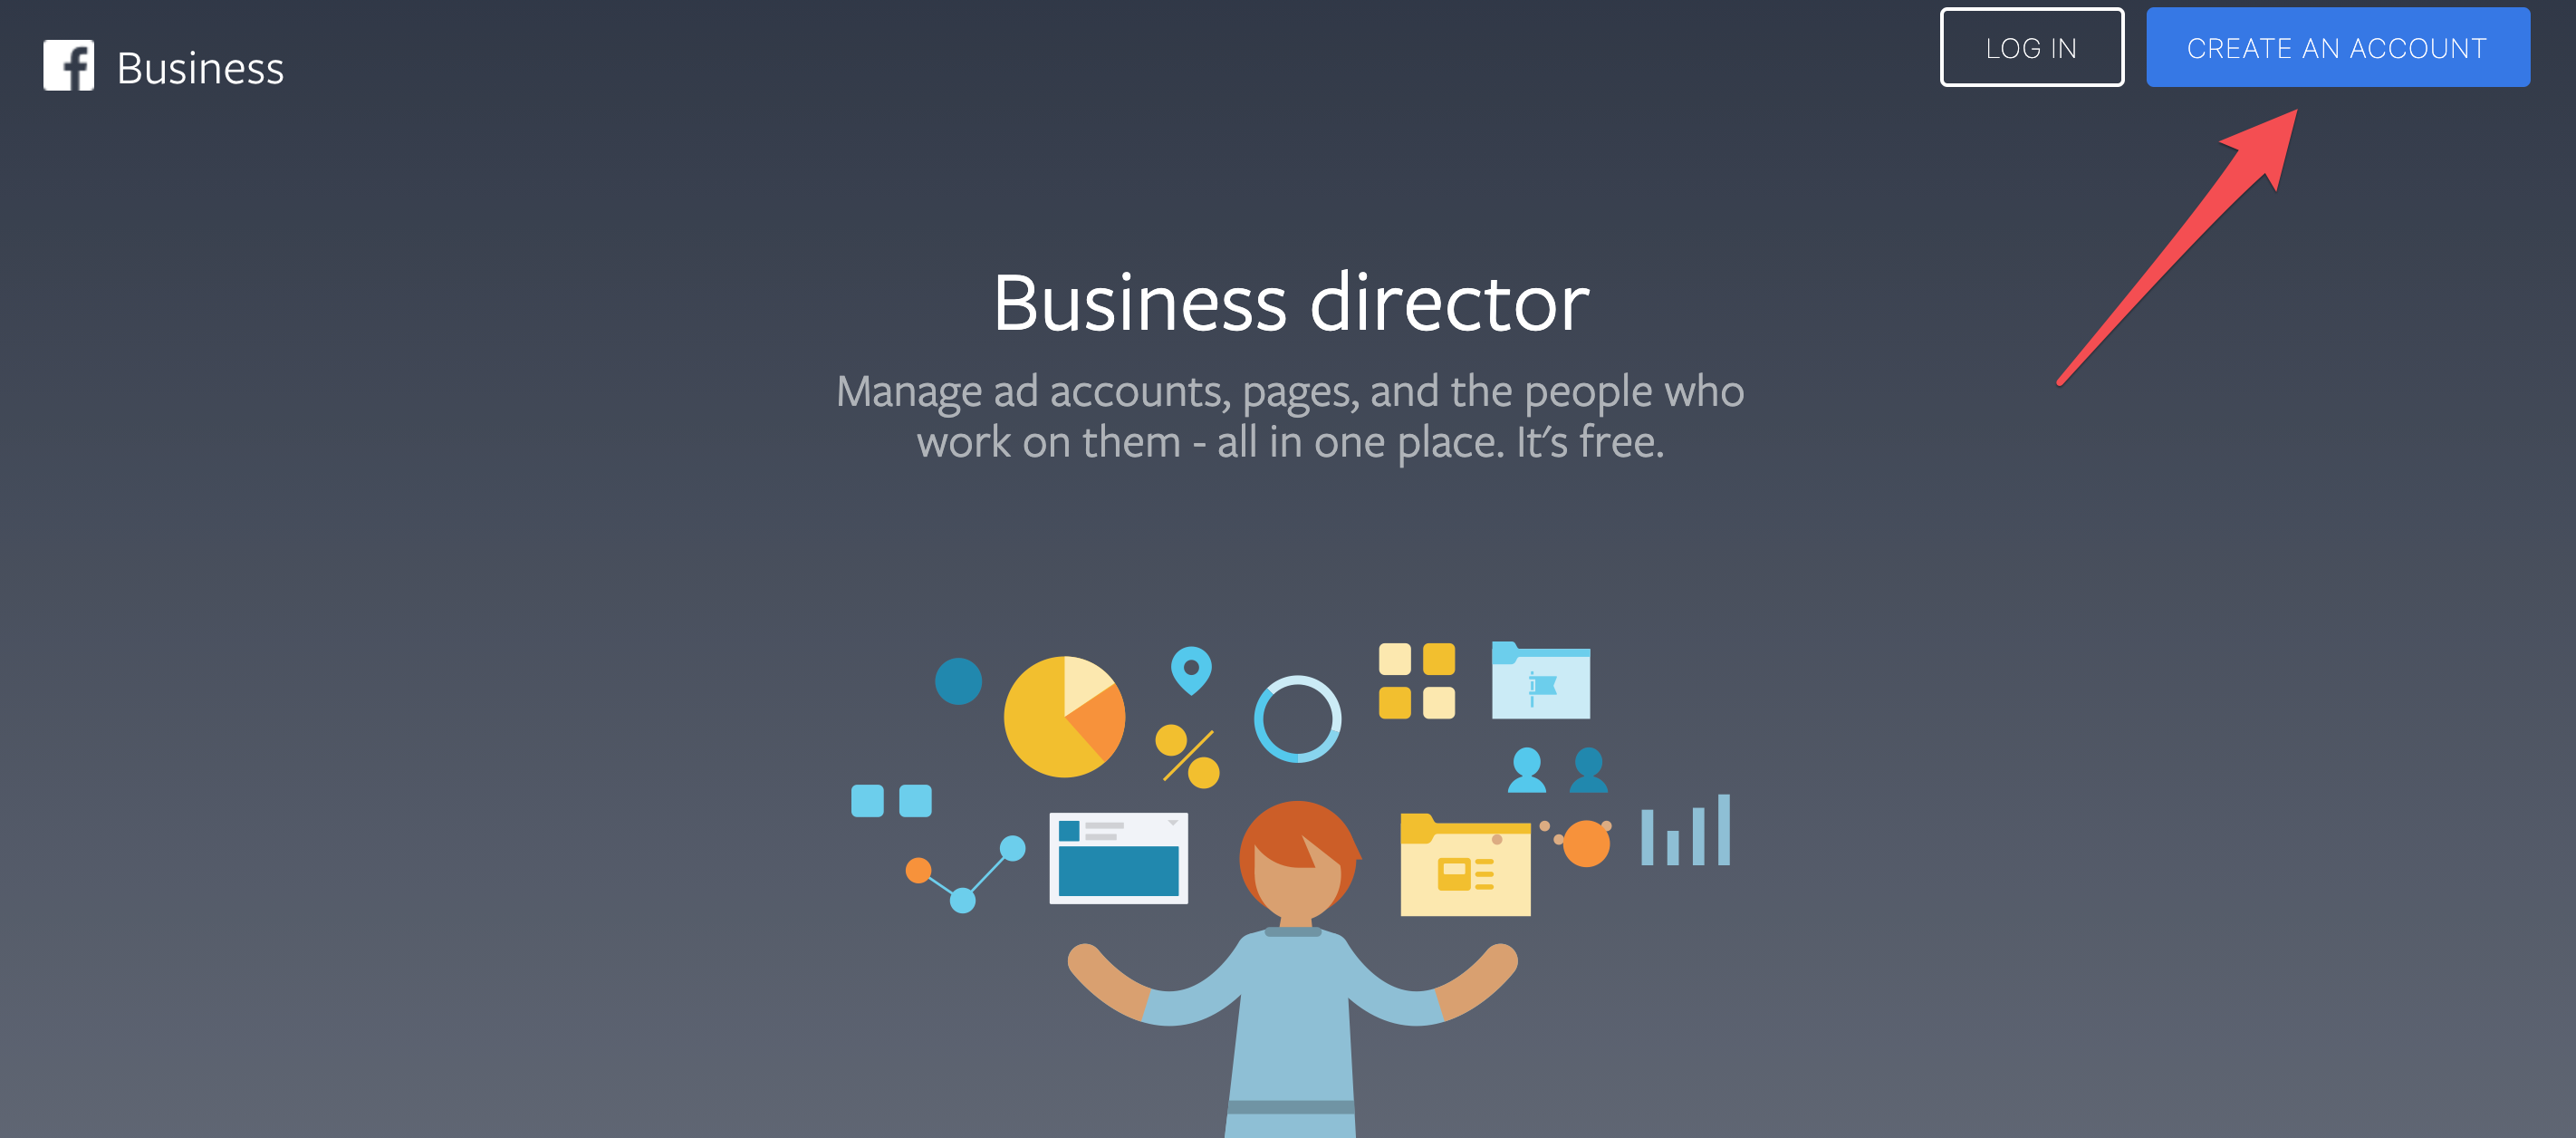
- Go to business.facebook.com.
- Click on the Create an Account button on the top right-hand side of the screen.
- Log in to your personal Facebook account. If you’re already logged in, you can proceed to the next step.
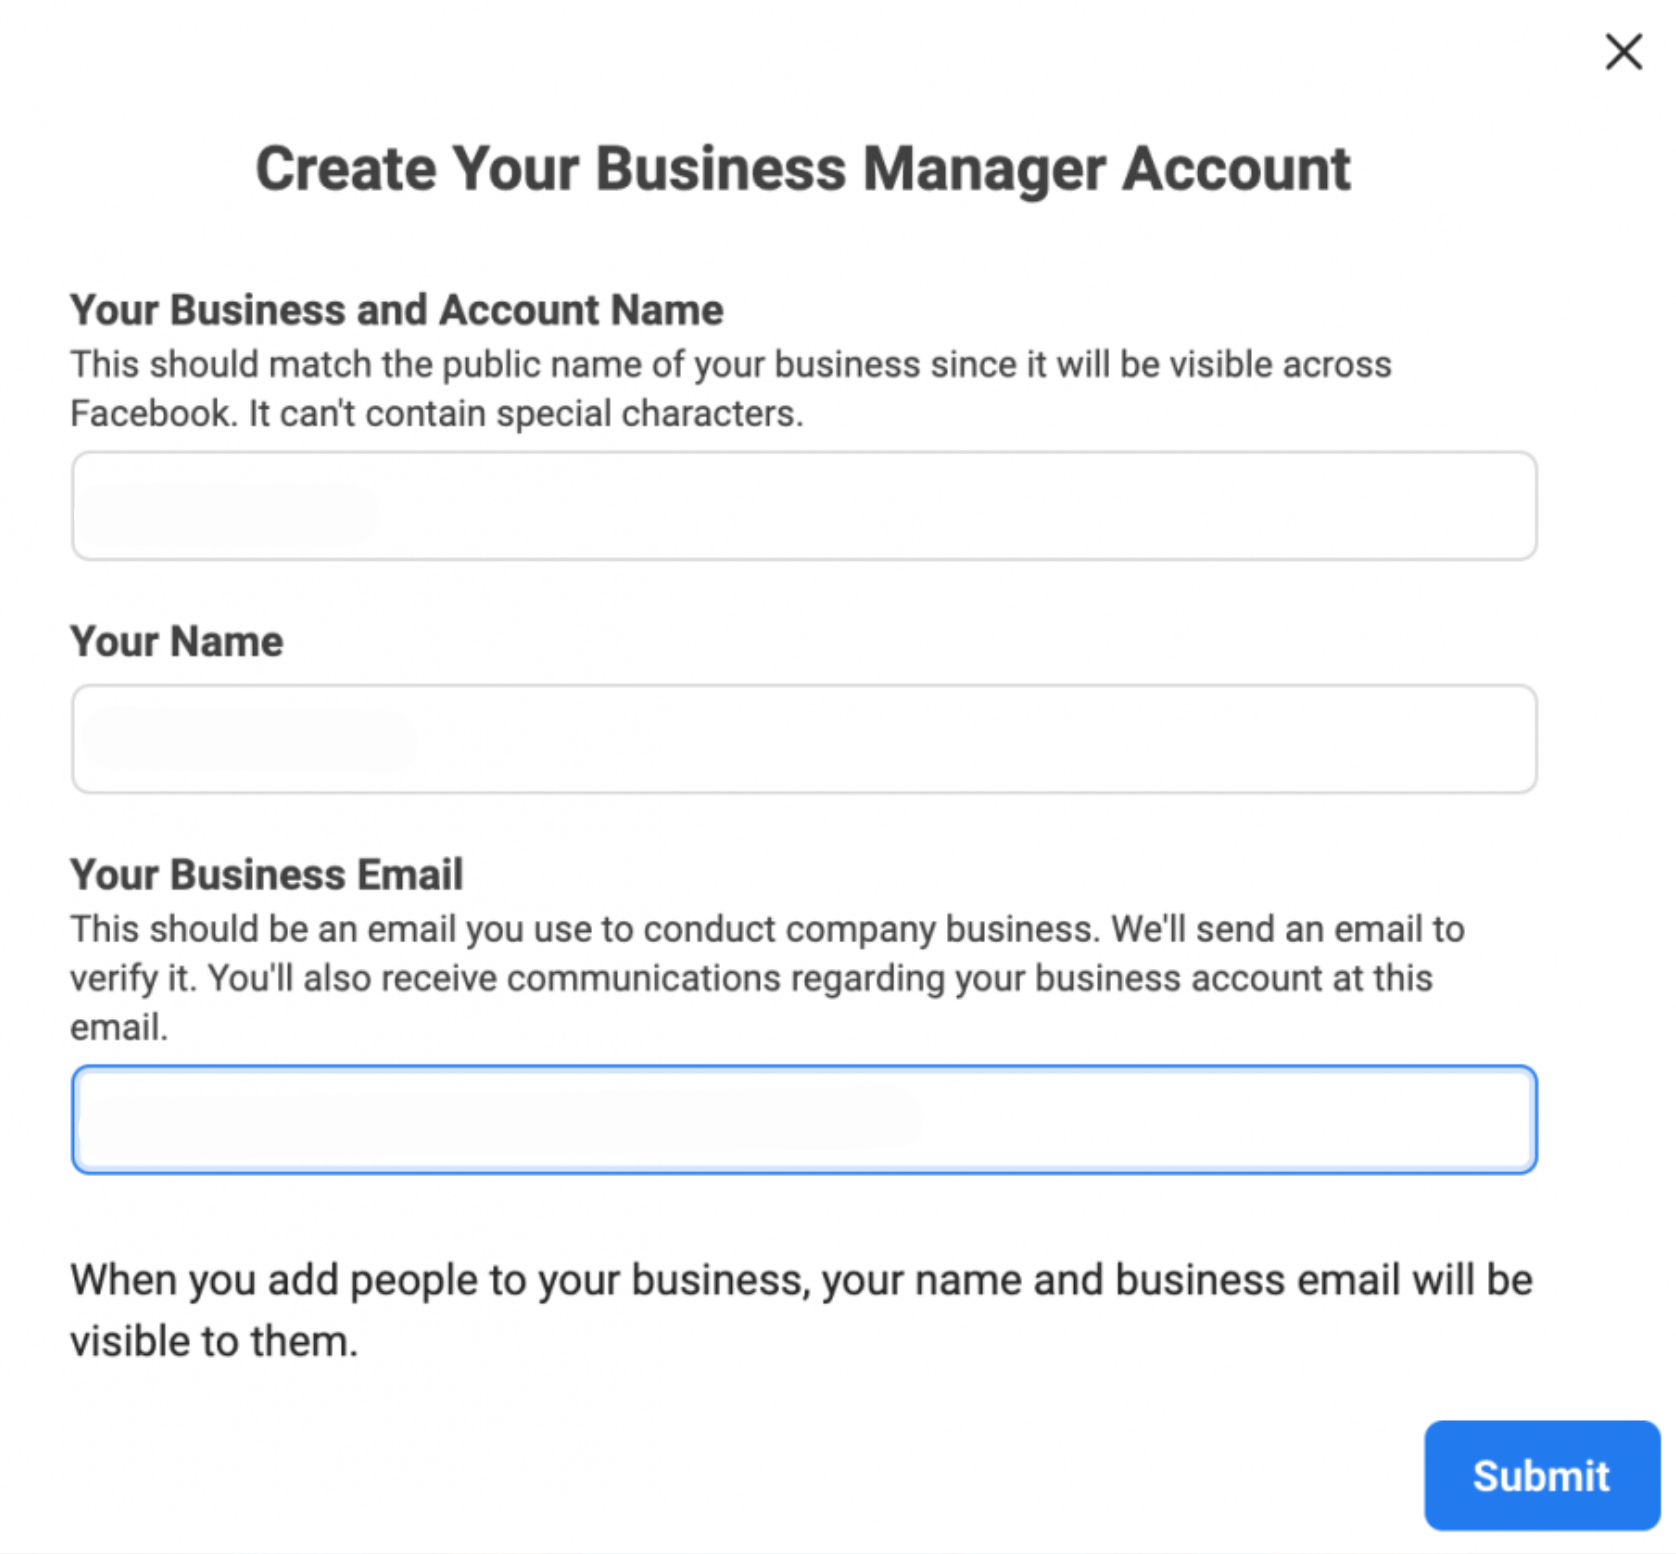
- Enter your business name, your name, and the email address you want to use for your Business Manager account. Click Next.
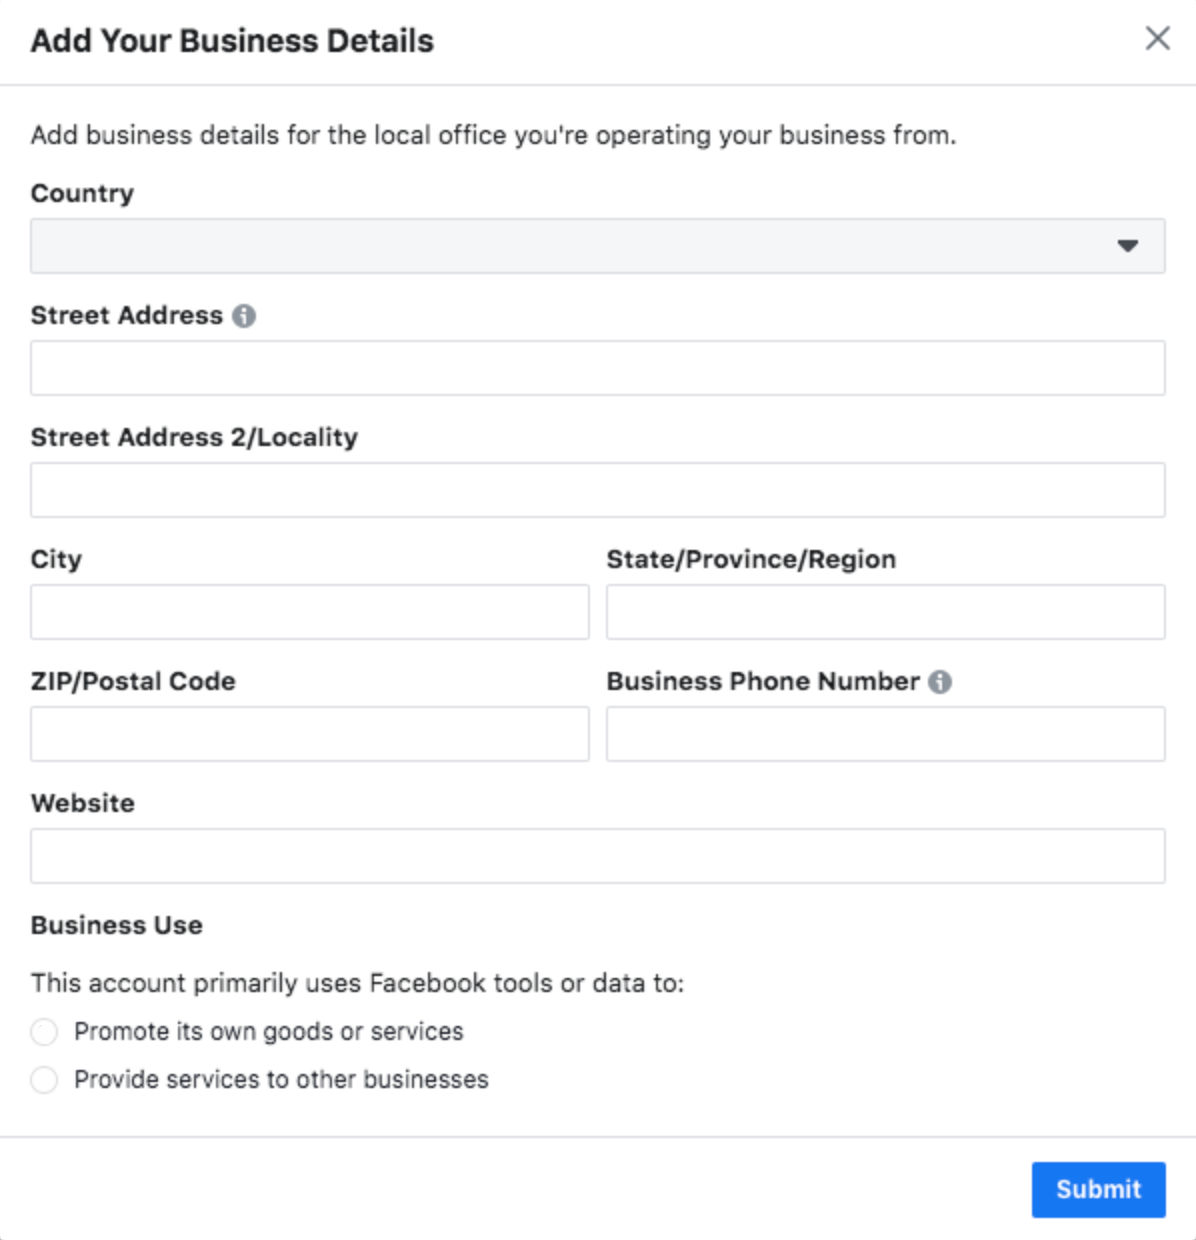
- Fill in additional details, such as your address, phone number, and website. You’ll also have to specify whether you’ll use the account to promote your own business or provide services to other businesses (AKA whether you’re an agency). Click Submit.
- Next, you’ll receive an email asking to confirm your Business Manager account. Go to your inbox and look for an with the subject line “Confirm your business email.“ Open the email, and click Confirm Now.
Your business now has an up and running Facebook Business Manager account to its name.
Step 2: Link your Facebook business pages to your Business Manager account
You can take three different approaches here. You can:
- Add an existing Facebook business page
- Create a new Facebook business page
- Requesting access to your client’s page
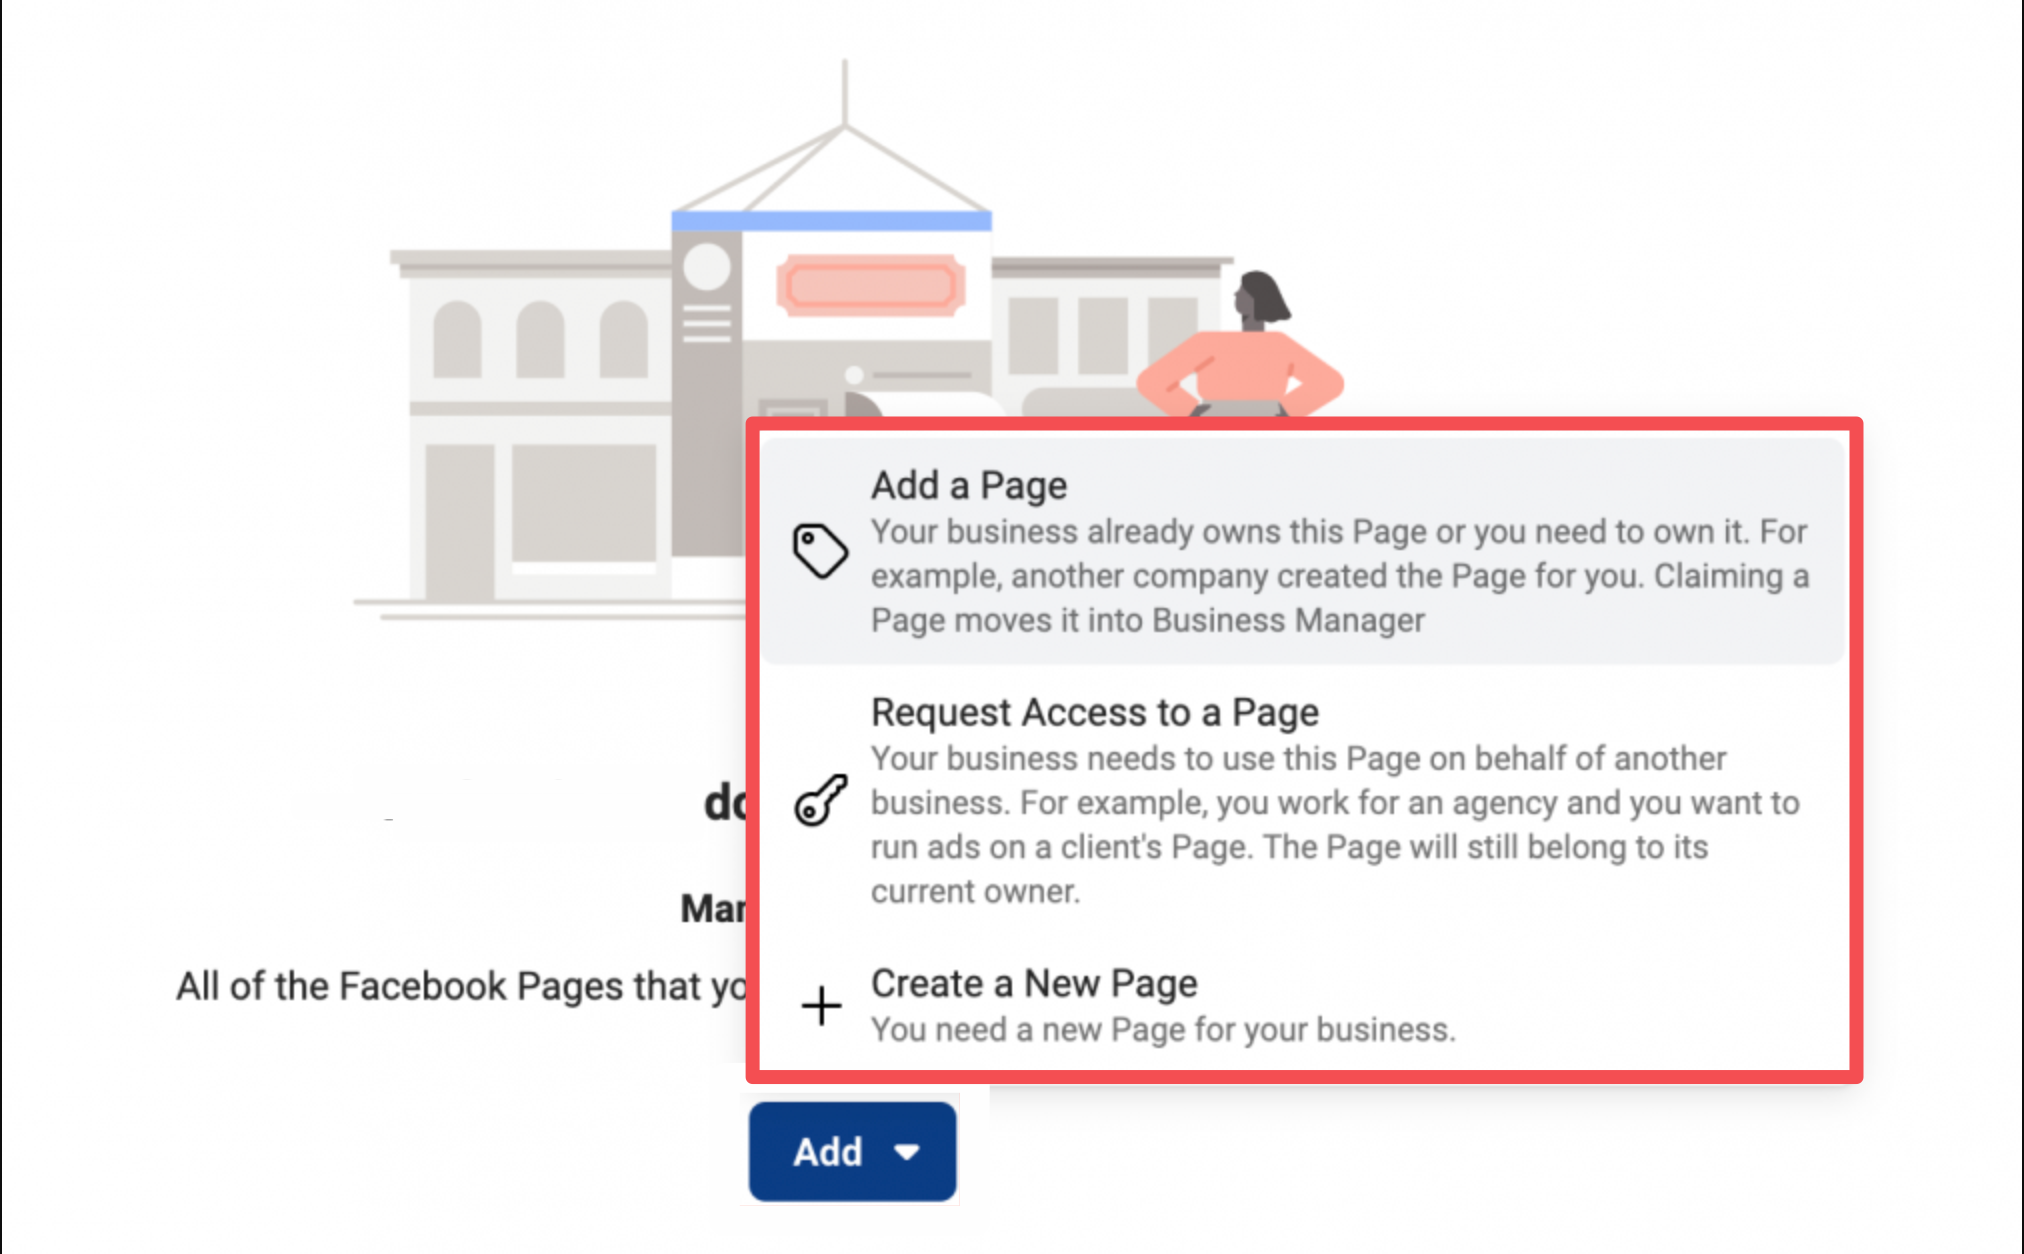
If you’re managing Facebook pages for clients or other businesses, you have to click on the Request Access option rather than Add Page. Otherwise, you’ll have an angry client calling you to ask why they have limited access to their own business assets.
Precisely why you don’t want to add your client’s pages and ad accounts to your Business Manager.
For this article, we’re going to assume you’re not an agency and will be managing your own assets—and that you already have a business page. If you haven’t created a business page yet, click here to know how and come back when you’ve made one.
Here’s how to add your Facebook page to Facebook Business Manager:
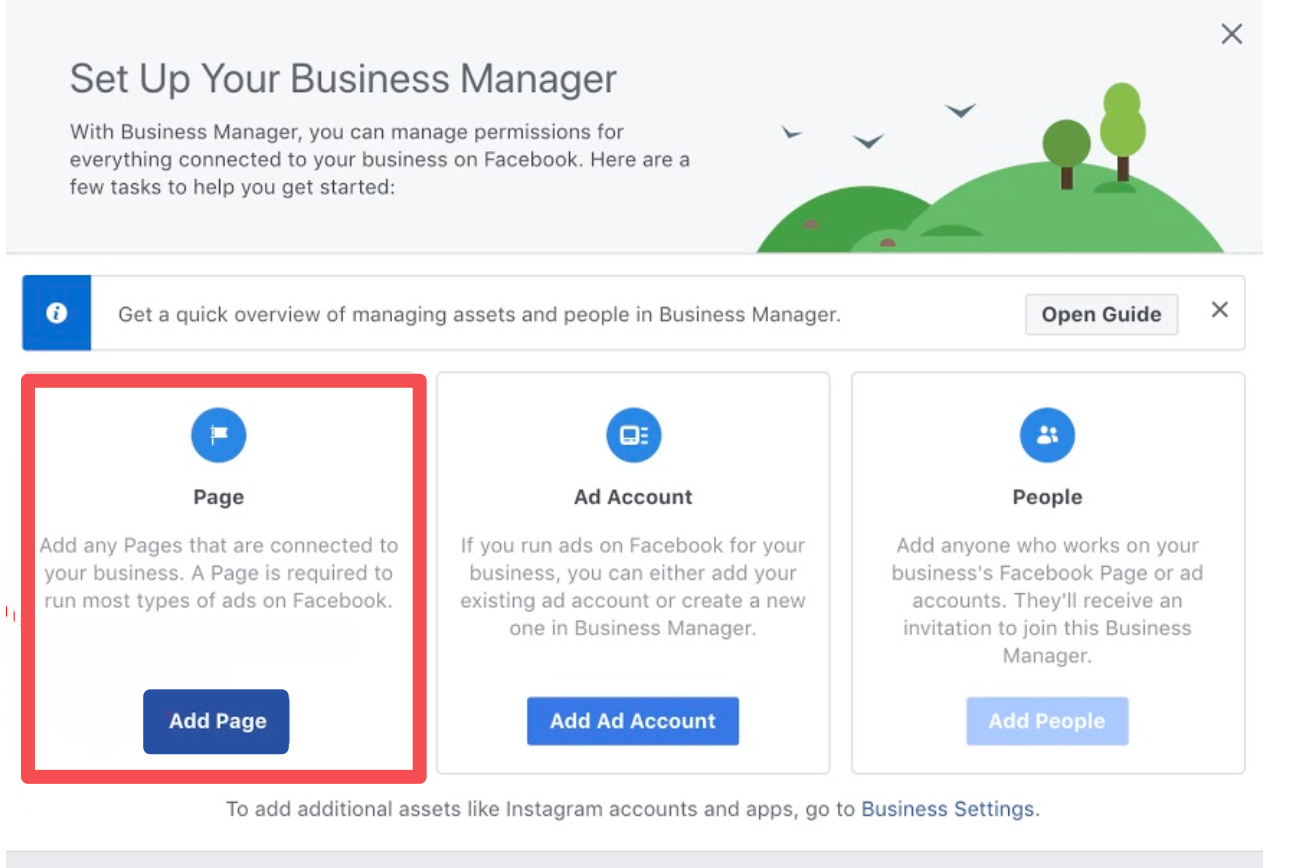
- Open your Business Manager dashboard. Click on Add Page, followed by Add Page again in the Add Pages to Business Manager pop-up box.
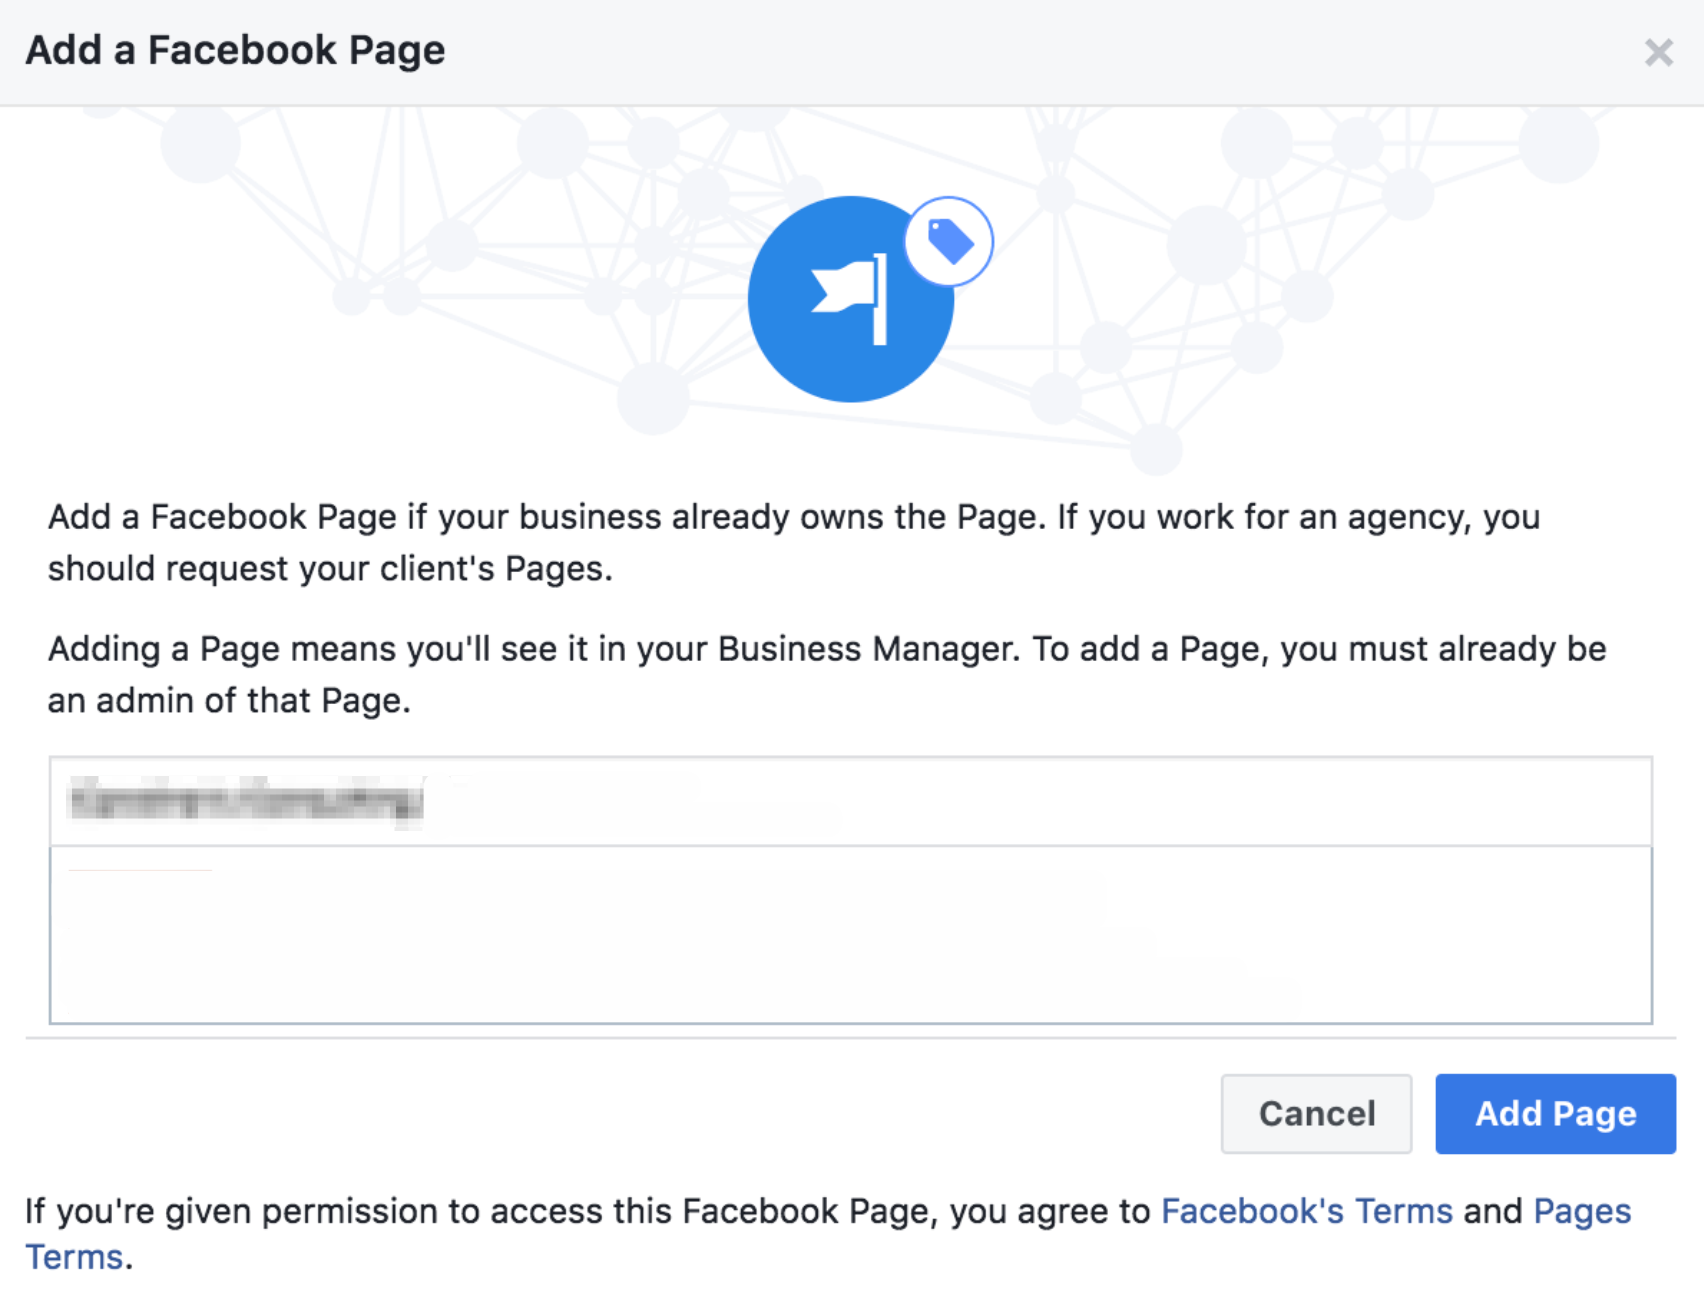
- Enter your Facebook business page name in the text box. Then click Add Page. Your request will be approved automatically since you have administrator access to the page.
- Repeat the steps if you have more than one Facebook page associated with your business.
Once you’ve linked all your Facebook business pages to your Business Manager account, you can proceed to Step 3.
Step 3: Add your Facebook ad accounts to your Business Manager account
Disclaimer: There’s no going back after adding your ad account to Facebook Business Manager. You can’t remove it, so make sure you only add accounts you own. For client accounts, always select Request Access.
If you already have a Facebook Ads Account, simply link your existing ad accounts by following the steps below:
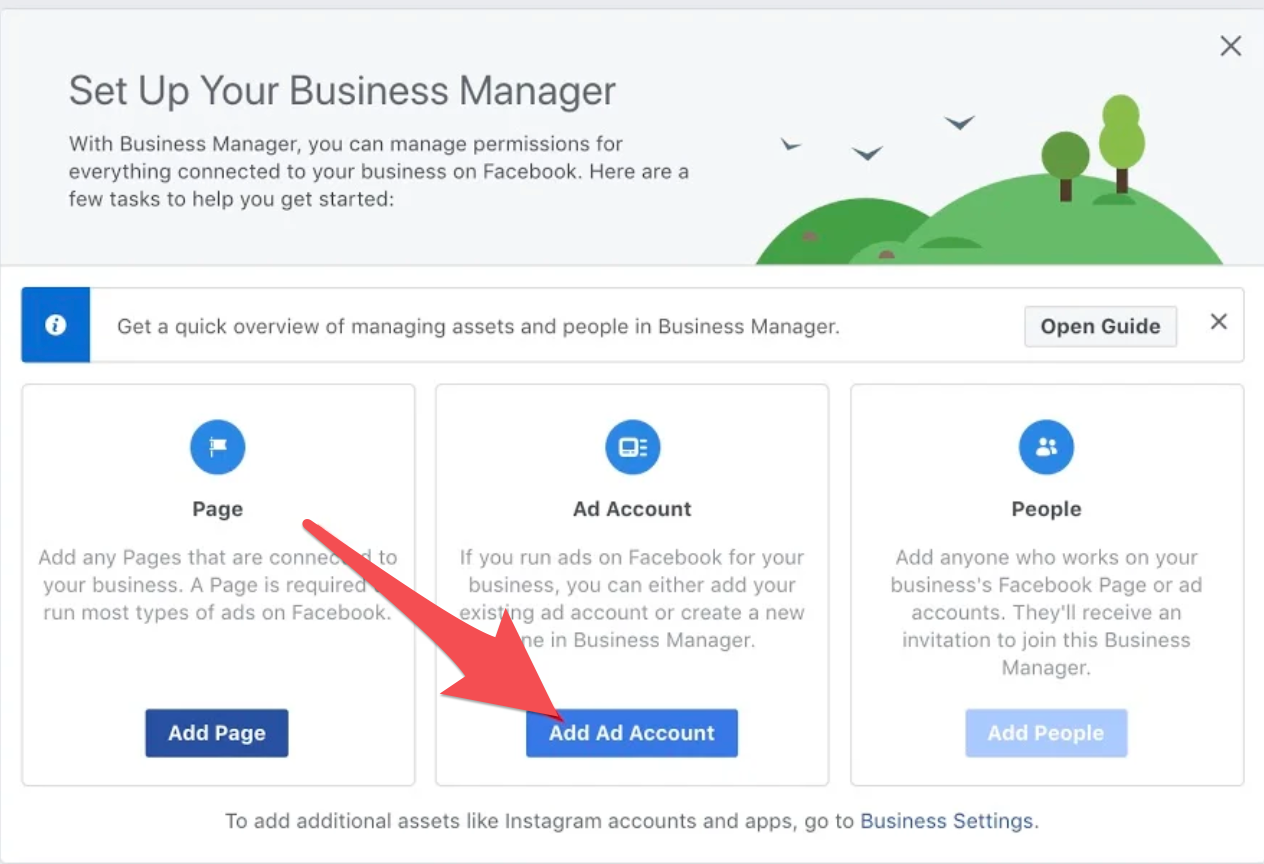
- From the Business Manager dashboard, select Add Ad Account.
- Click on Add Ad Account again, and then enter the ad account ID. You can find your account ID in Facebook Ads Manager.
If you don’t have a Facebook Ads Account, you’ll have to set one up. Here's how:
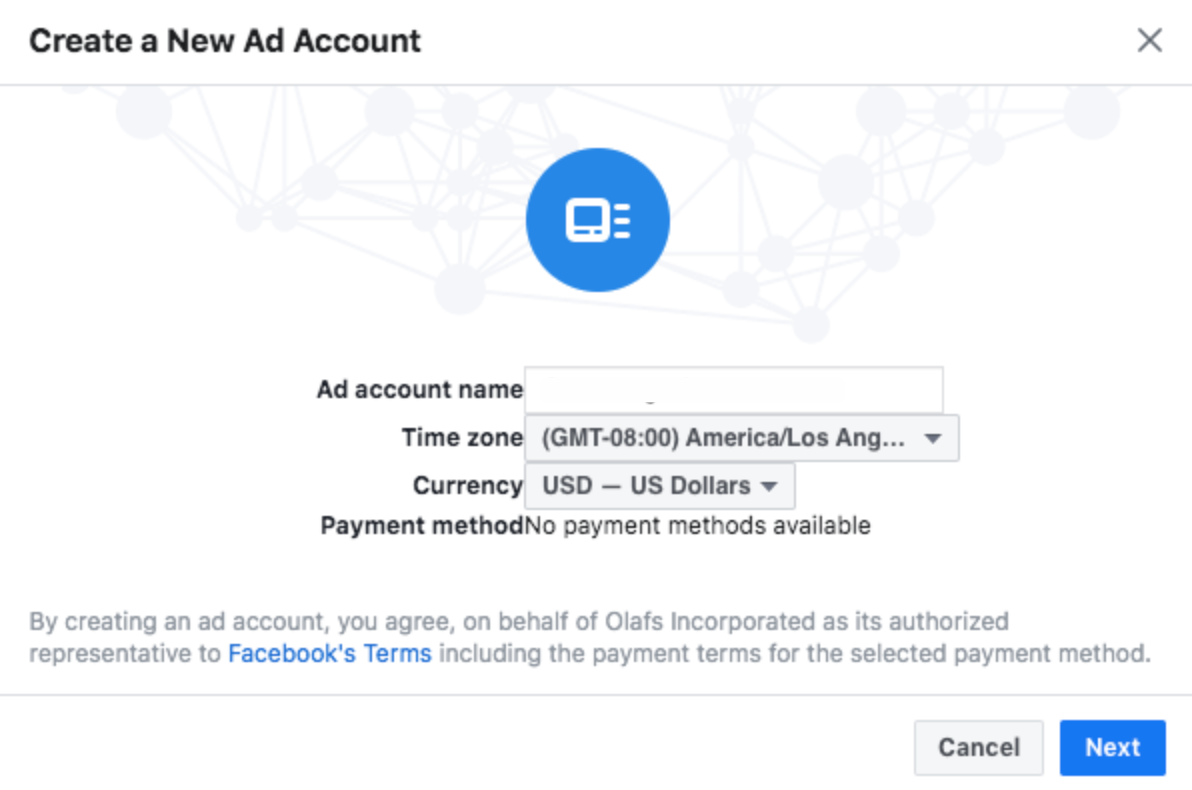
- From the Business Manager dashboard, select Add Ad Account followed by Create Account.
- Enter your account details. Click Next.
- Check the My business option to indicate you’re using the ad account for your own business. When done, select Create.
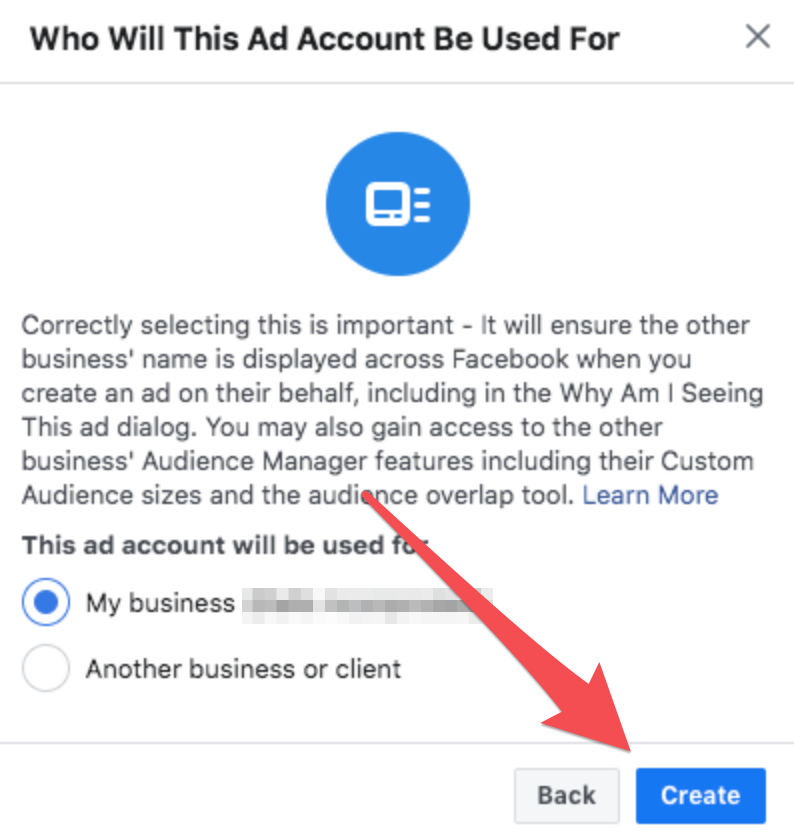
Every business creates one ad account right off the bat. Once you start to spend money actively in your first account, you can add more based on your advertising spend.
Remember, you cannot request more ad accounts.
Step 4: Add people to help you manage your Facebook assets
Facebook advertising is intense. You may not want to do it alone, which is why Facebook Business Manager allows you to add team members.
You can set up a whole group of people to work with you on your page and ad campaigns. Here’s how to go about this:
- Open your Business Manager dashboard, and select Add People.
- In the pop-up box, enter the work email address of the person you want to add. You can only add specific individuals here—not an agency or another business.
- Decide whether you want to give your team members limited access (select Employee access) or full access (choose Admin access). When done, select Next.
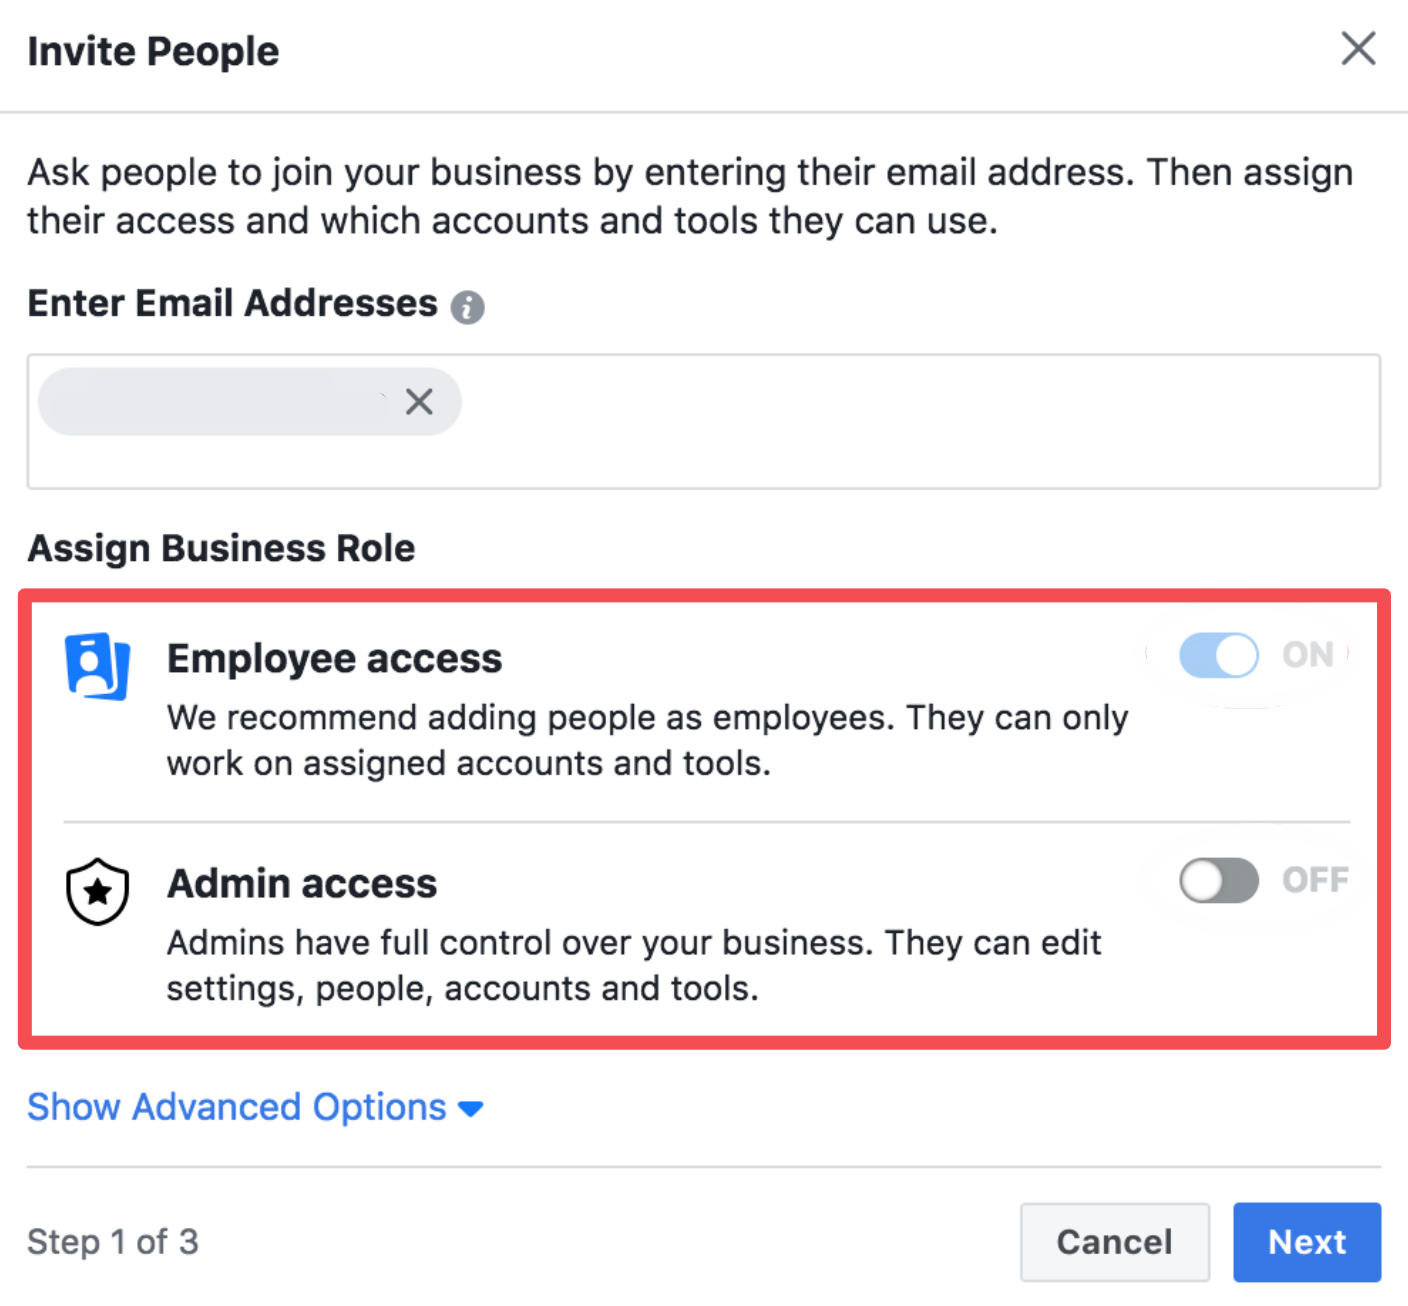
- On the left side, select Pages. Choose the pages you want this team member to work on. Customize the member’s access using the toggle switches.
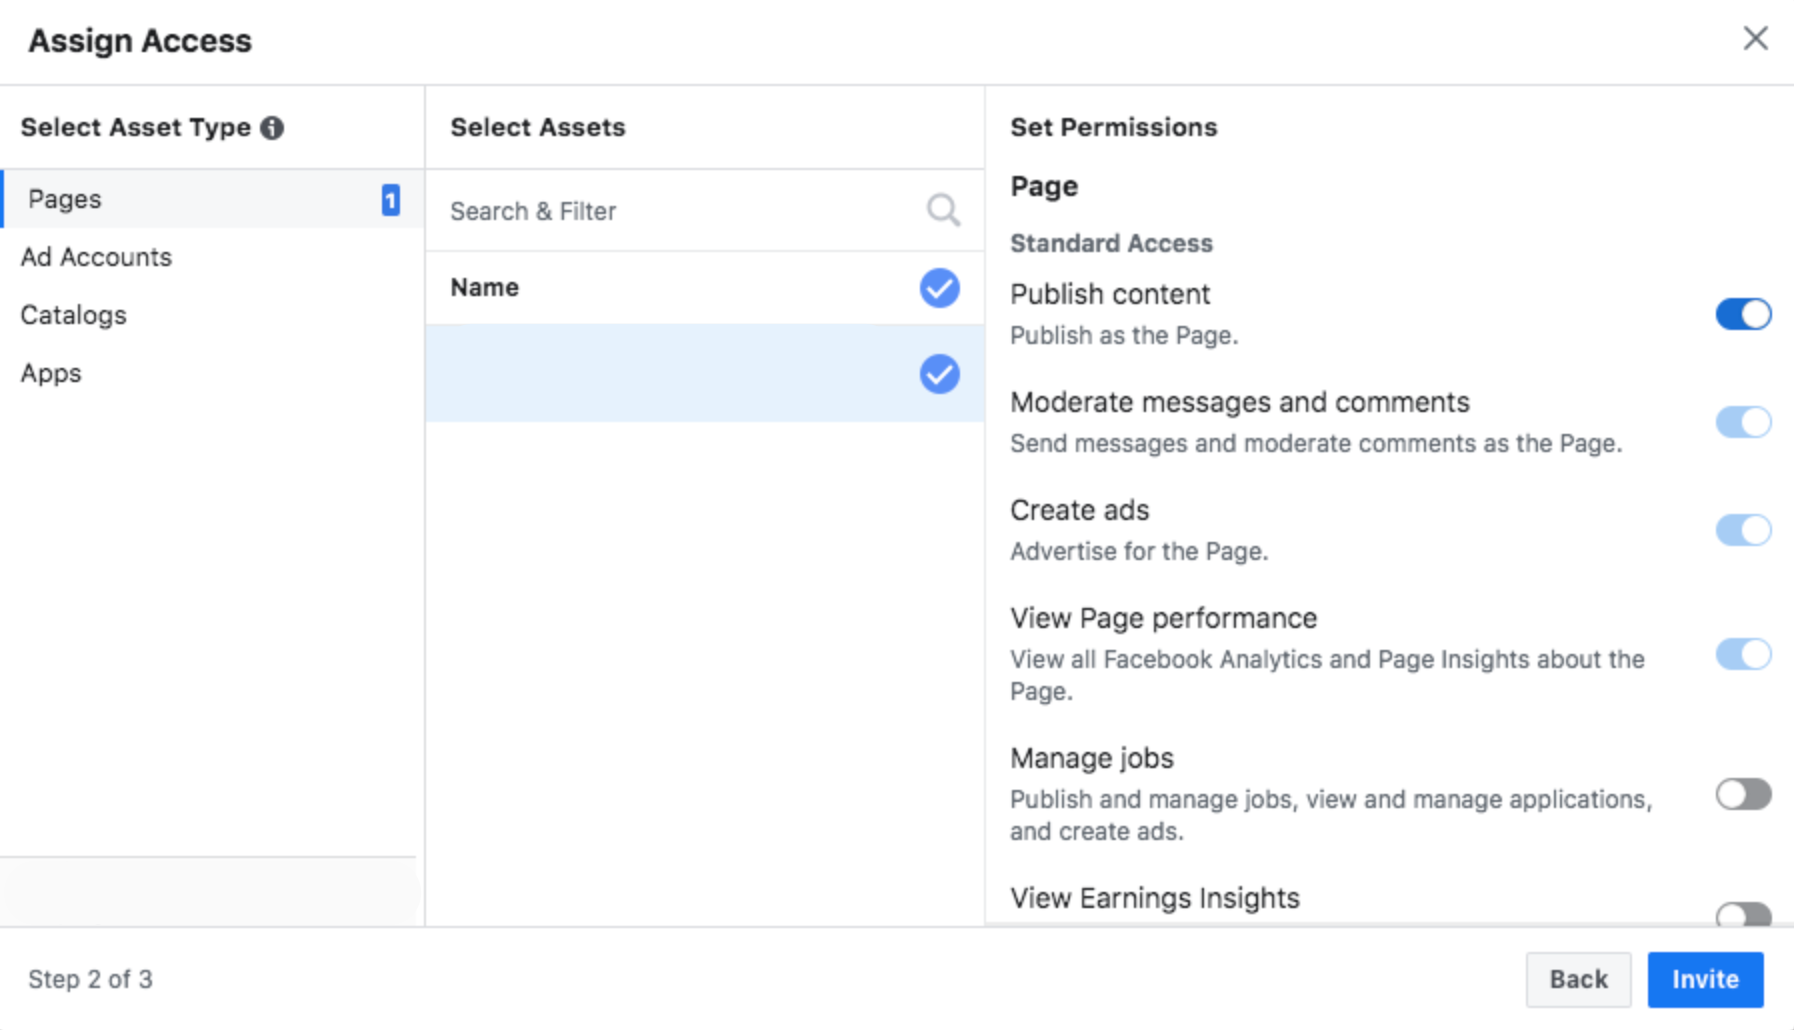
- Return to the left menu, and select Add Accounts. Customize the user’s access using the toggle switches. Once you’re done, select Invite.
- You can also add more team members. To do this, select Add More People, followed by Done.
Now, you wait for your team members to accept their email invites to be a part of your Facebook Business Manager team.
Step 5: Add your Instagram account
After you’ve got your Facebook assets set up, you can connect your Instagram account to Facebook Business Manager as well.
- Go to your Business Manager dashboard, and click Business Settings on the top right-hand side of the screen.
- In the left column, select Instagram Accounts followed by Add.
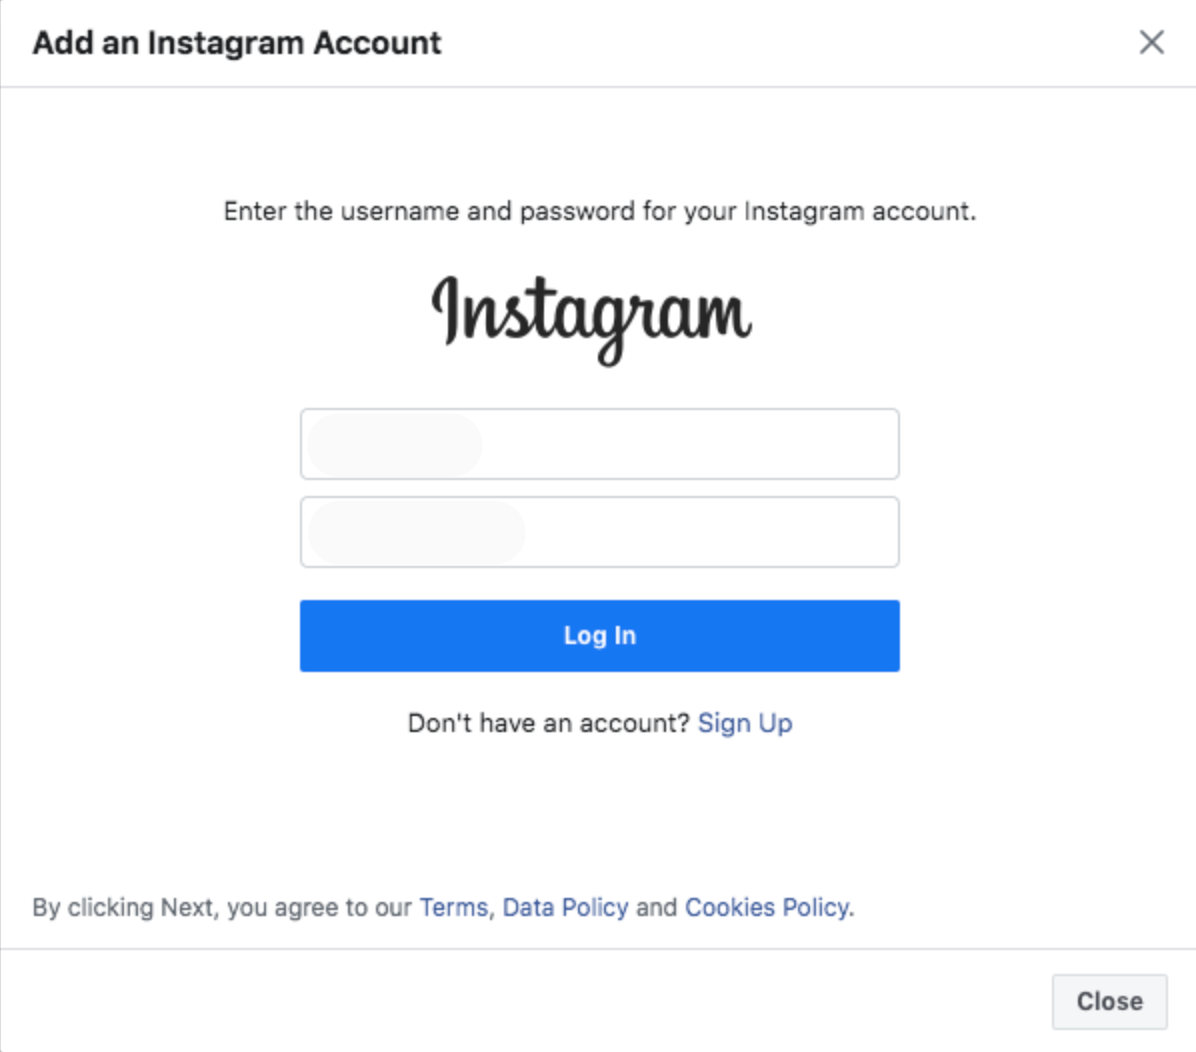
- In the Add an Instagram Account pop-up box, into your Instagram credentials and click Log In.
Step 6: Set up Facebook Pixels
Facebook Pixel is a small bit of code generated by Facebook for you. You can place the code on your website to access critical business information to track conversions, optimize Facebook ads, build targeted audiences for your ads, and re-market to leads.
Setting up your Facebook pixel right away is a recommended practice—even if you aren’t ready to start your first ad campaign yet. Here’s how you can get your pixel set up from within Facebook Business Manager.
- Click on Business Settings from your Business Manager dashboard.
- In the left column, click on Data Sources. A dropdown menu will appear. Select Pixels, followed by Add.
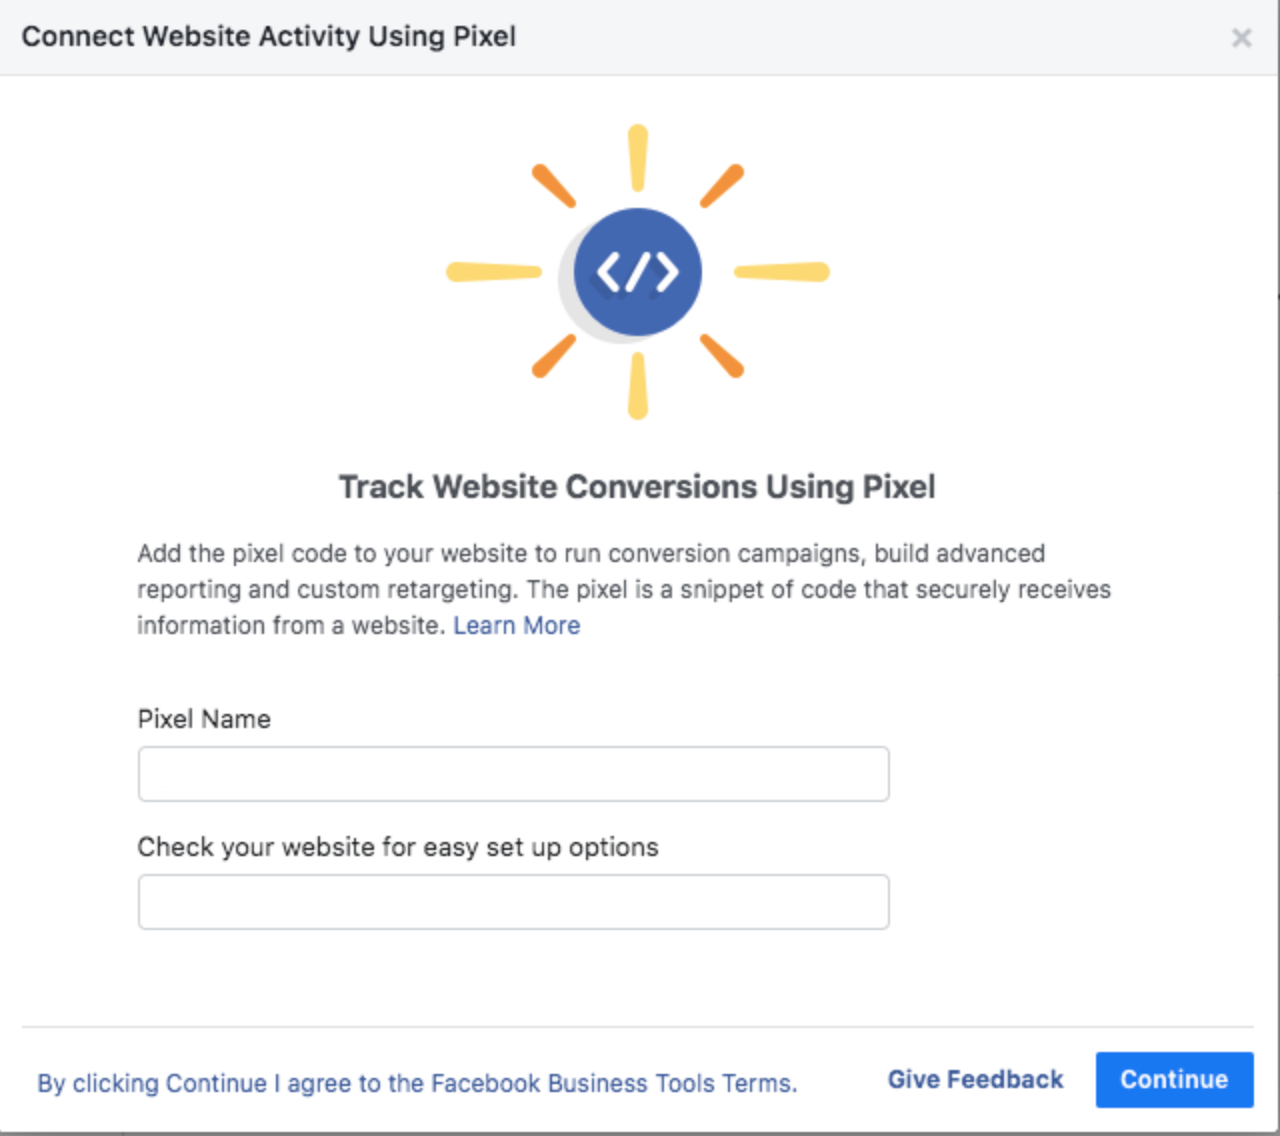
- Enter a name for your pixel. Remember, this must be within 50 characters. Facebook will then ask you to enter your website to provide recommendations on how to set up your pixel. Click Continue.
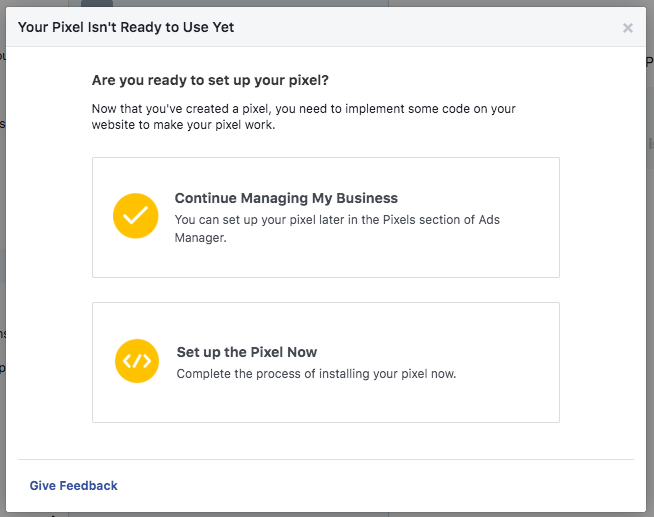
- Choose Set up the Pixel now.
You can then proceed as you normally would when setting up Facebook pixel. Check out KlientBoost's detailed guide on Facebook pixel to help you set up your website and start collecting data.
Who should create a Facebook Business Manager account?
Honestly, not everyone needs a Facebook Business Manager account. For instance, if you’re running a small home business and managing your own social accounts, you don’t. But it’s a must if:
- You have a team of people managing your social media and marketing presence
- You’re an agency managing multiple Facebook or Instagram pages, or/and their ad campaigns
- You have vendors helping you run or manage your ads and/or Facebook pages, but don’t want to hand over your assets to them
- You want control over who has access and permission to your Facebook page and don’t want to hand over ownership to employees or agencies managing your business assets
Facebook Business Manager best practices to set yourself up for success
Below, we’ve compiled a list of tips to ensure you make the most of Facebook Business Manager. Let’s take a look.
Take advantage of the Locations feature
If your business—or a business you’re collaborating with—has multiple locations, you should definitely use Business Manager’s Location feature. This will enable your customers to find the most relevant store pages through search engines.
Click on the Business Manager button located at the top of your page. Then under Assets, select Shop Locations.
Next, under Manage Business, click on All Tools followed by Shop Locations and Stores. You‘ll have to add all your stores manually, but you can use a spreadsheet if you have more than ten shops.
Don’t forget your business manager account security
Facebook Business Manager offers extra security for your business assets. To increase security on your account, follow the steps below:
- Go to your Business Manager dashboard.
- Click Business Settings.
- Select Security Center in the left menu.
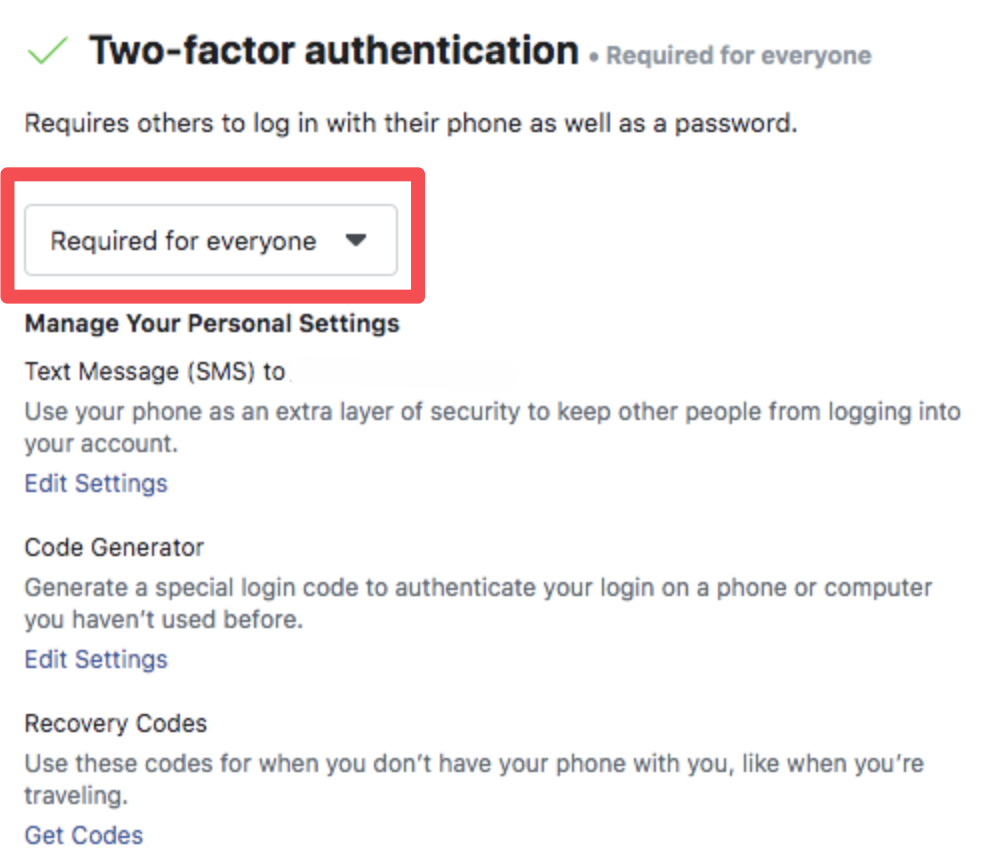
- Next, set up two-factor authentication for your account. In the dropdown, choose the Required for everyone option to ensure the highest level of security.
Use the Projects feature
The Projects feature lets you group different pages, ad accounts, and apps into a single entity. This will give you logical access to specific assets that go together, which considerably simplifies managing business assets.
You can even add your Instagram accounts to these projects.
What’s more, you can group ages and ad managers by location, region, and business unit—or whatever makes the most sense based on your structure. Use the structure to add employees and partners to the relevant projects without having to add them where they don’t belong.
Facebook Business Manager recap
In this guide, we’ve covered everything to help you get started and make the most of your digital marketing and advertising efforts. But if you’re thinking of running Facebook ads, be sure you check out our Facebook Ads guide to understand how to maximize results from your ad campaigns.
Considering the scale of Facebook‘s digital footprint, it makes sense to create and maintain a business presence on the platform. So don't wait, jump on the Facebook advertising bandwagon now.
You’re absolutely ready to go!