


We know Facebook is smart, but we don’t know much about the tool that makes it so smart: the Facebook pixel.
Installing pixels should be the first item on your to-do list before launching a Facebook ad campaign. Otherwise, you’ll only get half the power and reach of Facebook marketing.
Why? With the Facebook pixel, you can:
- Measure the effectiveness of your ad campaigns
- Keep track of user behavior across your website
- Build highly targeted audiences to feed your remarketing campaigns
Let's put it this way: if the algorithm is Facebook’s brain, the pixel is its omniscient eyes.
At KlientBoost, we want to help you improve your ROI and bridge the gap between your Facebook ad account and your website. Read on as we show you how you can use Facebook pixel to achieve all three goals and more.
Get brand new Facebook ad strategies straight to your inbox every week. 23,739 people already are!
What is the Facebook pixel?
The Facebook pixel is a small piece of code you place on your website to monitor customer behavior and collect data. In the words of Facebook, it’s “an analytics tool that allows you to measure the effectiveness of your advertising by understanding the actions people take on your website.“
You can use it to track events such as:
- Pageviews
- Purchase
- Time on page
- Scroll depth
- Add to cart
Additionally, you can use the pixel to create retargeting campaigns and remarket to people who have visited a specific web page without taking the desired action.
To reiterate, the Facebook pixel is a small JavaScript code that:
- Lives on the backend of your website
- Tracks visitors as they interact with your web pages
- Allows you to build custom audiences for the targeting
- Lets you track the ROI of your Facebook and Instagram campaigns
How does the Facebook pixel work?
The Facebook pixel collects data and provides valuable insights that you can use to optimize your ads and make more data-driven, informed decisions. You can also ensure the ads are shown to the right people—people who are more likely to take meaningful action, such as buying your product or signing up for a demo.
But the question is how the pixel does its magic?
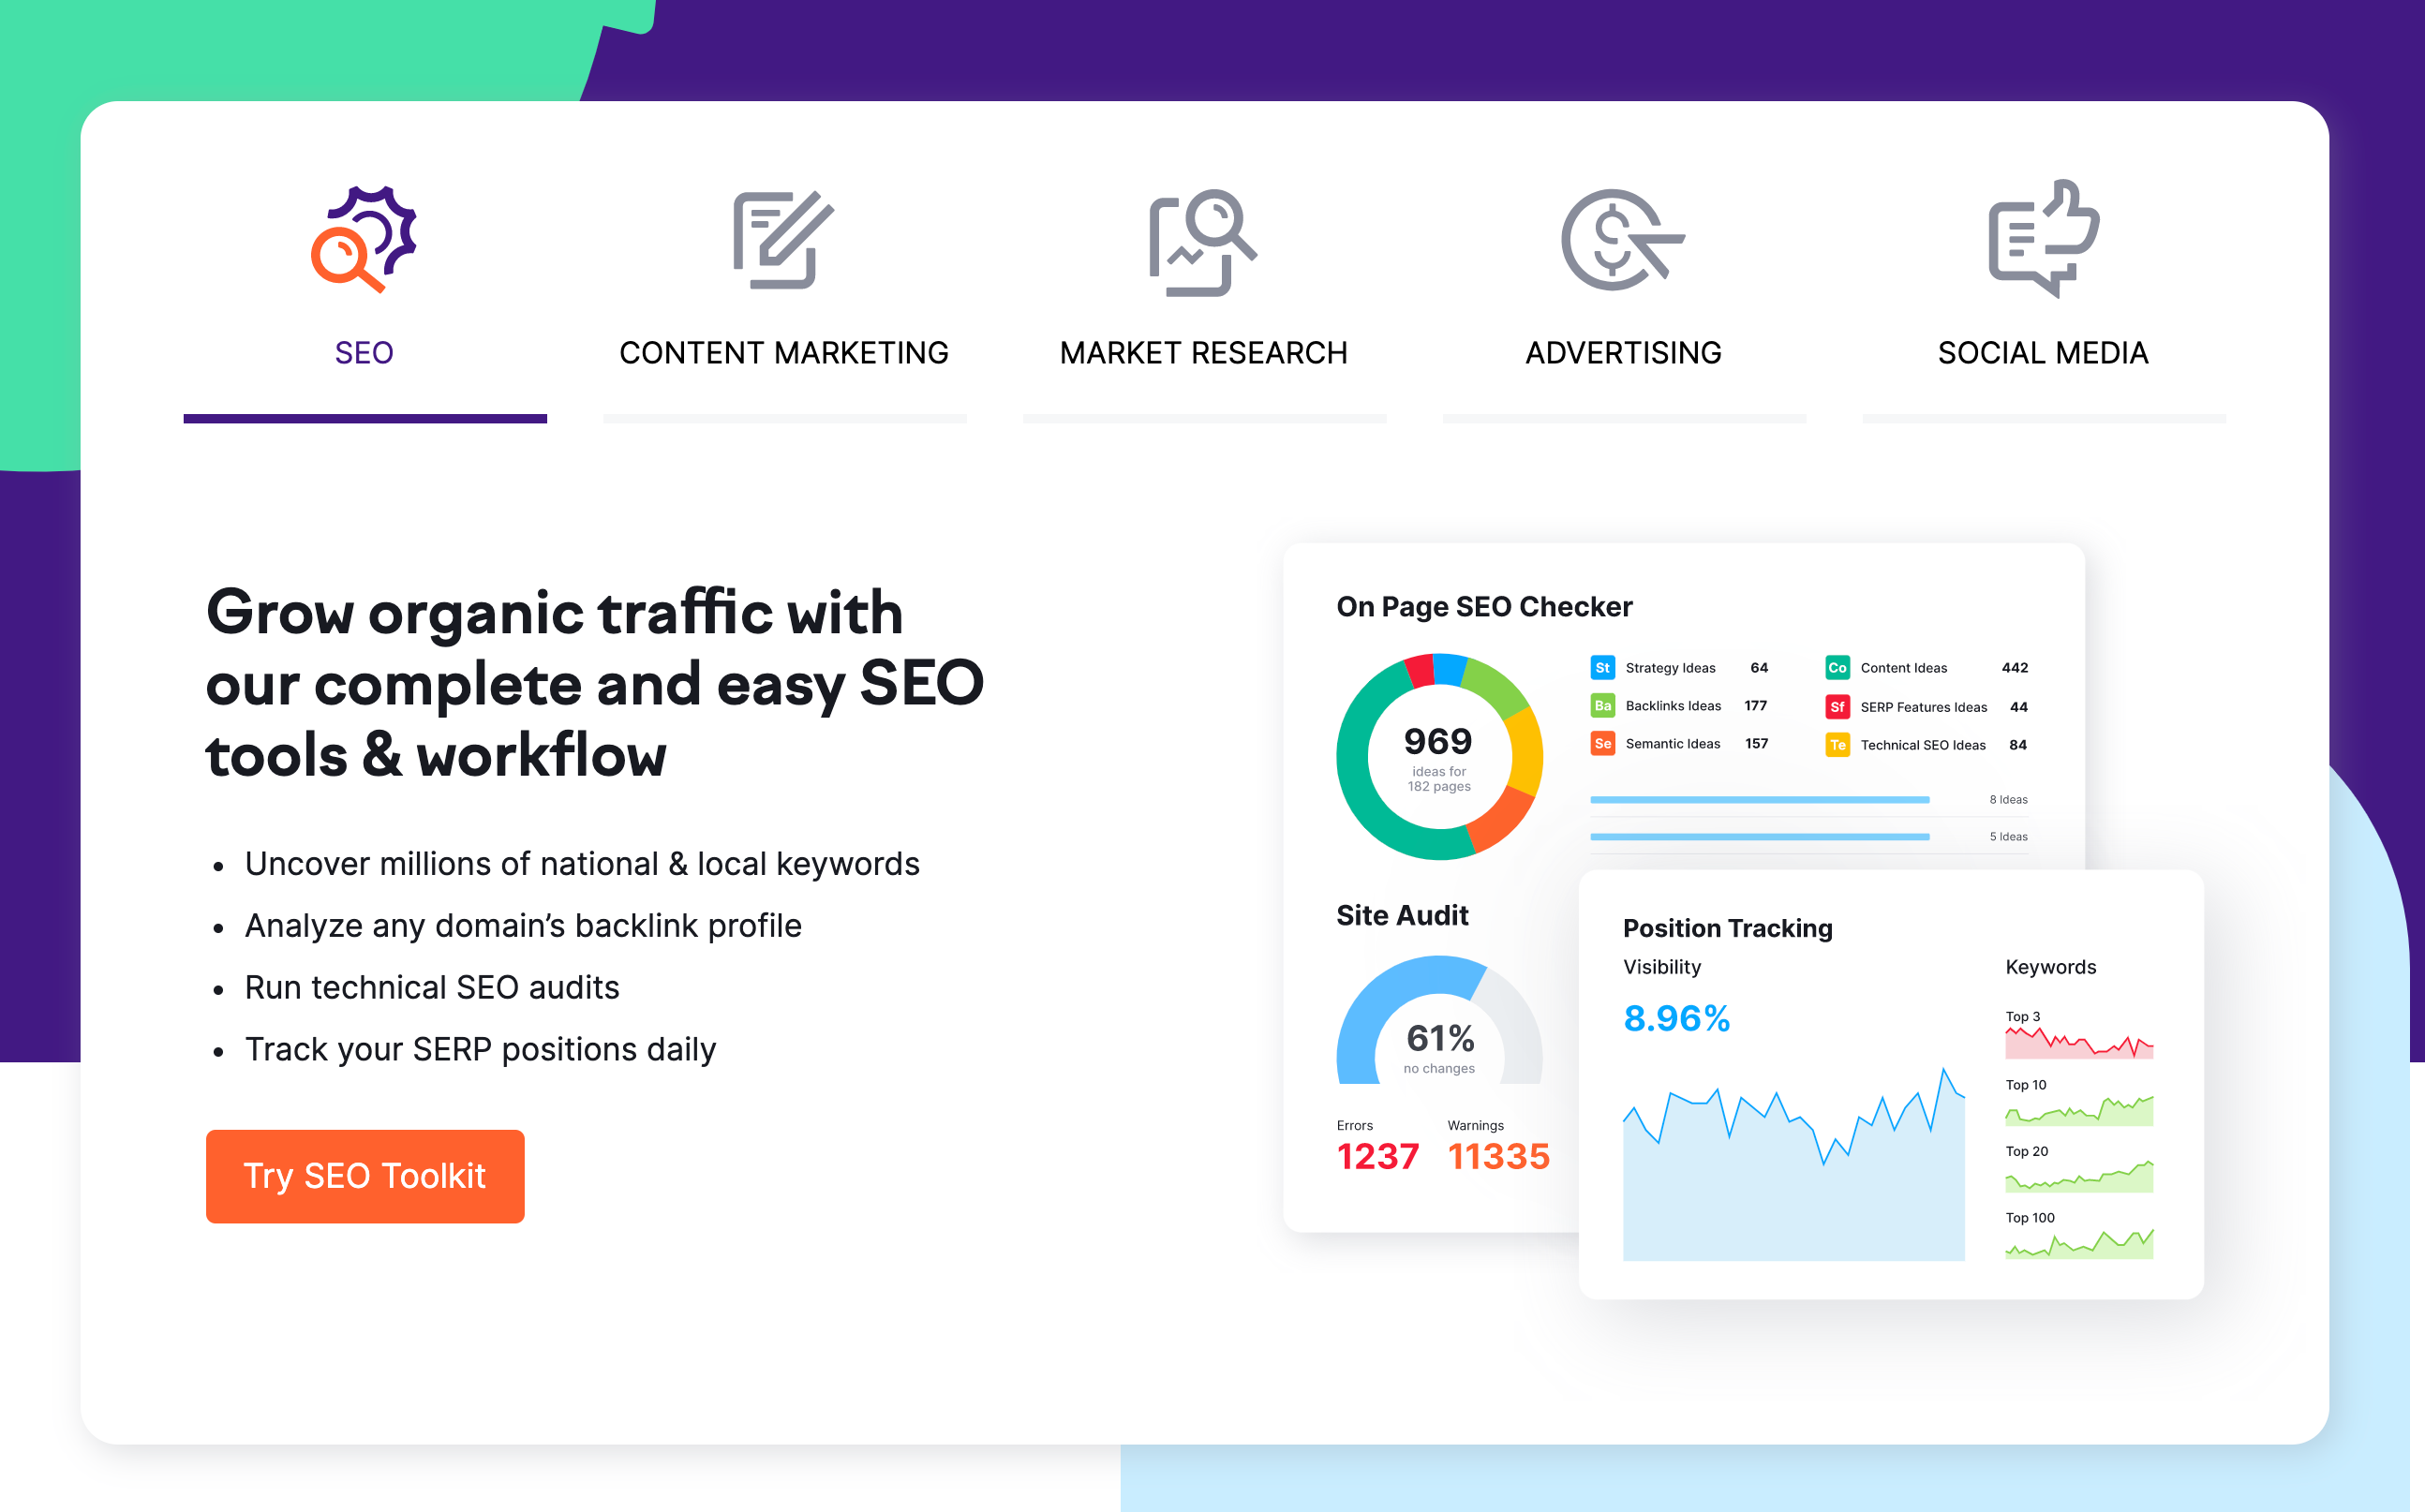
Suppose you’re a marketer wanting to increase your blog’s organic traffic. You hear Semrush is an excellent tool for identifying relevant keywords and doing SEO. You visit its website to check out its features.
Now, let's assume you exit the website before signing up for an account. Here’s what you’ll see the next time you log into Facebook.
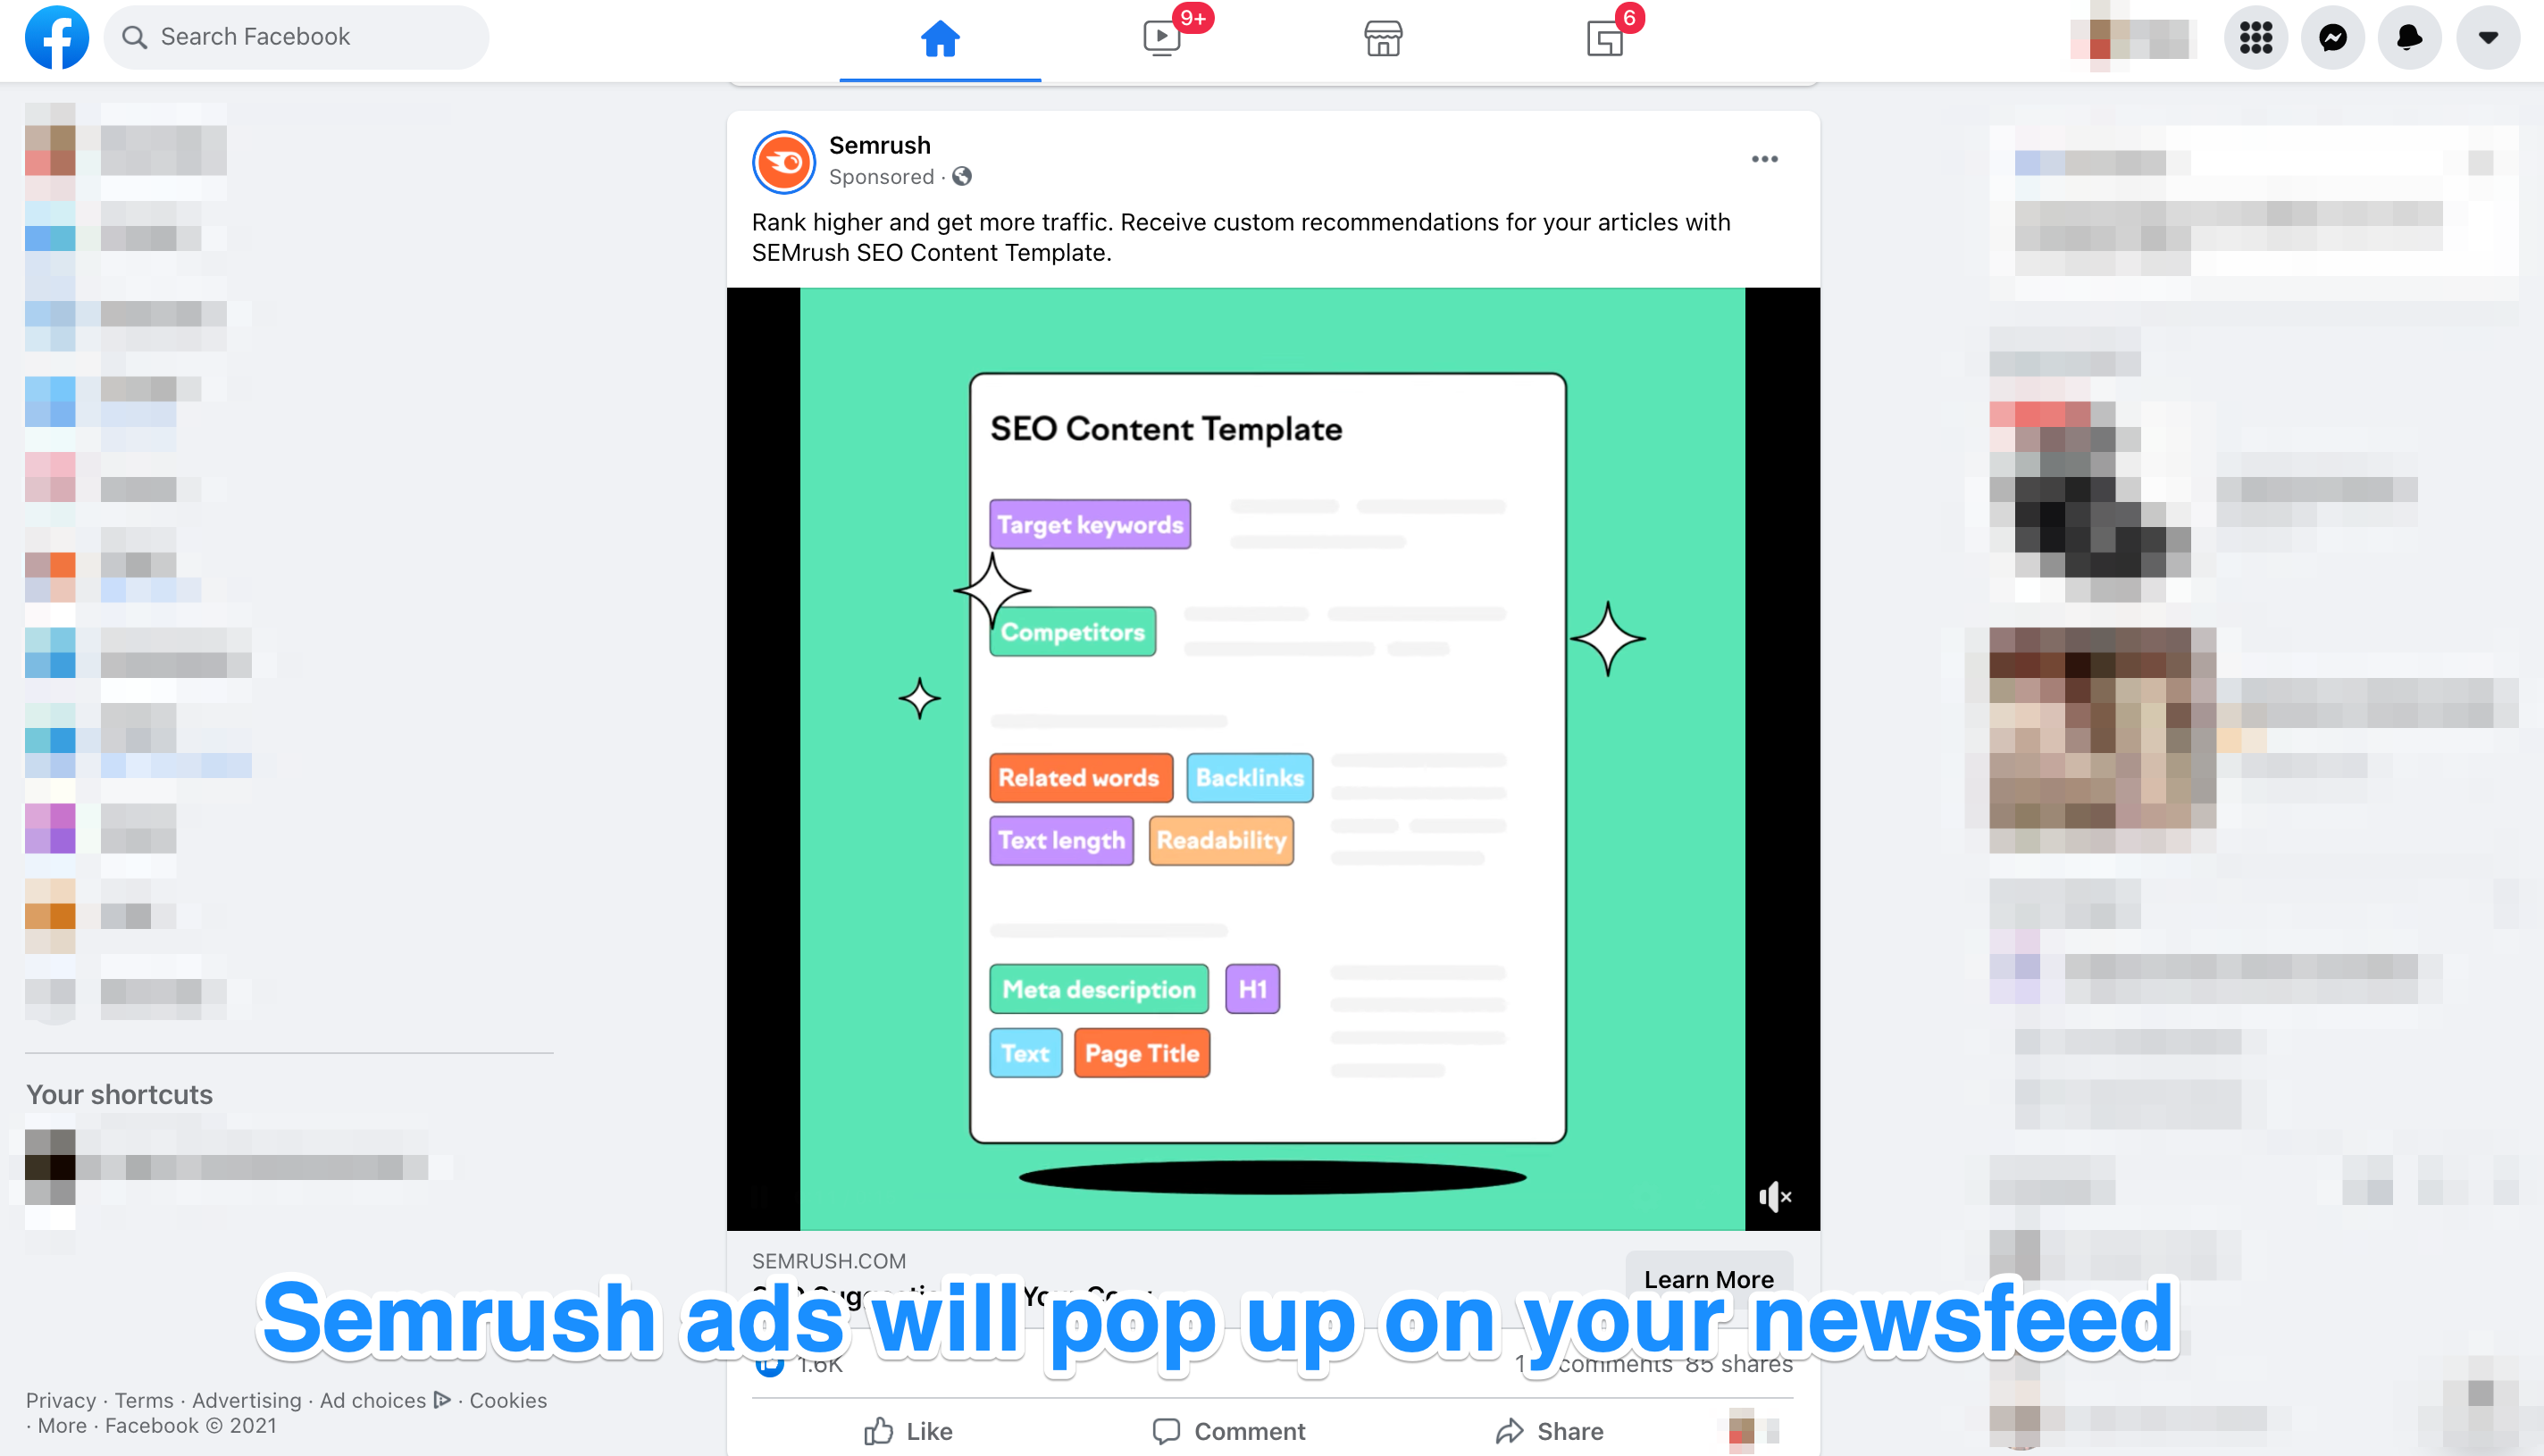
Pretty awesome, right?
This is called retargeting, which is a trusted Facebook pixel tactic that marketers and e-commerce sellers use to remind shoppers to return to the website and sign up for the service.
Here’s how the pixel Facebook works:
- Add the pixel to your website. You add a snippet of tracking code to the backend of your website.
- Collect insights. You start getting insights about your visitors, like where they come from, the devices they are using, and other demographic information.
- Analyze behavior. Find out how visitors act when on your website, whether they check out a specific product page or add anything to their shopping carts.
- Build audiences. Use the data collected by the pixel to create Facebook custom audiences, lookalike audiences, and ads tailored to those specific people.
- Optimize bidding. Using the lowest cost bid strategy, reach out to people likely to take the desired action (signing up for a free trial, buying a product) to spend your budget optimally.
- Evaluate events. Evaluate conversion events to decide the best Facebook ad strategy and campaign.
Understanding the Facebook pixel code
The Facebook pixel code is divided into two main sections:
- Base code: The code snippet you add to all your web pages.
- Event code: The code snippet(s) you add to specific web pages or whenever a user takes an action you want to track, such as when someone purchases a product or initiates checkout.
Here are the 17 standard Facebook pixel events you can copy-paste the Facebook event code to track actions.
- Registration: When a visitor completes the registration form on your website.
- Purchase: When a visitor completes buying a product or service on your website.
- Lead: When a visitor signs up for a trial or takes any action that will identify them as a lead on your website.
- Add the payment info: When a visitor enters their payment information during checkout.
- Add to wishlist: When a visitor adds something to their wishlist on your website.
- Add to cart: When a visitor adds a product to their shopping cart on your website.
- Initiate checkout: When a visitor starts the checkout process to buy something from your website.
- Search: When a visitor uses the search function to look for something on your website.
- Contact: When someone contacts your business.
- View content: when a visitor lands on a specific page on your website.
- Donate: When a visitor donates to you or your cause.
- Customize product: When a visitor selects a specific version of your product, such as a specific pattern or color.
- Submit application: When an individual applies for your product, service, or program (eg: credit card).
- Schedule: When a visitor books an appointment at your business.
- Start trial: When a visitor signs up for a free trial of your product.
- Contact: When a visitor contacts your business.
- Find location: When a visitor searches for your business‘s physical location.
- Subscribe: When a visitor subscribes to your paid product or service.
Additionally, you can make the standard events more detailed. To add more details, you'll need extra bits of code called parameters, which will let you customize standard events based on specific factors, such as:
- Currency
- Type of content
- How much a conversion event is worth
- Estimated long-term value
For instance, you can separate sedan owners from SUV owners based on the sections of your car website they viewed.
Get it?
How to set up a Facebook pixel on your website
Before you start collecting and analyzing data, you’ll have to actually set the Facebook pixel. Let's discuss how to create and install a pixel for free and confirm whether it’s working or not.
Note: You’ll have to reinstall the new Facebook pixel even if you had installed the custom audience pixel or conversion tracking pixel before. Facebook combined the custom audience pixel and conversion tracking pixel into one Facebook pixel. So it doesn’t support the old conversion tracking pixel for ad creation anymore.
1. Create the Facebook pixel
The first step is to create a pixel to set things in motion. Follow the steps below to create one for your account:
- Open Facebook Ads Manager. Open the All Tools menu and click on Events Manager.
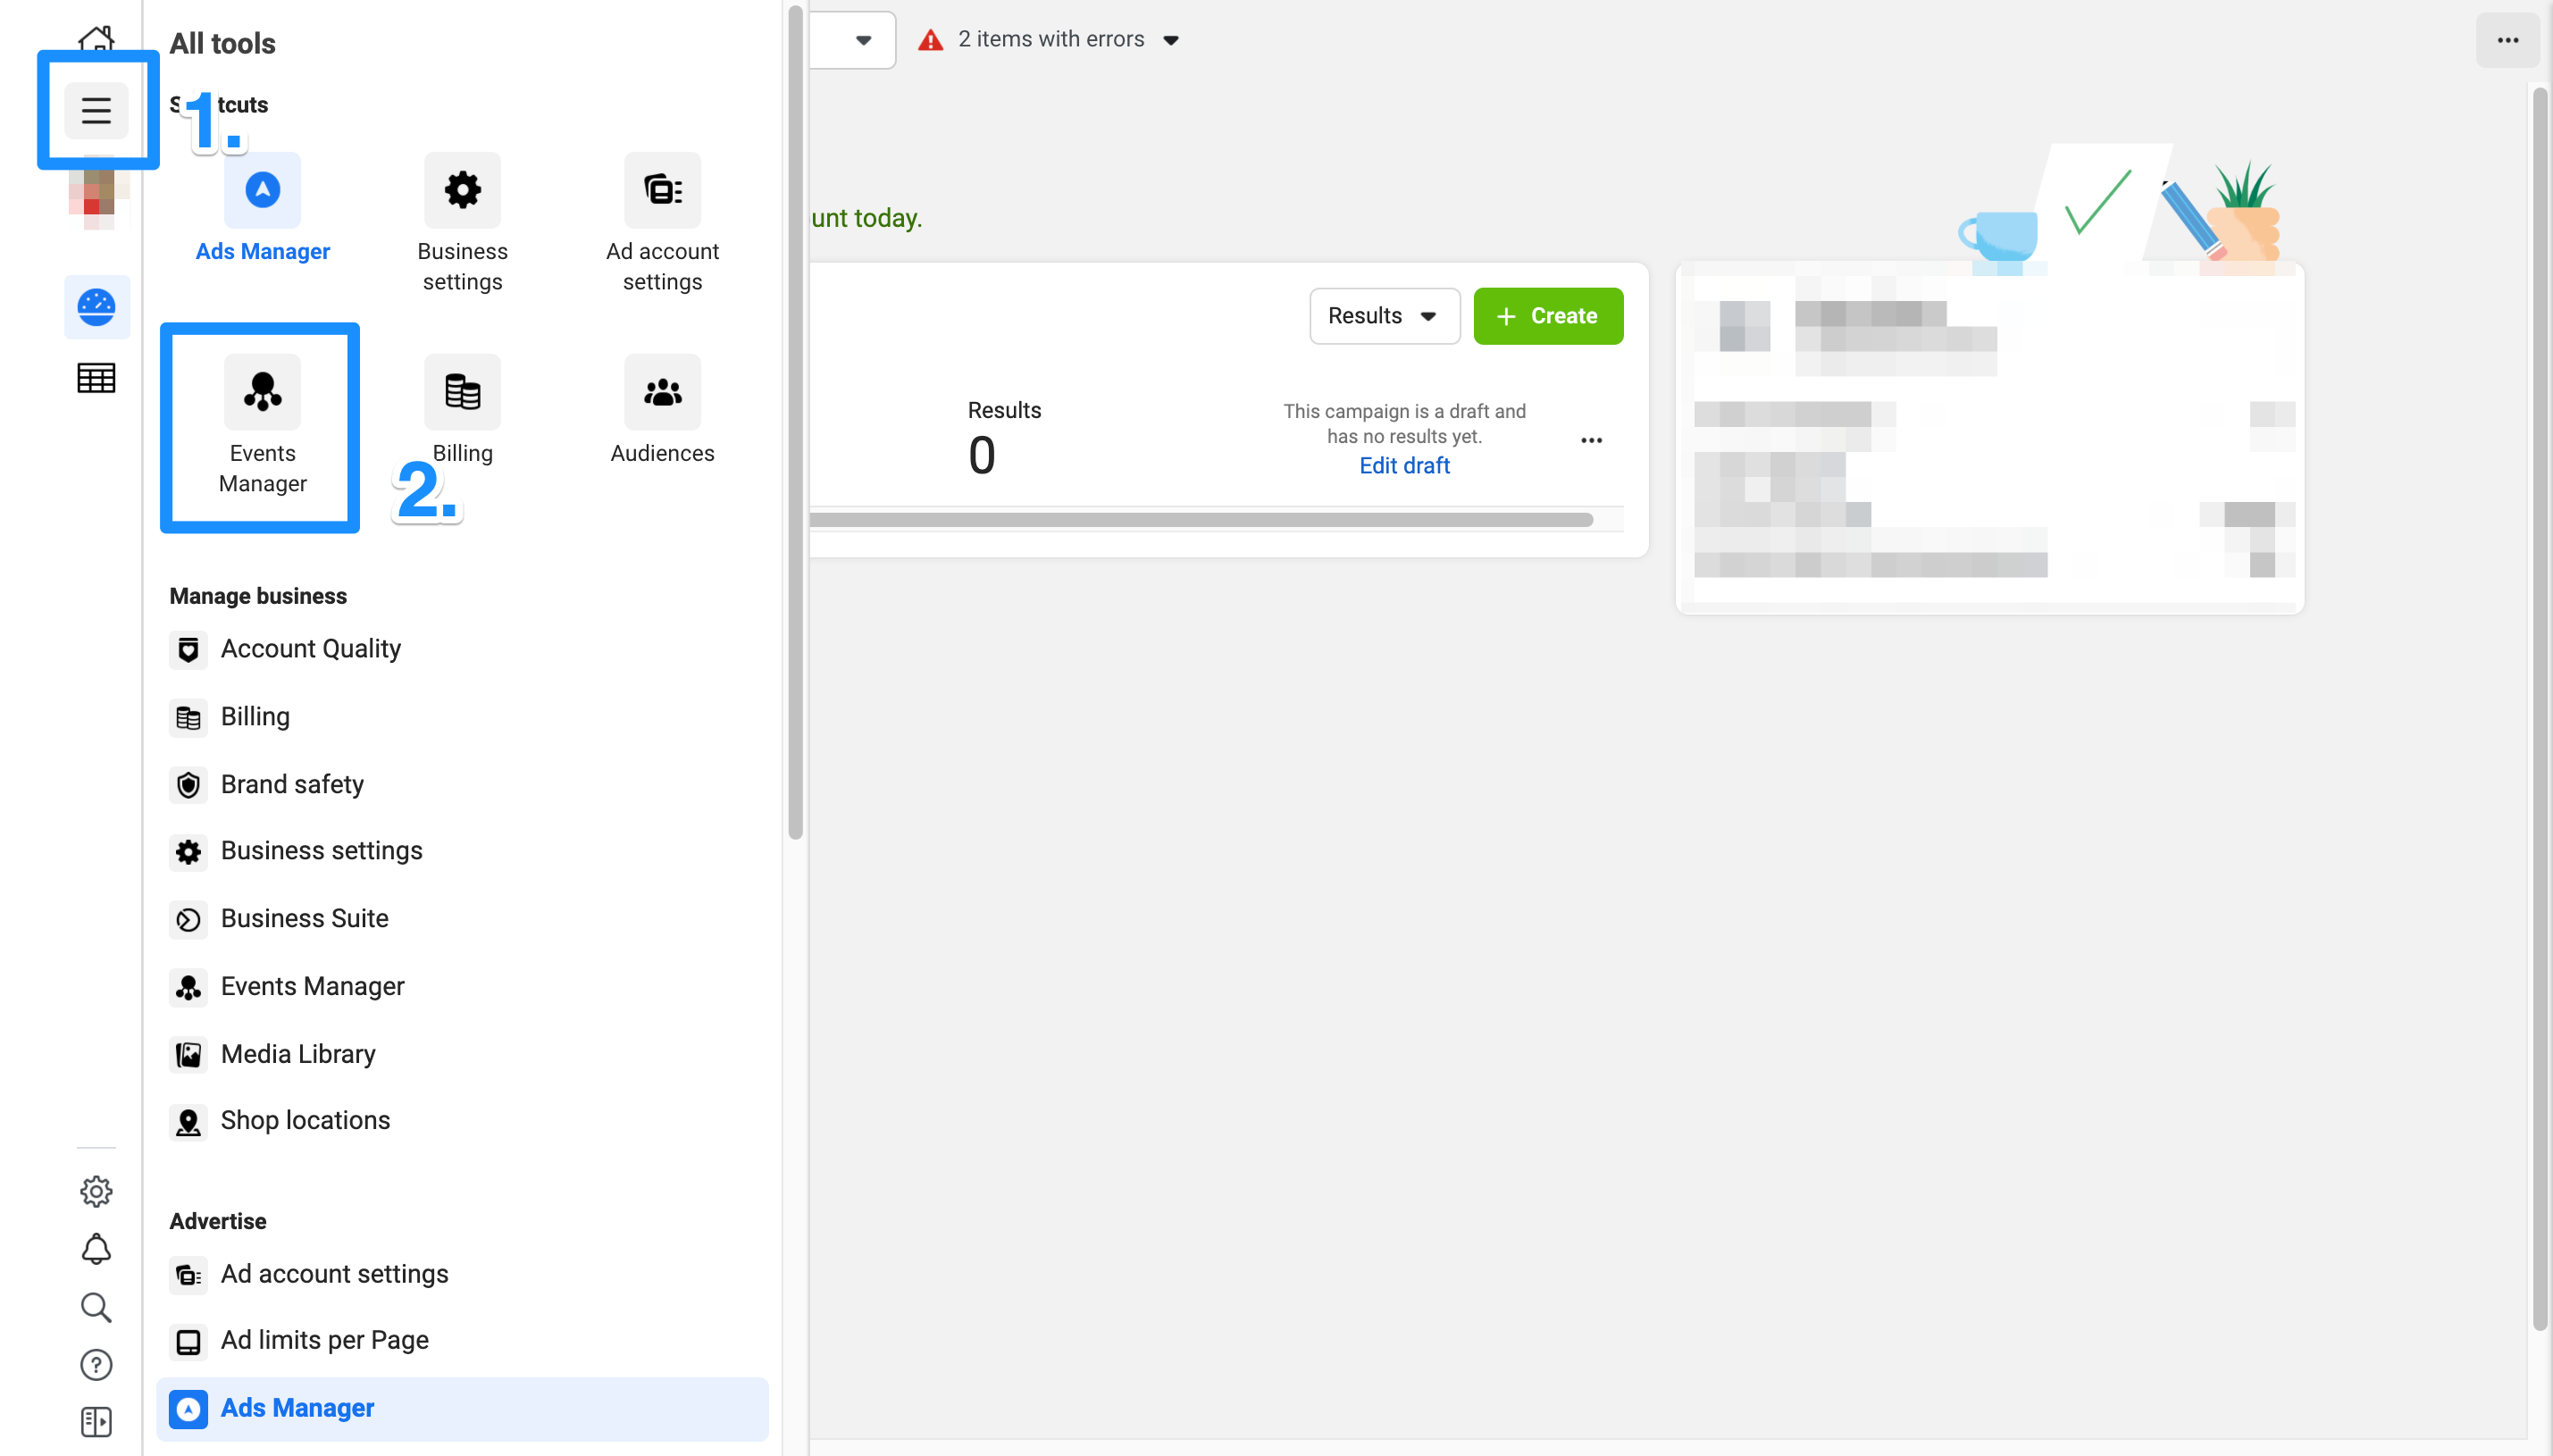
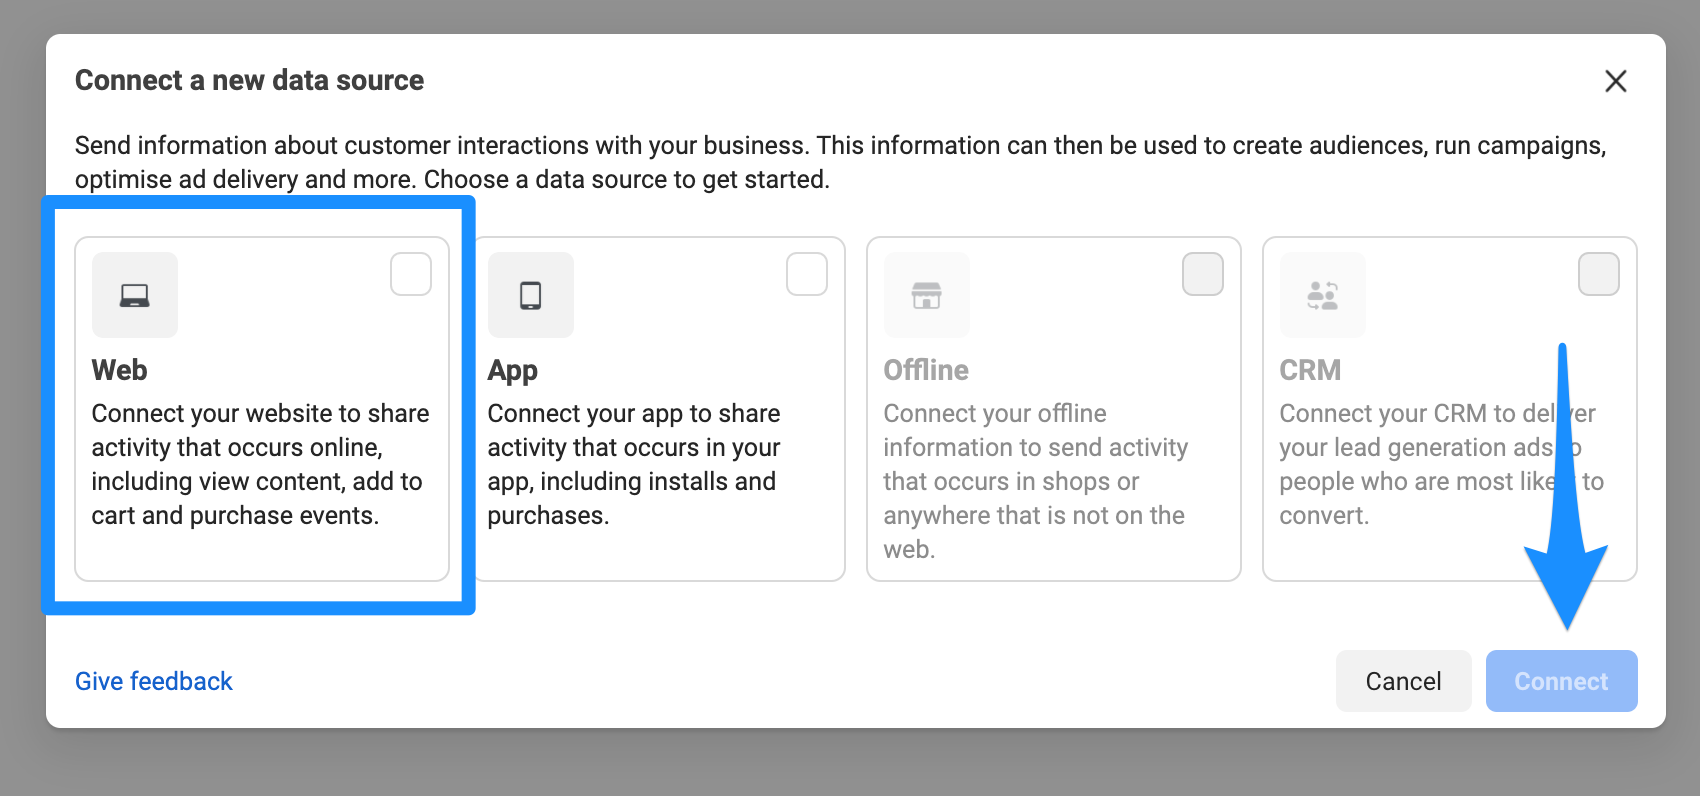
- From the side menu, click on Connect Data Sources
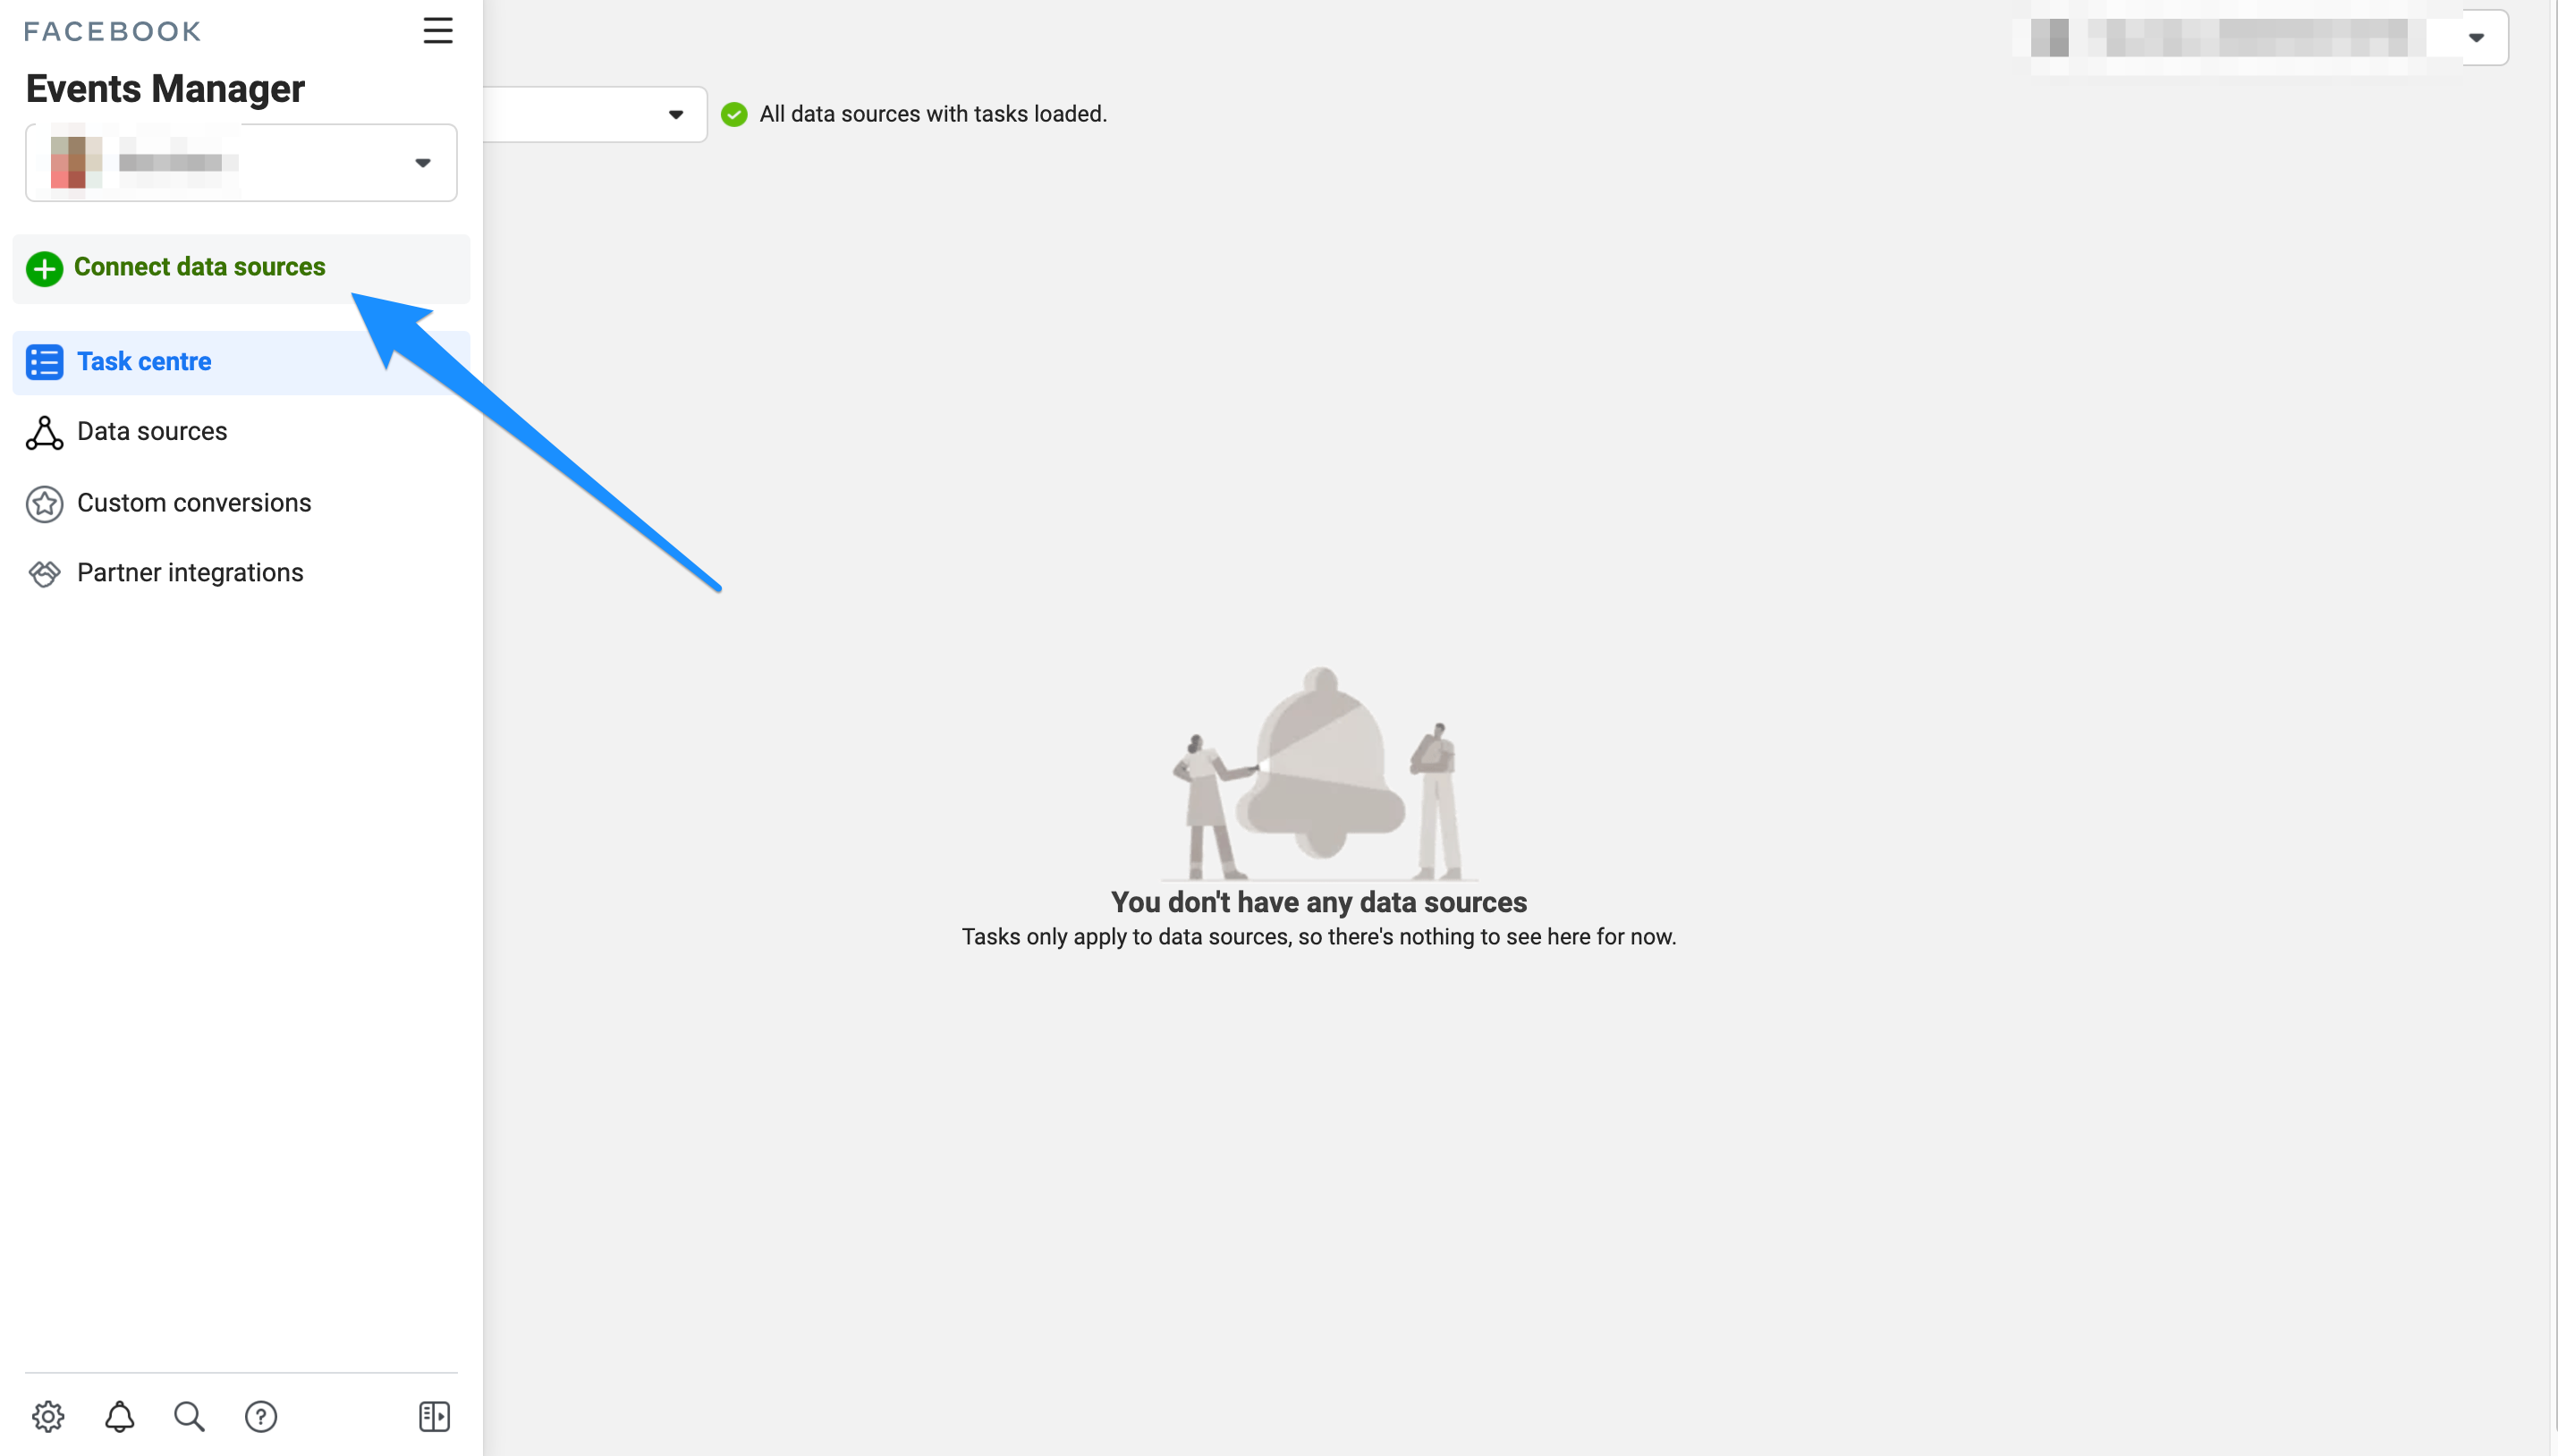
- Select the Web option, followed by Connect.
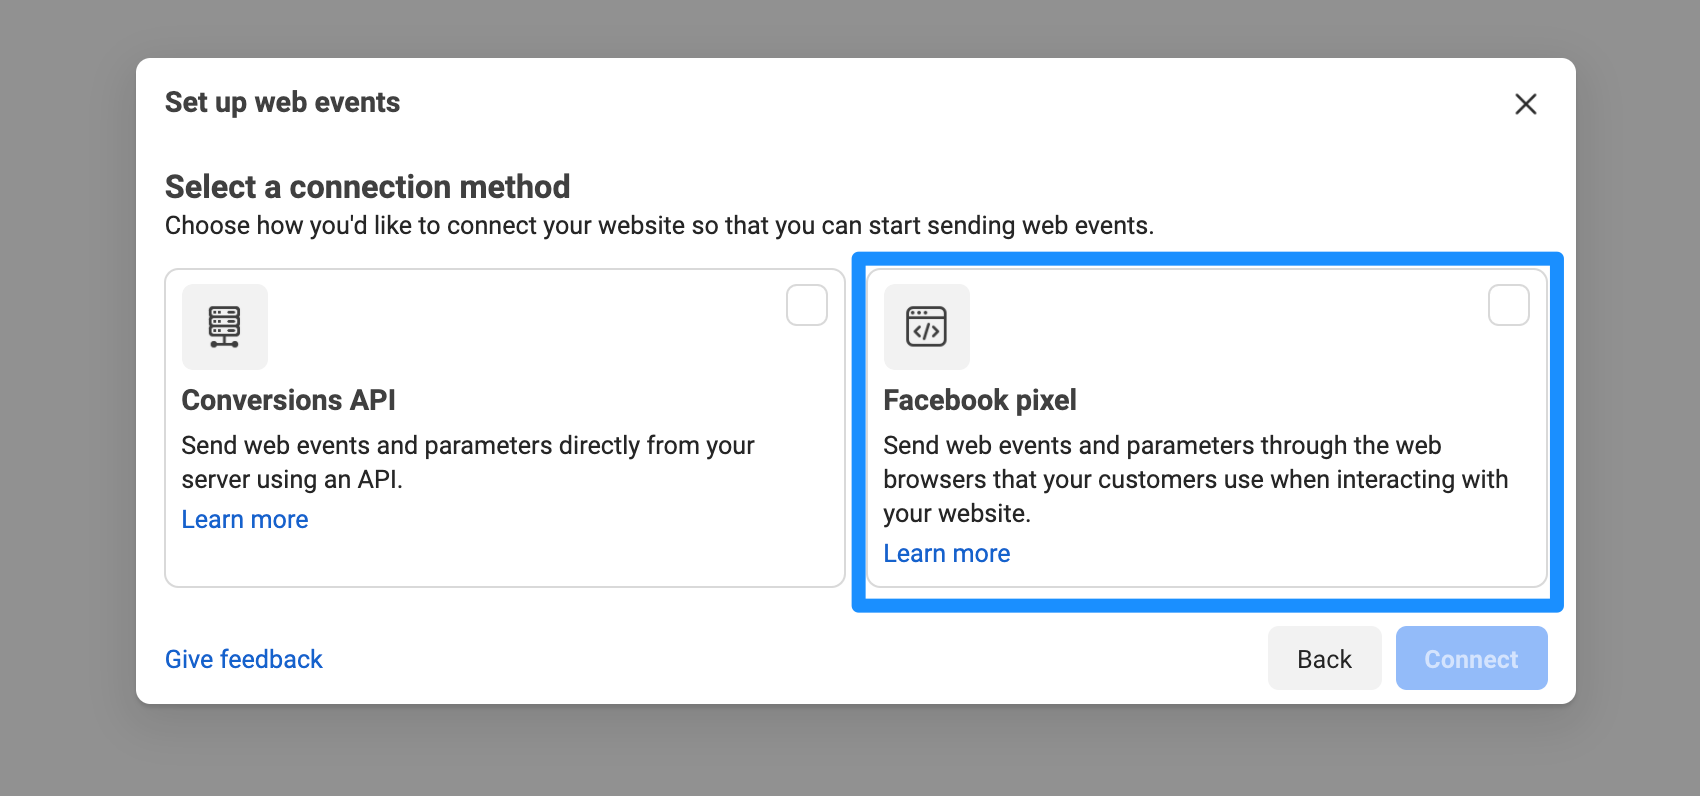
- Click on the Facebook Pixel option, followed by Connect.
- Next, fill in all the necessary details. Name your pixel, and type in your website URL. Once done, click on Continue.
If you want to use more than one pixel per ad account, you'll have to use the Facebook Business Manager.
2. Install the Facebook pixel into your website
The next step is to put the pixel to work so it starts collecting data on your website.
When installing a Facebook pixel into your website, you have three options:
1. Use a Facebook website partner
If you’re hosting your website on any one of the above Facebook partners, you can quickly install your pixel by choosing Use a Partner Integration. Select a partner and then follow the displayed prompts.
2. Install the pixel manually
Facebook lets users manually install the pixel, where one simply has to copy the pixel code and paste it in the website header.
To start off, click on Install code manually and then the green Copy Code button.
Paste the pixel code into your website‘s header code, just above the </head> tag. Remember, you have to paste the code into every single page or your header template if you’re using one.
Click Continue.
You can also turn on Automatic Advanced Matching to match hashed customer data from the website to Facebook profiles. This will allow you to track conversions more accurately and create larger custom audiences. Once done, click Continue.
3. Email pixel installation instructions to your developer
Probably the easiest way out—provided you have the budget. You can ask one of your developers to install a Facebook pixel on your behalf.
3. Use the Facebook pixel to track data
Here, you’ll set up Facebook pixel events.
- Select Open Event Setup Tool.
- After selecting your Facebook pixel ID, go to Settings and scroll down to Open Event Setup Tool.
- In the Set Up Events popup, type in your website URL and click Open Website.
- A list of suggestions will pop up on your screen. Select Review next to each event, and then select Confirm or Dismiss, depending on your needs.
- Click Finish Setup once you're done.
4. Check whether your pixel is working properly
Confirming whether your pixel is working properly with the Facebook pixel helper is a crucial step. This will help you determine whether the data collected by the pixel is reliable.
- Open Google Chrome browser.
- Add the Facebook Pixel Helper extension to your browser.
- Open the page where you installed the Facebook pixel. You’ll see a popup on your screen that will tell how many pixels are there on the specific page. It’ll also tell you whether your pixel is working properly, and if not, what adjustments you’ll have to make it work.
5. Add a Facebook pixel notice to your website
As per Facebook‘s rules and regulations—and a few very stringent laws—you have to inform your website visitors you’re collecting their data.
Add a Facebook pixel notice to your website, telling visitors you’re using the Facebook pixel and that their information may be collected through cookies or other methods. In addition, the notice should provide information to users on how to opt out if they aren’t comfortable with you collecting their data.
For more details, visit Facebook Business Tools Terms or the Cookie Consent Resource.
Important: iOS 14 and the Facebook pixel
Apple’s iOS 14.5 has updated rules for third-party tracking, which limits some Facebook pixel functionality. The good news is that only 14.8% of Facebook mobile users access the site via iOS devices. So no, you aren't doomed.
But that doesn’t mean you won’t have to make changes to your marketing plans.
You have to accommodate the iOS 14.5 requirements, one of which is that advertisers can only set up a maximum of eight standard events and custom conversions. Moreover, you can only have one domain for conversion tracking as iOS 14.5 removes the tracking feature across multiple domains.
We've created an in-depth article covering how the iOS 14 impacts Facebook advertising. Check it out here.
The benefits of using Facebook pixel
Let’s take a look at why installing the Facebook pixel could help with your Facebook ad campaign objectives.
Improved conversion tracking
The Facebook pixel lets you observe how visitors interact with your website after viewing your Facebook ad. The fact you can track customers across the devices is why you see that red sweater you recently added to your shopping cart on your news feed.
It's not magic; it's the Facebook pixel.
You can use these insights to refine your ad strategy and calculate your ROI. For example, you can see if people see your ads on their mobile phones but switch to a desktop before placing an order. Or maybe see that it’s the other way around.
Increase the ROI on your Facebook ad spend
With the Facebook pixel, you can make sure your target audience sees your ad and encourage them to take your desired action. In other words, Facebook pixel helps you improve your Facebook ad conversion rate and get better ROI.
Even if you don’t plan on launching Facebook or Instagram at any time soon, you should still install the Facebook pixel. You’ll have a complete database ready so you won’t have to start from scratch when running Facebook ads.
Create lookalike audiences
Facebook’s targeting data makes it easier for you to build a lookalike audience comprising people who share similar interests, pain points, interests, and demographics to people who are already interacting with your website.
Once your pixel tracks a minimum of 100 conversions, you can create a lookalike audience of your website visitors and past customers on the social media platform and advertise your product or services. This way, you can expand your potential customers base and create revenue-driving opportunities.
Facebook ads optimization for better outcomes
Facebook collects data on who buys what and for how much on your website. You can use these insights to optimize your ad audience based on value, which will ensure your ads are displayed to people who are most likely to make high-value purchases.
What's more, Facebook retargeting pixel data and dynamic ads allow you to show targeted ads to people who have already visited your website.
Facebook pixel data and Conversions API
You can have access to more reliable data even as the pixel loses information—provided you combine Conversions API with the Facebook pixel.
Wait, what?
Conversions API is Facebook’s initiative to counter the data-loss effects of iOS 14.5. This feature collects data directly from the servers instead of relying on cookies and the web so you can retain access to visitor behavior data.
And yes, Conversions API can really enhance your pixel-collected data, among other benefits.
In 2020, the popular betting company Lull discovered their pixel was missing about 8% of purchase events. They decided to add Conversions API to overcome the issue.
In addition to being able to track 100% of purchase events, Lull also saw a 12.9% reduction in cost per action on a one-day click, one-day view attribution window.
Talk about killing two birds with one stone.
Interested to try it out? You have two ways to turn on Conversions API:
- If you don’t want to write any code, you can use one of Facebook integration partners like WooCommerce, WordPress, or Shopify.
- If you don’t want to use Facebook integration partners, you can ask a developer to create a code that lets you implement Conversions API manually.
Facebook pixel recap
That’s all from us on why you need Facebook pixel and how you can use it to maximize your Facebook advertising efforts.
With this one single snippet of code, you can measure, optimize, and build a highly targeted audience for your Facebook ads that will ultimately help you drive conversions, revenue and improve ROI.
The only thing you need to ensure is that the pixel is set up and installed properly. Get this right, and you’ll never have to worry about advertising to people who aren’t going to convert.


